
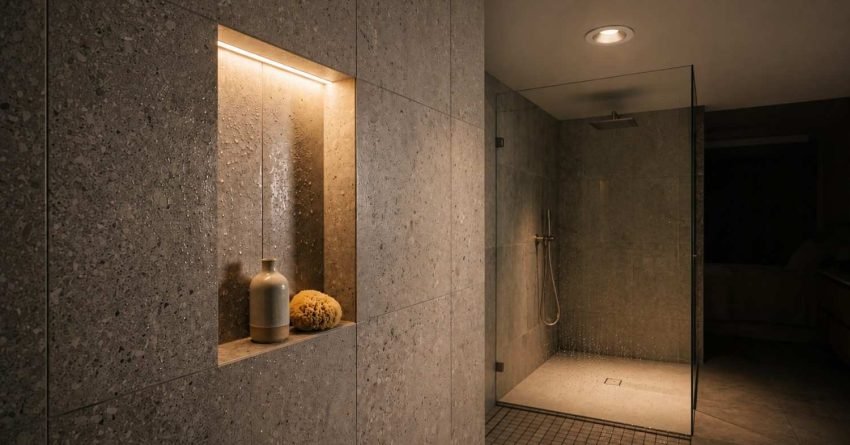
Shower lighting is one of the most under-planned parts of a bathroom renovation, and it’s also one of the easiest to get wrong. Most homeowners pick a fixture they like the look of, only to discover it’s not rated for wet zones, throws harsh shadows, or makes the whole shower feel like a hospital corridor. Getting it right means understanding waterproofing requirements, fixture types, and how ambient light actually works in a confined tiled space.
This matters more than most people realise during a renovation. The wrong choice creates safety risks, compliance issues, and a bathroom that never quite feels finished.
I’ll walk through the best waterproof options, ambient lighting strategies, placement tips, and what it all costs in Sydney so you can plan with confidence.
Why Shower Lighting Needs Its Own Plan
Most people treat shower lighting as an afterthought: a single downlight centred on the ceiling and done. That approach almost always produces a flat, unflattering result that also fails to meet Australian safety standards. Shower lighting sits in a regulated zone, and the fixtures you choose must match the conditions they’re installed in.
The planning conversation needs to happen before tiling starts. Once the walls are tiled and the waterproofing membrane is sealed, retrofitting a different lighting layout becomes expensive and disruptive.
The Difference Between Wet Zone and Dry Zone Lighting
Australian wiring rules under AS/NZS 3000 divide bathrooms into zones based on proximity to water. Zone 0 is inside the shower itself: the floor, walls, and any surface directly exposed to water spray. Zone 1 extends above the shower to a height of 2.25 metres. Zone 2 covers the area within 600mm outside the shower boundary.
Each zone has minimum IP rating requirements. A fixture that’s fine above a vanity is not automatically safe inside a shower enclosure. I see this mistake regularly on renovation projects where homeowners have sourced their own fixtures without checking the zone classification first.
IP Ratings Explained for Shower Spaces
IP stands for Ingress Protection. The two-digit code tells you how well a fixture resists solid particles and water. For shower lighting, the second digit water resistance is the one that matters most.
Inside the shower (Zone 0), you need a minimum of IP67, which means the fixture is dust-tight and can withstand temporary immersion. Zone 1 requires at least IP44, meaning protection against water splashing from any direction. Zone 2 accepts IP44 as well, though many electricians recommend IP65 or higher throughout the entire bathroom for long-term reliability. When you’re choosing fixtures, check the IP rating on the product specification sheet, not just the marketing description.
Waterproof Shower Lighting Options That Actually Work
There are three fixture categories worth considering for shower spaces. Each suits different ceiling types, renovation budgets, and aesthetic goals. The right choice depends on your shower size, ceiling construction, and how much visual impact you want the lighting to have.
Recessed Downlights for a Clean, Flush Finish
Recessed downlights are the most popular choice for shower lighting in Sydney renovations, and for good reason. They sit flush with the ceiling, keep the visual lines clean, and distribute light evenly across the shower floor and walls. For a standard shower enclosure, one or two IP65-rated recessed LED downlights positioned correctly handle the task lighting load without any glare issues.
The key spec to check beyond IP rating is the trim type. A deep-set or baffle trim reduces glare significantly compared to a flat open trim. For plasterboard ceilings, standard recessed downlights work well. For concrete slab ceilings common in Sydney apartments, you’ll need a surface-mounted option instead, which I cover below.
LED Strip Lighting Along Niches and Shelves
LED strip lighting adds a layer of ambient warmth that recessed downlights alone can’t deliver. Installed along the underside of a shower niche, behind a floating shelf, or along a floor-level recess, waterproof LED strips create a soft glow that makes the shower feel considered and intentional rather than purely functional.
For shower use, you need IP67-rated strip lighting fully waterproof, not just water-resistant. The strip itself should be silicone-encased, not just coated. I always recommend a separate low-voltage driver installed outside the wet zone, with the strip run into the shower on a sealed cable entry. This keeps the electrical components away from moisture while still delivering the lighting effect inside the enclosure.
Surface-Mounted Waterproof Fixtures
Surface-mounted fixtures, sometimes called bulkhead lights or oyster lights, are the practical solution when recessing into the ceiling isn’t possible. They’re common in apartments with concrete slab ceilings, older homes with limited ceiling cavity depth, and shower enclosures where the ceiling structure can’t accommodate a recessed fitting.
Modern surface-mounted waterproof fixtures have improved significantly in design. The old dome-shaped bulkhead look has largely been replaced by slim-profile circular and square options that sit close to the ceiling and look intentional rather than industrial. For a compact shower in a Sydney apartment, a single IP65 surface-mounted LED fixture often does the job cleanly and cost-effectively.
Ambient Lighting Ideas to Elevate the Shower Experience
Task lighting gets you clean. Ambient lighting makes the shower feel like somewhere you actually want to be. The difference between a functional shower and one that feels like a spa retreat almost always comes down to how the ambient layer is handled.
Layered Lighting: Combining Task and Ambient Sources
Layered bathroom lighting design uses at least two light sources working together: a primary task source for visibility and a secondary ambient source for atmosphere. In a shower, this typically means a recessed downlight for task lighting combined with LED strip lighting in a niche or along a recess for the ambient layer.
The two sources don’t need to be on the same circuit. Putting them on separate switches or, better, separate dimmers gives you full control over the mood. A bright task setting for morning showers, a warm low-level ambient setting for evening use. That flexibility is worth planning for at the rough-in stage, before the walls are closed.
Colour Temperature and How It Changes the Feel of a Shower
Colour temperature is measured in Kelvin (K) and has a direct impact on how a shower feels. Warm white light sits around 2700K to 3000K and produces a soft, relaxed tone that reads as spa-like and calming. Cool white light at 4000K and above is crisp and energising but can feel clinical in a tiled enclosure, especially with white or light grey tiles that reflect the light back harshly.
For most Sydney homeowners, I recommend 2700K to 3000K for the ambient layer and 3000K to 3500K for the task downlight. That combination gives you enough clarity for practical use while keeping the overall feel warm and inviting. Avoid anything above 4000K inside the shower unless the brief specifically calls for a high-contrast, contemporary look with dark tiles.
Practical Placement Tips for Shower Lighting in Sydney Bathrooms
Where you put the light matters as much as which fixture you choose. Poor placement produces glare, uneven coverage, and shadows in exactly the wrong places. Good placement is almost invisible; the light just works.
Positioning Lights to Avoid Glare and Shadows
The most common placement mistake is centring a single downlight directly above the shower head. This puts the brightest point of light directly in your line of sight when you look up, which creates glare. It also casts shadows downward across the face when you’re standing under it, which is unflattering and reduces visibility for tasks like shaving or applying skincare.
A better approach positions the downlight toward the front of the shower, roughly above where you stand facing the shower head, not directly above the head itself. This throws light forward across the face rather than straight down onto the top of the head. For larger shower enclosures, two downlights positioned at the front and rear thirds of the ceiling distribute light evenly without creating a single harsh focal point.
Working With Low Ceilings and Compact Shower Spaces
Low ceilings and compact shower enclosures, both common in Sydney’s older terrace houses and apartments, require a more considered approach. Standard recessed downlights need a minimum ceiling cavity depth of around 100mm to 150mm. When that depth isn’t available, semi-recessed or surface-mounted slim-profile fixtures are the practical alternative.
In a compact shower, one well-positioned IP65 fixture is almost always enough. Adding a second light in a small enclosure creates over-illumination and makes the space feel smaller, not larger. A single warm-white LED fixture at the front of the ceiling, combined with a low-level LED strip in a niche if one exists, handles both task and ambient needs without overwhelming the space.
What Shower Lighting Costs in Sydney
Shower lighting sits at the intersection of electrical work and renovation finishes, which means the total cost includes both fixture supply and licensed installation. Understanding both components helps you budget accurately and avoid surprises.
Fixture Costs by Type
Recessed IP65 LED downlights for shower use typically range from $40 to $150 per fixture at the supply level, depending on brand, trim quality, and lumen output. Budget options from electrical wholesalers perform adequately for most residential applications. Mid-range fixtures from brands with stronger warranty support are worth the premium for a renovation you’re planning to live with for ten or more years.
Waterproof LED strip lighting for a single niche runs $80 to $200 for the strip, driver, and connectors, depending on strip length and quality. Surface-mounted waterproof fixtures range from $60 to $180 per unit. These are supply-only figures; installation is separate and quoted by your electrician.
Electrician and Installation Costs to Budget For
Licensed electrician rates in Sydney currently sit between $120 and $180 per hour for residential work, with most shower lighting installations taking two to four hours depending on complexity. A straightforward swap of an existing downlight for a new IP-rated fixture at the lower end. A new circuit with multiple fixtures, a dimmer switch, and LED strip wiring at the higher end.
Budget $300 to $600 for a standard shower lighting installation in Sydney, inclusive of labour. More complex setups new circuits, multiple fixture types, dimmer installation can reach $800 to $1,200. Always use a licensed electrician for any work inside bathroom wet zones. In New South Wales, electrical work in wet areas requires a licensed contractor and a certificate of compliance.
Common Shower Lighting Mistakes to Avoid
The mistakes I see most often on bathroom renovation projects are predictable and avoidable. Most come down to skipping the planning conversation early enough.
Using a fixture with an insufficient IP rating is the most serious error. A fixture rated IP44 installed inside Zone 0 is a safety and compliance issue, not just an aesthetic one. Always verify the zone classification and match the IP rating before purchasing.
Relying on a single light source produces flat, uninspiring results. One centred downlight is functional but nothing more. Adding even a single LED strip in a niche transforms the feel of the space for a relatively small additional cost.
Choosing the wrong colour temperature is the subtlest mistake but one of the most noticeable in daily use. A 5000K cool white light in a white-tiled shower enclosure feels harsh and clinical every single morning. Getting the Kelvin range right costs nothing extra; it’s just a decision made at the specification stage.
Finally, leaving the lighting plan until after tiling is complete limits your options significantly. Conduit runs, switch positions, and dimmer circuits all need to be roughed in before the walls are closed. Plan the lighting layout at the same time as the tile layout, not after.
Conclusion
Shower lighting works best when it’s planned early, specified correctly, and layered intentionally. The right IP rating keeps the installation safe and compliant. The right fixture type suits the ceiling construction and shower size. The right colour temperature makes the space feel the way you want it to feel every day.
At Sydney Home Renovation, we plan shower lighting as part of the full bathroom renovation scope, not as an afterthought. That means the electrical rough-in, fixture selection, and ambient layering all happen in the right sequence, before the tiles go on.
We’d love to help you get it right from the start. Reach out to the Sydney Home Renovation team to talk through your bathroom renovation and lighting plan.
Frequently Asked Questions
What IP rating do shower lights need in Australia?
Inside the shower enclosure (Zone 0), fixtures need a minimum IP67 rating. Zone 1, directly above the shower up to 2.25 metres, requires at least IP44. Most licensed electricians recommend IP65 or higher throughout the entire bathroom for long-term reliability and compliance with AS/NZS 3000.
Can I use LED strip lights inside a shower?
Yes, but only IP67-rated silicone-encased strips designed for full waterproof applications. Standard IP20 or IP44 LED strips are not suitable inside the shower enclosure. The driver unit must be installed outside the wet zone, with a sealed cable entry into the shower space.
How many downlights do I need in a shower?
One well-positioned downlight handles most standard shower enclosures. Larger showers roughly 1200mm by 900mm or bigger benefit from two downlights positioned at the front and rear thirds of the ceiling. More than two in a standard enclosure creates over-illumination and glare.
What colour temperature is best for shower lighting?
2700K to 3000K warm white works best for the ambient layer and creates a relaxed, spa-like feel. For the task downlight, 3000K to 3500K gives enough clarity for practical use while staying warm. Avoid anything above 4000K unless the design brief specifically calls for a high-contrast contemporary look.
Do I need a licensed electrician to install shower lights in Sydney?
Yes. In New South Wales, all electrical work inside bathroom wet zones must be completed by a licensed electrician. The work requires a certificate of compliance on completion. DIY electrical work in wet areas is illegal and voids home insurance in most cases.
How much does it cost to install shower lighting in Sydney?
A standard shower lighting installation in Sydney costs between $300 and $600 inclusive of labour, based on current electrician rates of $120 to $180 per hour. More complex setups with new circuits, dimmers, and multiple fixture types range from $800 to $1,200. Fixture supply costs are additional.
Can shower lighting be added during a bathroom renovation?
A bathroom renovation is the ideal time to upgrade or add shower lighting. Electrical conduit, switch positions, and dimmer circuits are roughed in before waterproofing and tiling, which keeps costs down and options open. Retrofitting lighting after tiling is complete is possible but significantly more disruptive and expensive.


