
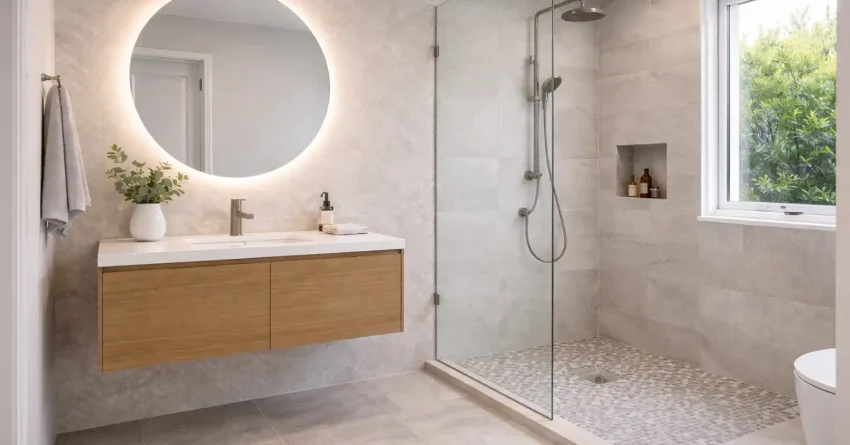
Choosing the right bathroom tiles is one of the most consequential decisions in any Sydney renovation. The material you select affects your budget, your daily comfort, your safety underfoot, and the long-term value of your property.
Tile selection goes well beyond colour. We look at material durability, slip resistance, water absorption, installation costs, and how each option performs in Sydney’s humid climate. This guide covers every tile type, realistic Sydney pricing, layout strategies, waterproofing requirements, and budgeting frameworks so you can make confident, cost-effective decisions for your bathroom renovation.
Types of Bathroom Tiles
Bathroom tiles fall into six main categories. Each material brings different strengths in durability, water resistance, maintenance, and price. Understanding these differences is the first step toward a tile choice that fits your budget and your bathroom’s demands.
Best tile for a bathroom floor? Porcelain is the top choice for most Sydney bathrooms. It has a water absorption rate below 0.5%, meets slip resistance requirements without sealing, and lasts 20 to 30 years with basic maintenance. For walls, ceramic and glass are cost-effective and practical alternatives.
Ceramic Tiles
Ceramic tiles are made from natural clay fired at lower temperatures than porcelain. They are lighter, easier to cut, and generally the most affordable option for bathroom walls and low-traffic floors.
In Sydney, ceramic tiles typically range from $20 to $60 per square metre for materials alone. They work well on walls and splashbacks where heavy foot traffic is not a concern. Ceramic absorbs slightly more water than porcelain, so it suits walls or floors in powder rooms and ensuites with moderate use.
Renovating on a tight budget, ceramic gives you a clean, finished look without stretching your material allowance. The trade-off is lower density ceramic chips more easily and is less suited to high-moisture floor areas like walk-in showers.
Porcelain Tiles
Porcelain is fired at higher temperatures than ceramic, producing a denser, harder tile with a water absorption rate below 0.5%. This makes porcelain the most popular choice for bathroom floors across Sydney renovations.
Expect to pay between $40 and $120 per square metre for porcelain tiles, depending on size, finish, and brand. Full-body porcelain, where the colour runs through the entire tile, hides chips and scratches better than glazed varieties.
Porcelain handles moisture, temperature changes, and heavy use without degrading. It suits both floors and walls, including shower recesses and wet zones. The higher upfront cost pays off in longevity, with a quality porcelain floor lasting 20 to 30 years with basic maintenance.
Rectified vs Non-Rectified Tiles
Rectified tiles are cut to precise dimensions after firing, producing perfectly uniform edges. Non-rectified tiles have a slight size variation from the kiln process and require wider grout joints to accommodate the difference.
Rectified tiles allow grout joints as narrow as 1.5mm to 2mm, creating a cleaner, more seamless look. They demand a flatter substrate; any unevenness causes lippage that is far more visible with tight joints. Non-rectified tiles are more forgiving on imperfect substrates and suit traditional or rustic designs where wider grout lines read as intentional.
For large-format tiles (600x600mm and above), rectified edges are standard. Specifying non-rectified tiles at large formats creates installation problems that cost more to fix than the tile savings justify.
Natural Stone Tiles
Natural stone includes marble, travertine, limestone, slate, and granite. Each stone has a unique grain, colour variation, and texture that no manufactured tile can replicate.
Stone tiles in Sydney range from $60 to $250 per square metre before installation. Marble and travertine are the most common choices for bathroom feature walls and vanity splashbacks. Slate and granite are harder and more practical for floors.
The key consideration with natural stone is maintenance. Stone is porous and requires sealing on installation and periodic resealing every 12 to 24 months to prevent water absorption, staining, and mould growth. Homeowners who invest in ongoing care get a premium finish that adds measurable value to their property.
Glass Tiles
Glass tiles are non-porous, stain-resistant, and reflective. They are used primarily as feature accents, splashbacks, and decorative borders rather than full floor or wall coverings.
Prices range from $50 to $200 per square metre in Sydney. Glass tiles are available in a wide spectrum of colours and finishes, from frosted to iridescent. Their reflective surface bounces light around small bathrooms, making them a practical design tool for compact spaces.
Glass is not suitable for floors. It lacks the slip resistance required for wet areas underfoot, and installation requires specialised adhesive and careful handling, which increases labour costs compared to ceramic or porcelain.
Mosaic Tiles
Mosaic tiles are small tiles typically 20mm to 50mm mounted on mesh sheets for easier installation. They come in ceramic, porcelain, glass, or natural stone.
Mosaic tiles cost between $40 and $180 per square metre in Sydney. Their small size makes them ideal for curved surfaces, shower niches, and feature strips. The high grout-to-tile ratio also provides excellent grip on shower floors, increasing traction where it matters most.
The downside is labour. Mosaic installation takes longer than large-format tiles, and the additional grout lines require more maintenance over time. Budget for higher installation costs across large mosaic areas.
Vinyl and Composite Tiles
Vinyl and composite tiles are synthetic alternatives that mimic the look of ceramic, stone, or timber. Modern luxury vinyl tiles (LVT) are waterproof, warm underfoot, and significantly cheaper than natural materials.
In Sydney, vinyl bathroom tiles range from $15 to $50 per square metre. They are softer, quieter, and easier to install than traditional tiles. Some products use click-lock systems that eliminate the need for adhesive or grout.
Vinyl is a practical choice for rental properties, budget renovations, and laundry-bathroom combinations. It will not match the longevity or resale appeal of porcelain or stone, but it delivers a functional, water-resistant finish at a fraction of the cost.
How to Choose the Right Bathroom Tiles
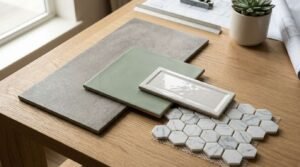
Selecting bathroom tiles requires balancing aesthetics with practical performance. The right tile depends on where it will be installed, how much moisture it will face, who uses the bathroom, and what your renovation budget allows.
Matching Tiles to Your Bathroom Size and Layout
Tile size has a direct impact on how large or small your bathroom feels. Large-format tiles 300x600mm or 600x600mm reduce the number of grout lines and create a cleaner, more open visual. This works well in small Sydney bathrooms where visual clutter makes the space feel cramped.
For very small bathrooms under 4 square metres, using the same tile on floors and walls creates continuity that tricks the eye into seeing a larger room. Lighter tones generally make compact bathrooms feel more spacious, though darker tiles work well in well-lit spaces.
Narrow or awkward layouts benefit from rectangular tiles laid in a horizontal pattern. This draws the eye sideways and widens the perceived space. Tile choice should respond to the room’s dimensions, not just colour preference.
Slip Resistance and Safety Ratings
Slip resistance is not optional for bathroom floors. In Australia, tiles are rated using the P rating system (P1 to P5) for wet barefoot areas and the R rating system (R9 to R13) for other applications.
For residential bathroom floors, a minimum rating of P3 or R10 is recommended. Shower floors should meet P4 or P5 due to the constant presence of water and soap residue.
| Area | Minimum Slip Rating | Recommended Rating |
| Bathroom floor (general) | P3 / R10 | P4 / R11 |
| Shower floor | P4 / R11 | P5 / R12 |
| Bathroom wall | No requirement | N/A |
| Pool surround / outdoor | P5 / R12 | P5 / R13 |
Choosing a tile with the correct slip rating protects your household and ensures compliance with Australian building guidelines. Glossy, polished tiles belong on walls, not wet floors.
Water Absorption and Durability
Water absorption measures how much moisture a tile absorbs. Lower absorption means better performance in wet environments.
Tiles are classified into four groups:
| Classification | Water Absorption | Best Use |
| Impervious | Less than 0.5% | Shower floors, wet zones |
| Vitreous | 0.5% to 3% | Bathroom floors, walls |
| Semi-vitreous | 3% to 7% | Walls, dry areas |
| Non-vitreous | Over 7% | Decorative walls only |
Porcelain falls into the impervious category. Ceramic is typically vitreous or semi-vitreous. Natural stone varies widely depending on the type and whether it has been sealed.
For any tile in direct contact with water, aim for a water absorption rate below 3%. This reduces the risk of cracking from moisture expansion, mould growth behind tiles, and premature deterioration.
Style, Colour, and Finish Options
Tile finishes fall into three broad categories: matte, gloss, and textured. Each affects both the look and the function of your bathroom.
Matte finishes hide water spots and fingerprints, provide better grip on floors, and suit contemporary, minimalist designs. Gloss finishes reflect light and make small bathrooms feel brighter, but they show water marks and are slippery when wet.
Textured finishes, including lappato (semi-polished) and structured surfaces, offer a middle ground, providing visual interest and moderate slip resistance.
Neutral palettes whites, greys, warm beiges, and soft greens maintain resale value better than bold or highly specific colour choices. Renovating for long-term value means choosing a neutral base and adding personality through accessories and fixtures that are cheaper to update later.
Bathroom Tile Costs in Sydney
Understanding tile costs in Sydney means looking beyond the price tag on the box. Your total spend includes the tile material, adhesive, grout, waterproofing, labour, wastage, and any preparation work the substrate needs before a single tile is laid.
Tile Material Price Ranges
Material costs vary significantly by tile type, size, and supplier. Here is a realistic breakdown for Sydney in 2025–2026:
| Tile Type | Price Per Square Metre (Supply Only) |
| Ceramic | $20 – $60 |
| Porcelain | $40 – $120 |
| Natural stone | $60 – $250 |
| Glass | $50 – $200 |
| Mosaic | $40 – $180 |
| Vinyl / LVT | $15 – $50 |
These are supply-only prices. A standard Sydney bathroom of 8 to 12 square metres of tiled surface (floors plus walls) requires between $320 and $3,000 in tile materials alone, depending on your selections.
Always order 10% to 15% extra for cuts, breakage, and future repairs. Running short mid-project means delays, potential dye-lot mismatches, and rush delivery fees.
Entry, Mid-Range, and Premium Tile Budgets
A three-tier framework helps Sydney homeowners set realistic expectations before they walk into a tile showroom.
Entry tier (under $60/sqm supply): Ceramic wall tiles and vinyl or basic porcelain floors. Delivers a clean, functional finish suited to rental properties and investment renovations. Total tiled bathroom materials budget: $500 to $1,500.
Mid-range tier ($60–$120/sqm supply): Quality porcelain floors with ceramic or mid-grade porcelain walls. The most common choice for owner-occupier renovations across Sydney. Total materials budget: $1,500 to $3,500.
Premium tier ($120/sqm+ supply): Large-format rectified porcelain, natural stone feature walls, or designer mosaic accents. Suited to high-end renovations where resale value and visual impact are the priority. Total materials budget: $3,500 to $8,000+.
These figures cover tile supply only. Add labour, waterproofing, and preparation costs on top.
Labour and Installation Costs
Tiling labour in Sydney typically costs between $50 and $120 per square metre, depending on tile size, pattern complexity, and the tiler’s experience.
| Factor | Impact on Labour Cost |
| Large-format tiles (600x600mm+) | Higher per-tile handling cost |
| Small mosaic tiles | Higher due to time-intensive layout |
| Herringbone or chevron patterns | 20–30% premium over straight lay |
| Straight stack or brick bond | Standard rate |
| Shower niche or curved surfaces | Additional charges per feature |
A full bathroom tiling job including floor and walls generally runs between $1,500 and $4,000 for labour in Sydney. This assumes the substrate is prepared and waterproofing is already complete.
Get itemised quotes. A low per-square-metre rate means nothing if the quote excludes preparation, waterproofing, or waste removal.
Hidden Costs and Budget Allowances
Several costs catch first-time renovators off guard.
Waterproofing is a separate trade and cost. Expect $800 to $2,000 for a standard bathroom, depending on the scope and the waterproofing system used. Tile removal from an existing bathroom adds $30 to $60 per square metre for demolition and disposal.
Substrate repair is common in older Sydney homes. Damaged cement sheeting, uneven floors, or deteriorated screed all need fixing before tiling; budget $500 to $1,500 for preparation work. Grout and adhesive add $10 to $25 per square metre on top of tile and labour costs, and wastage from cuts and breakage typically accounts for 10% to 15% of your total tile order.
A realistic all-in budget for tiling a standard Sydney bathroom including materials, labour, waterproofing, and preparation sits between $4,000 and $12,000. The range depends on tile selection, bathroom size, and the condition of the existing space.
Best Tiles for Bathroom Floors vs Walls
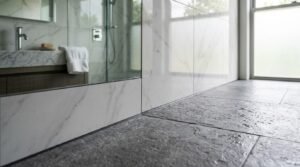
Floors and walls face different stresses. Choosing the right tile for each surface protects your investment and keeps your bathroom safe.
Floor Tile Requirements
Bathroom floor tiles must handle constant moisture, foot traffic, cleaning chemicals, and temperature changes. The three non-negotiable requirements are slip resistance (minimum P3/R10 for general bathroom floors, P4/R11 or higher for showers), low water absorption (below 3%, ideally below 0.5% for wet zones), and durability (PEI rating of 3 or higher for residential foot traffic).
Porcelain is the default choice for bathroom floors in Sydney. It meets all three criteria without requiring sealing. Natural stone performs well when sealed and maintained correctly. Ceramic is acceptable for low-traffic powder rooms but is not ideal for main bathrooms or ensuites with daily use.
Wall Tile Requirements
Wall tiles do not bear weight or foot traffic. This opens up more options: ceramic, glass, and decorative tiles that would fail on a floor perform well on walls.
The primary considerations for wall tiles are water resistance and ease of cleaning. In shower recesses and behind vanities, tiles should still have low water absorption to prevent moisture penetrating the substrate.
Wall tiles can be thinner and lighter than floor tiles. This reduces material cost and makes installation easier, especially on stud walls where weight is a concern.
Can You Use the Same Tile on Floors and Walls
Yes, provided the tile meets floor-grade requirements. Using one tile across both surfaces creates a seamless, cohesive look that works particularly well in small bathrooms. To qualify for dual use, a tile needs a minimum P3/R10 slip rating, a water absorption rate below 3%, and a PEI wear rating of 3 or higher.
The reverse does not apply. A tile rated only for walls must never be used on floors; it will lack the slip resistance, density, and wear rating needed to perform safely underfoot.
For visual continuity without using the exact same tile, choose floor and wall tiles from the same range or colour family. Many manufacturers produce matching floor and wall versions with different thicknesses and surface textures.
Bathroom Tile Layouts and Patterns
The way tiles are arranged affects the visual proportions of your bathroom as much as the tile itself. Layout decisions should be made before purchasing, because pattern choice influences how much tile you need and how much the installation will cost.
Popular Tile Layout Patterns
Straight lay (stack bond): Tiles aligned in a grid. Clean, modern, and the most cost-effective to install. Minimal cuts and waste.
Brick bond (offset): Each row is offset by half a tile width. This is the most common layout for subway tiles and rectangular formats. It adds subtle visual interest without increasing labour costs significantly.
Herringbone: Rectangular tiles laid at 45-degree angles in a zigzag pattern. Herringbone creates a strong visual statement and works well as a feature wall or shower recess accent. Expect 20% to 30% more in labour and waste compared to straight lay.
Chevron: Similar to herringbone but with tiles cut at an angle so the ends meet in a clean point. More expensive to produce and install than herringbone.
Basketweave and pinwheel: Decorative patterns that combine different tile sizes. These suit traditional or heritage-style bathrooms but require precise planning and skilled installation.
Tile Sizes and How They Affect the Look
Large tiles make small rooms feel bigger. Fewer grout lines mean less visual interruption, which creates a sense of openness.
| Size | Best Application |
| 300x300mm | Shower floors, small feature areas |
| 300x600mm | Walls and floors in standard bathrooms |
| 600x600mm | Floors in medium to large bathrooms |
| 600x1200mm | Feature walls, large format floors |
| 75x300mm (subway) | Walls, splashbacks |
| 20x20mm to 50x50mm (mosaic) | Shower floors, niches, accents |
Oversized tiles (600x1200mm and above) look impressive but require perfectly flat substrates. Any unevenness in the floor or wall causes lippage where tile edges sit at different heights. Substrate preparation costs increase with tile size.
Grout Colour and Spacing Choices
Grout is functional and visual. It fills the joints between tiles, allows for thermal expansion, and prevents water from reaching the substrate.
Matching grout (same colour as the tile) creates a seamless, uniform surface, the most popular choice for modern Sydney bathrooms. Contrasting grout highlights the tile pattern and individual tile shapes, suiting subway tiles and geometric layouts where the pattern is part of the design.
Grout width affects both aesthetics and maintenance. Narrower joints (1.5mm to 2mm) look cleaner but require more precision during installation. Standard joints (3mm) are easier to install and maintain. Wider joints (5mm+) suit rustic or handmade tiles with irregular edges.
Epoxy grout costs more than cement-based grout but resists staining, mould, and moisture far better. For shower floors and wet zones, epoxy grout is a worthwhile upgrade that reduces long-term maintenance.
Waterproofing and Tile Preparation
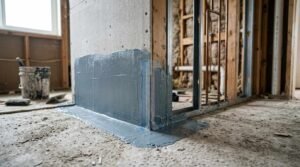
Waterproofing is the most critical step in any bathroom tiling project. Tiles are not waterproof on their own without a proper waterproofing membrane beneath them; water will eventually reach the substrate, the framing, and the adjoining rooms.
Why Waterproofing Matters Before Tiling
Water damage from failed or missing waterproofing is one of the most expensive problems in Sydney homes. Moisture that penetrates past tiles causes timber rot, mould growth, structural damage, and can affect neighbouring rooms and floors below.
Repairing water damage after the fact means stripping all tiles, replacing the substrate, reapplying waterproofing, and retiling from scratch. This can cost three to five times more than doing it correctly the first time.
Every bathroom renovation in Sydney should include professional waterproofing as a non-negotiable line item. It is not an area to cut costs.
Substrate Preparation for Bathroom Tiles
The substrate is the surface beneath your tiles. In most Sydney bathrooms, this is either cement sheeting (such as Villaboard or similar), a sand-cement screed, or existing concrete.
Before tiling, the substrate must be structurally sound with no cracks, delamination, or soft spots. It must be level; variations greater than 3mm over 2 metres need correction with levelling compound or additional screed, and clean and dry, free from dust, paint, oil, or old adhesive residue. A bonding primer improves adhesive grip on smooth or porous surfaces.
In older Sydney homes, you may encounter original plaster walls, deteriorated cement sheeting, or asbestos-containing materials. These require professional assessment and, in the case of asbestos, licensed removal before any tiling work begins.
Australian Standards for Wet Area Waterproofing
Bathroom waterproofing in Australia must comply with AS 3740-2021 (Waterproofing of domestic wet areas). This standard specifies that shower areas must be waterproofed to a minimum height of 1,800mm from the finished floor level (or to the ceiling if the shower has no screen), and the entire general bathroom floor must be waterproofed, including under the bath and vanity.
All joints between floors and walls, around pipes, and at drain connections must be reinforced with bond-breaker tape and additional membrane. The waterproofing membrane must be flood-tested for a minimum of 24 hours before tiling begins to confirm there are no leaks.
In NSW, waterproofing must be carried out by a licensed waterproofer or a builder with the appropriate licence class. A certificate of waterproofing compliance should be issued and retained; it is essential for insurance claims and future property sales.
How Bathroom Tiles Are Installed
Understanding the installation sequence helps you manage trades, set realistic timelines, and avoid the most common mistakes that cause cost blowouts in Sydney bathroom renovations.
The Tiling Sequence
A professional bathroom tiling job follows a fixed order. Skipping or rushing any step creates problems that are expensive to fix after the fact.
Step 1: Substrate preparation: The tiler assesses the existing surface, repairs any damage, and applies levelling compound where needed. This step alone can add one to two days to the timeline in older Sydney homes.
Step 2: Waterproofing: A licensed waterproofer applies the membrane to all wet areas, reinforces junctions and penetrations, and flood-tests the membrane for 24 hours. Tiling cannot begin until the membrane is dry and tested.
Step 3: Layout planning: The tiler dry-lays tiles to plan the pattern, centre the layout, and minimise awkward cuts at visible edges. This planning step is what separates a professional result from an amateur one.
Step 4: Adhesive and setting: Tiles are fixed using the correct adhesive for the tile type and substrate. Large-format tiles require back-buttering (adhesive applied to both the tile and the substrate) to achieve full contact and prevent hollow spots.
Step 5: Grouting: Once the adhesive has cured typically 24 to 48 hours grout is applied, worked into joints, and cleaned from tile faces. Epoxy grout requires faster working times and more precise technique than cement-based alternatives.
Step 6: Sealing: Natural stone and cement-based grout require sealing after grouting. Porcelain and epoxy grout do not. The tiler or a separate trade applies the sealer and allows full cure time before the bathroom is used.
What to Look for in a Tiling Contractor
Not all tilers deliver the same standard. In NSW, tiling work in wet areas must be carried out by a licensed contractor. Verify the licence number through the NSW Fair Trading licence check before signing any contract.
Beyond licensing, ask for public liability insurance documentation, a minimum of three recent references for bathroom tiling specifically, and an itemised written quote that separates materials, labour, waterproofing, preparation, and waste removal. A tiler who quotes a single lump sum without line items is a risk you have no visibility into where costs sit or what is excluded.
Bathroom Tile Trends in Sydney
Tile trends in Sydney bathrooms shift with broader design movements, but the strongest trends of 2025–2026 share a common thread: texture, warmth, and a move away from the stark white-and-grey palettes that dominated the previous decade.
Large Format and Minimal Grout Lines
The shift toward 600x1200mm and 800x1600mm tiles continues to accelerate. Fewer grout lines create a cleaner, more spa-like aesthetic that photographs well and appeals strongly to buyers at resale. The trade-off is that substrate preparation cost large format tiles demand near-perfect flatness.
Textured and Fluted Surfaces
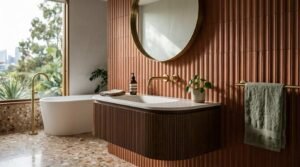
Fluted tiles with vertical or horizontal ridges are appearing on feature walls, vanity splashbacks, and shower niches across Sydney renovations. Textured surfaces add depth and visual interest without requiring pattern complexity, and they perform well in matte finishes that suit the current preference for understated luxury.
Earthy Tones and Warm Neutrals
Warm beiges, terracotta, sage green, and soft ochre are replacing cool greys as the dominant palette in Sydney bathroom renovations. These tones work well with timber vanities, brushed brass fixtures, and natural stone accents, a combination that reads as premium without requiring premium tile budgets across every surface.
Terrazzo Revival
Terrazzo tiles featuring chips of marble, granite, or glass set in a cement or resin base have moved from commercial spaces into residential bathrooms. They work particularly well as floor tiles in powder rooms and ensuites, delivering a high-end look at mid-range price points ($80 to $150 per square metre for quality terrazzo-look porcelain).
How to Budget for Bathroom Tiles in a Renovation
Tile costs are one of the largest variable expenses in a bathroom renovation. Getting your tile budget right prevents cost blowouts and ensures you allocate enough for quality materials where they matter most.
Setting a Realistic Tile Budget
A practical approach is to allocate 20% to 30% of your total bathroom renovation budget to tiles, including supply, installation, and associated materials (adhesive, grout, waterproofing).
For a standard Sydney bathroom renovation budgeted at $20,000 to $35,000, this means a tile budget of $4,000 to $10,500.
| Budget Component | Percentage of Tile Budget |
| Tile supply | 40% – 50% |
| Labour/installation | 30% – 40% |
| Waterproofing | 10% – 15% |
| Adhesive, grout, prep | 5% – 10% |
Start by measuring your tiled areas accurately. Multiply floor area and wall area separately, then add 10% to 15% for waste. This gives you the total square metreage to price against.
Where to Save and Where to Spend
Not every surface in your bathroom needs premium tiles. Strategic spending puts your budget where it has the most visual and functional impact.
Spend more on shower floors and walls (high moisture, high visibility, safety critical), main floor tiles (durability, slip resistance, daily wear), and feature walls or niches (visual focal point). Save on areas behind the toilet (low visibility, low moisture), under the vanity (partially hidden), and upper wall areas above splash zones (lower moisture exposure).
Using a premium tile as a feature strip or accent combined with a more affordable base tile creates a high-end look without a high-end price tag. Many Sydney tile suppliers offer coordinated ranges designed for exactly this approach.
Avoiding Common Tile Budgeting Mistakes
Underestimating waste: Ordering exactly the square metreage you need guarantees you will run short. Always add 10% to 15%.
Ignoring labour cost variations: A complex pattern like herringbone costs significantly more to install than a straight lay. Factor pattern choice into your budget from the start.
Forgetting preparation costs: Old tile removal, substrate repair, and levelling are separate costs that many first-time renovators overlook.
Choosing tiles before setting a budget: Falling in love with a $200-per-square-metre tile when your budget supports $60 creates problems. Set your budget first, then shop within it.
Not getting itemised quotes: A single lump-sum quote hides where your money goes. Request line-item breakdowns for materials, labour, waterproofing, preparation, and waste removal so you can compare quotes accurately.
Maintaining and Cleaning Bathroom Tiles
Proper maintenance extends the life of your bathroom tiles and keeps them looking fresh between renovations. Most tile maintenance is straightforward, but the approach varies depending on the tile material.
Daily and Weekly Tile Maintenance
Daily: wipe down shower walls and glass after each use to prevent soap scum and mineral buildup. A squeegee takes 30 seconds and dramatically reduces cleaning effort over time.
Weekly: mop floors with warm water and a pH-neutral cleaner. Avoid acidic or abrasive cleaners on natural stone and grout. A microfibre mop picks up grime without scratching tile surfaces.
Ventilation is the most effective maintenance tool. Run your exhaust fan during and for 20 to 30 minutes after every shower. Adequate airflow prevents moisture from settling on tile surfaces, and grout lines are the primary cause of mould in Sydney bathrooms.
Grout Cleaning and Sealing
Grout is more porous than most tiles and absorbs moisture, soap residue, and dirt over time. Cement-based grout should be sealed after installation and resealed every 12 to 18 months.
For routine cleaning, a paste of baking soda and water applied with a soft brush lifts surface grime without damaging the grout. For deeper stains, an oxygen-based cleaner (not bleach) is effective and grout-safe.
Epoxy grout does not require sealing and resists staining far better than cement-based alternatives. For any new installation, the higher upfront cost of epoxy pays for itself in reduced maintenance.
Discoloured or crumbling grout can be raked out and replaced without removing the tiles. This is a cost-effective way to refresh an older bathroom without a full retile.
When to Replace vs Repair Bathroom Tiles
Repair when individual tiles are cracked or chipped but the surrounding tiles and waterproofing are intact, when grout is discoloured or deteriorating but the tiles themselves are sound, or when a small area has been damaged by impact or movement.
Replace when multiple tiles are cracked (which may indicate substrate movement or waterproofing failure), when tiles are lifting or hollow-sounding when tapped (suggesting adhesive failure), or when water is appearing in adjoining rooms or on the ceiling below (indicating a waterproofing breach).
A full retile is also the right call when the bathroom is being fully renovated, and the existing tiles are outdated or incompatible with the new design. At that point, addressing layout, fixtures, and bathroom waterproofing requirements in a single coordinated project delivers the best outcome.
Conclusion
Choosing bathroom tiles involves balancing material performance, budget realities, and design preferences. We have covered the six main tile types available in Sydney, realistic cost ranges, layout strategies, waterproofing requirements, installation sequencing, and practical budgeting frameworks to help you make informed decisions.
Every successful bathroom renovation starts with a clear plan. Understanding what tiles cost, where to invest, and how to avoid common budgeting mistakes puts you in control of your project from day one.
At Sydney Home Renovation, we help homeowners and investors plan and deliver bathroom renovations with transparent pricing, licensed trades, and quality workmanship so your tile selection, waterproofing, and installation are handled the first time correctly. Contact us today for a detailed, itemised quote you can trust.
Frequently Asked Questions
What is the best type of tile for a small bathroom in Sydney?
Porcelain tiles in large formats like 300x600mm or 600x600mm work best. Fewer grout lines create a cleaner look that makes small bathrooms feel more spacious. Light, neutral colours enhance this effect.
How much do bathroom tiles cost per square metre in Sydney?
Tile supply costs range from $20 to $250 per square metre depending on the material. Add $50 to $120 per square metre for installation labour. A fully tiled standard bathroom typically costs $4,000 to $12,000 all-in.
Are porcelain tiles better than ceramic for bathrooms?
Porcelain is denser, harder, and absorbs less water than ceramic. It performs better on bathroom floors and in wet zones. Ceramic suits walls and low-moisture areas where budget is the priority.
Do I need to waterproof before tiling a bathroom?
Yes. AS 3740-2021 requires waterproofing in all wet areas. The membrane must be applied and flood-tested before any tiles are installed. Skipping this step risks structural damage and voids insurance coverage.
What tile size makes a bathroom look bigger?
Larger tiles with minimal grout lines create a sense of openness. Tiles sized 300x600mm or 600x600mm are the most effective for visually expanding small Sydney bathrooms. Using the same tile on floors and walls amplifies this effect.
How long do bathroom tiles last?
Quality porcelain and ceramic tiles last 20 to 30 years or more with proper installation and maintenance. Natural stone lasts even longer when sealed and maintained correctly. Vinyl tiles typically last 10 to 15 years.
Can I tile over existing bathroom tiles?
It is possible if the existing tiles are firmly bonded, level, and structurally sound. Tiling over old tiles adds height to the floor, which can affect door clearances, shower drainage, and threshold levels. In most full renovations, removing old tiles and starting fresh produces a better result.


