
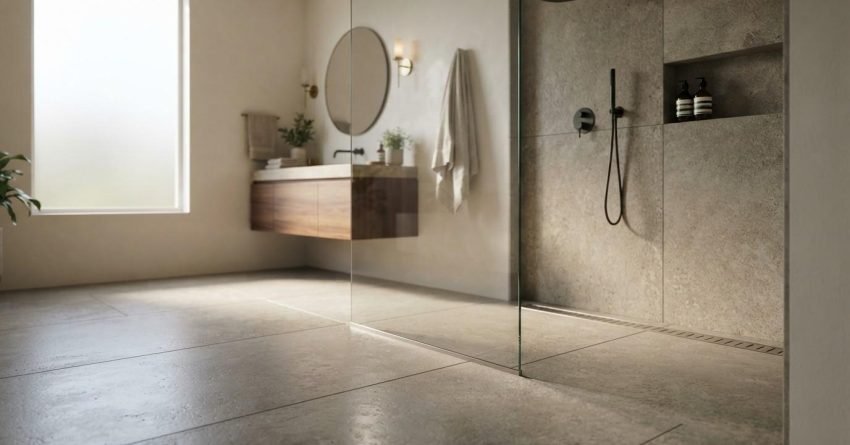
A curbless shower removes the raised threshold entirely, creating a continuous floor surface from the bathroom to the shower zone. It is one of the most requested design upgrades in Sydney bathroom renovations right now and for good reason.
Getting the design right matters more than most homeowners expect. The drainage gradient, waterproofing membrane, and tile selection all have to work together precisely, or you end up with pooling water and costly repairs.
In this guide, I cover what a curbless shower actually is, the real benefits, the full installation process, typical Sydney costs, and the mistakes that trip up even experienced renovators.
What Is a Curbless Shower?
A curbless shower, also called a barrier-free shower, walk-in shower, or threshold-free shower, is a shower recess built flush with the surrounding bathroom floor. There is no step, no raised base, and no curb separating the shower zone from the rest of the room.
The floor transitions seamlessly from the dry area into the wet zone. Water is controlled entirely through a precisely engineered floor gradient that directs flow toward a drain.
How It Differs from a Standard Shower
A standard shower sits on a raised shower base or has a built-up curb at the entry point. That curb creates a physical barrier that contains water but also creates a step-over threshold, a trip hazard, and a visual interruption.
A curbless shower eliminates that barrier completely. The wet zone is defined by the floor slope and the waterproofed membrane area, not by a physical edge. This demands more precise construction but delivers a cleaner, more functional result.
Common Design Configurations in Sydney Homes
Sydney bathrooms most commonly use three curbless configurations. The alcove design fits between three walls and suits narrow bathrooms. The corner configuration uses two glass screens and works well in medium-sized bathrooms. The open wet room design waterproofs the entire bathroom floor and suits larger spaces or contemporary open-plan layouts.
Each configuration changes the drainage strategy and the waterproofing scope. The right choice depends on your bathroom dimensions, your existing subfloor type, and how much of the floor area you want to include in the wet zone.
Benefits of a Curbless Shower Design
The appeal of a curbless shower goes well beyond aesthetics. The practical advantages are significant, and they compound over time.
Accessibility and Ageing-in-Place Advantages
A curbless shower is the single most effective accessibility upgrade in a bathroom renovation. Removing the step-over threshold eliminates the most common bathroom fall hazard for older adults and anyone using a mobility aid or wheelchair.
This aligns with universal design principles and the requirements of Australian Standard AS 1428.1, which governs accessible design in residential construction. For homeowners planning to age in place, a curbless shower is not a luxury; it is a long-term safety investment. Pair it with a grab rail and a fold-down shower seat, and the bathroom functions safely for decades.
Visual Space and Bathroom Aesthetics
A continuous floor surface makes any bathroom feel larger. The eye travels across the room without interruption, which creates a sense of openness that a curbed shower simply cannot replicate.
This effect is especially valuable in Sydney’s smaller inner-city bathrooms. Combine a curbless design with large-format tiles and a frameless glass screen and the visual expansion is dramatic. The shower becomes part of the room rather than a separate compartment inside it.
Easier Cleaning and Long-Term Maintenance
No curb means no grout lines accumulating soap scum in a hard-to-reach corner. The floor surface is continuous and accessible, so cleaning takes less time and effort.
A linear drain along one wall is particularly easy to maintain; the cover lifts out, and the channel cleans in seconds. Compare that to a centre drain surrounded by four angled tile planes and the maintenance advantage is clear. Less grout, fewer corners, and a flat squeegee path make the daily routine genuinely simpler.
Key Design Elements to Get Right
A curbless shower looks simple. The construction behind it is not. Three design elements determine whether the shower performs correctly for its entire lifespan.
Floor Gradient and Drainage Placement
The floor must fall consistently toward the drain at a minimum gradient of 1:80, that is, one centimetre of drop for every 80 centimetres of horizontal run. The National Construction Code sets this as the minimum for wet area drainage in residential construction.
Get this wrong and water pools on the floor instead of draining. The gradient has to be built into the screed layer before tiling begins; it cannot be corrected after tiles are laid. Drain placement drives the entire gradient design, so it is the first decision made, not the last.
Tile Selection and Slip Resistance
Floor tiles in a curbless shower must carry a minimum R10 slip-resistance rating under AS 4586, which is the Australian standard for slip resistance classification. Wet areas with a gradient require tiles that grip underfoot even when the surface is wet and soapy.
Smaller format tiles, mosaic, penny round, or 100×100mm porcelain, create more grout lines, which increases grip. Large-format tiles look cleaner but require a textured or matte surface finish to meet the R10 threshold. Natural stone can work but needs sealing and careful R-rating verification before installation.
Waterproofing Requirements
Waterproofing is the most critical and least visible element of a curbless shower. Australian Standard AS 3740 governs wet area waterproofing in residential construction and sets minimum membrane heights, bond breaker requirements, and inspection standards.
The membrane must extend at least 150mm up every wall adjoining the shower zone and cover the entire floor area within the wet zone. In a curbless design, the membrane boundary is defined by the design intent, not a physical curb, so the waterproofing scope must be clearly documented before work begins. A breach in the membrane is the leading cause of tile failure, subfloor damage, and mould in bathroom renovations.
Curbless Shower Installation: What the Process Involves
Installation is a multi-trade process. Tiling is the visible finish, but the work that determines whether the shower performs correctly happens underneath and behind the tiles.
Structural and Subfloor Preparation
A curbless shower requires the shower floor to sit at the same level as the surrounding bathroom floor. In most Sydney homes, this means the subfloor inside the shower zone needs to be dropped, typically by 50mm to 100mm to accommodate the screed layer, membrane, tile bed, and tile thickness while maintaining a flush finish.
On a concrete slab, this involves grinding or cutting the slab down. On a timber subfloor, it requires structural modification, sometimes a bearer and joist adjustment, and a waterproof-rated substrate like fibre cement sheet before the screed goes in. A structural assessment is worth doing before any work starts on older Sydney homes with timber floors.
Waterproofing and Membrane Application
Once the subfloor is prepared and the screed is laid to the correct gradient, the waterproofing membrane is applied. Liquid membranes are the most common choice in Sydney; they are brush or roller applied in two coats, with a minimum curing time between coats and before tiling begins.
Sheet membranes are used in higher-risk applications or where the substrate movement is a concern. Both systems require a bond breaker at all internal corners and junctions. In New South Wales, waterproofing in wet areas must be carried out by a licensed waterproofer, and the work is subject to inspection under the Home Building Act 1989.
Tiling, Drainage Fitting, and Final Finishes
Tiling begins only after the membrane has fully cured and passed inspection. The tiler works from the drain outward, maintaining the gradient established in the screed. Every tile course is checked for level and for consistent fall toward the drain.
The linear drain or centre drain body is set into the screed before tiling, and the cover is fitted last. Grout joints are filled with a flexible, waterproof grout. All junctions between the floor and wall tiles are finished with silicone-based never grout to allow for movement without cracking. The shower screen or frameless glass panel is the final installation, sealed at the base with a clear silicone bead.
How Much Does a Curbless Shower Cost in Sydney?
Cost varies significantly depending on the scope of work, the subfloor condition, and the materials selected. These are realistic Sydney figures based on current tradie rates and material pricing.
Typical Price Ranges by Scope
| Scope | Estimated Cost Range |
| Basic curbless conversion (existing concrete slab, standard tiles) | $4,500 – $7,000 |
| Mid-range installation (subfloor prep, linear drain, quality tiles) | $7,000 – $12,000 |
| Premium wet room design (full bathroom, large-format tiles, frameless glass) | $12,000 – $20,000+ |
These figures include waterproofing, tiling, drainage, and labour. They exclude the shower screen, tapware, and any structural engineering fees if required.
What Drives the Cost Up or Down
Subfloor condition is the biggest variable. A concrete slab in good condition is straightforward to prepare. A timber subfloor in an older Sydney terrace or apartment adds structural work, substrate installation, and additional waterproofing complexity, and that adds cost.
Tile selection is the second major driver. A standard 300×300mm porcelain tile at $40 per square metre sits at a very different price point to a large-format Italian porcelain at $180 per square metre. Drain type also matters; a basic centre drain costs less than a custom-length linear drain with a tile-insert cover. The more bespoke the design, the higher the labour and material cost.
Common Mistakes to Avoid
Most curbless shower failures trace back to three categories of error. All three are avoidable with the right contractor and the right construction sequence.
Drainage Slope Errors, Waterproofing Failures, and Tile Choice Pitfalls
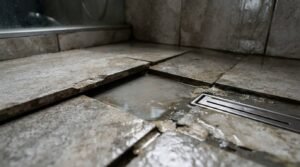
An inadequate floor gradient is the most common installation error. A slope that is too shallow or inconsistent across the floor plane causes water to pool rather than drain. This is a screed problem, not a tiling problem, and it cannot be fixed without removing the tiles and starting the screed again.
Waterproofing failures are the most expensive mistake. A membrane that is applied too thin, not taken high enough up the walls, or not given adequate curing time before tiling will eventually fail. Water gets behind the tiles, into the subfloor, and the damage spreads silently for months before it becomes visible. Always verify that your waterproofer is licensed and that the membrane is inspected before tiling begins.
Tile choice pitfalls are the most preventable. Using a tile with an insufficient slip-resistance rating is a safety issue and a compliance failure. Using large-format tiles on a gradient without checking that the tile can be laid without lippage- where one tile edge sits higher than the adjacent tile creates both a trip hazard and an aesthetic problem. Choose tiles that suit the gradient, not just the look.
Conclusion
A curbless shower is one of the most functional and visually impactful upgrades in a bathroom renovation. The design rewards careful planning; get the gradient, waterproofing, and tile selection right and the result performs beautifully for decades.
The installation process is more involved than a standard shower, but the outcome justifies it. Accessibility, aesthetics, and long-term maintenance all improve significantly with a well-executed curbless design.
At Sydney Home Renovation, we handle every stage of curbless shower installation from subfloor assessment and waterproofing through to tiling and final finishes. Contact us to plan your bathroom renovation with confidence.
Frequently Asked Questions
Is a curbless shower suitable for all bathrooms?
Most bathrooms can accommodate a curbless shower, but the subfloor type and available floor depth determine the complexity. Concrete slabs are the most straightforward. Timber subfloors require additional structural preparation but are achievable in most Sydney homes.
Do curbless showers leak more than standard showers?
A correctly waterproofed and graded curbless shower does not leak more than a standard shower. Leaks occur when the membrane is applied incorrectly, or the floor gradient is insufficient; both are construction failures, not design flaws.
What is the minimum size for a curbless shower?
The practical minimum is 900mm x 900mm for a functional shower space. Larger is always better for comfort and for achieving a consistent drainage gradient across the floor. Most Sydney renovators opt for 1,000mm x 1,200mm or larger.
How long does curbless shower installation take?
A curbless shower installation typically takes five to eight working days from subfloor preparation through to final finishes. The waterproofing membrane requires curing time between coats and before tiling, which drives the timeline more than the tiling itself.
Can I convert my existing shower to curbless?
Yes, in most cases. The existing shower base and curb are removed, the subfloor is assessed and prepared, and the new gradient screed and membrane are installed. The feasibility depends on the available floor depth and the subfloor condition.
What tiles work best for a curbless shower floor?
Tiles with a minimum R10 slip-resistance rating under AS 4586 are required. Smaller format tiles, mosaic, penny round, or 100×100mm porcelain provide more grip through additional grout lines. Matte or textured large-format tiles work well when the surface finish meets the R10 threshold.
Does a curbless shower add value to a Sydney home?
Yes. A well-executed curbless shower is a recognised value-adding feature in Sydney’s property market. It appeals to owner-occupiers for its aesthetics and accessibility, and to buyers and tenants who see it as a quality finish that signals a well-renovated bathroom.


