
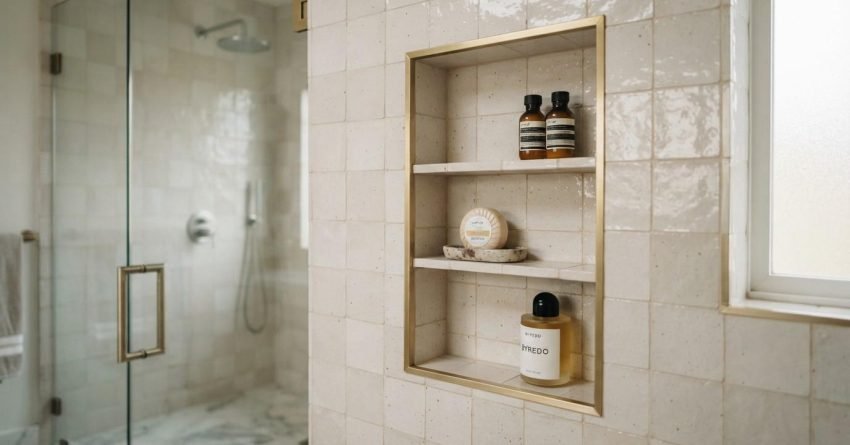
A shower niche is one of the most practical upgrades in any bathroom renovation and one of the most misunderstood. Get the size, placement, or waterproofing wrong, and you are looking at leaks, cracked tiles, and a costly fix within a few years.
Planning a niche correctly from the start saves money and protects the long-term integrity of your bathroom. Every decision from wall selection to membrane application has a direct impact on how the niche performs.
We cover standard sizing, placement heights, waterproofing sequences, design ideas, and the most common mistakes Sydney homeowners make when building a shower niche.
What Is a Shower Niche and Why Does It Matter?
A shower niche is a recessed shelf built directly into the shower wall. It sits flush with the tile surface, creating a clean, built-in storage space for shampoo, conditioner, soap, and other shower products.
Unlike freestanding caddies or corner shelves, a niche becomes a permanent part of the wall. It adds a finished, architectural quality to the shower that most homeowners and buyers notice immediately.
The Functional Role of a Shower Niche
The primary job of a shower niche is storage without clutter. Products sit inside the wall rather than hanging off a rail or balancing on a ledge, which keeps the shower looking clean and organised.
A well-built niche also eliminates the safety risk of items falling from a caddy. Everything has a fixed, stable position.
It is a small detail that makes daily use of the shower noticeably better.
How a Niche Adds Value to a Bathroom Renovation
Buyers and renters notice the quality of a bathroom faster than almost any other room. A tiled, recessed niche signals a considered renovation, not a budget flip.
For property investors and owner-occupiers alike, a niche is a low-cost addition relative to the visual and functional return it delivers. It costs a fraction of a full bathroom renovation but contributes meaningfully to the overall finish.
Done properly, it is one of the highest-value-per-dollar details in a bathroom build.

Shower Niche Size Guide: Getting the Dimensions Right
Size is where most niche decisions go wrong. Too small and the niche is barely functional. Too large and it creates structural problems or forces awkward tile cuts across the entire shower wall.
The right size balances usability, tile module, and structural constraints, and all three need to be considered together before a single cut is made.
Standard Shower Niche Sizes in Australian Bathrooms
The most common shower niche width in Australian bathrooms is 300mm for a single-product niche or 600mm for a standard double-width niche. Height typically sits between 200mm and 300mm for a single-shelf niche, with depth running at 100mm to 120mm, enough to hold a full-size shampoo bottle without protruding past the tile face.
These dimensions align with standard stud spacing in Australian timber-framed construction, which runs at 450mm or 600mm centres. Building the niche between studs avoids structural compromise.
Depth is the dimension most often underestimated. At less than 90mm, a niche struggles to hold larger product bottles upright.
How Tile Size Affects Niche Dimensions
Tile module is the single most important factor in finalising niche dimensions. The niche width and height must align with full tile increments, including grout joints, to avoid cut tiles inside the niche or misaligned grout lines across the surrounding wall.
A 300x600mm tile format, for example, works cleanly with a 600mm-wide niche. A 200x200mm mosaic tile gives more flexibility but still requires the niche opening to land on a grout line.
I always recommend locking in the tile selection before finalising niche dimensions. Reversing that order creates avoidable cutting problems on site.
Custom Sizing for Larger or Feature Niches
A full-height or double-shelf niche requires additional structural framing. The cavity between studs needs to be reinforced with nogging horizontal timber members to support the niche box and the tile load above it.
For a feature niche running floor to ceiling, the framing requirements increase significantly. This is not a DIY modification. It needs a licensed builder or experienced tiler who understands load paths and waterproofing continuity across a larger surface area.
Custom niches look exceptional when done correctly. The structural and waterproofing work behind them is what makes them last.
Shower Niche Placement: Where to Position It
Placement determines how useful the niche actually is in daily use. A niche built at the wrong height, on the wrong wall, or in the wrong position relative to the shower head creates frustration every single day.
Getting placement right is a combination of ergonomics, water management, and structural logic.
Height Placement for Everyday Usability
The most practical height for a shower niche is between 1,200mm and 1,500mm from the finished floor level. This range puts the niche at approximately elbow to chest height for most adults, easy to reach without bending or stretching.
For households with children or users with accessibility needs, a lower placement around 900mm to 1,000mm works better. For a primary adult bathroom, I recommend 1,350mm as a reliable default.
The bottom of the niche should land on a full tile course. This keeps the tiling layout clean and avoids a cut tile at the most visible part of the niche opening.
Side Wall vs. Back Wall Placement
The side wall is almost always the better choice for a shower niche. It receives less direct water impact than the back wall, which reduces the waterproofing load on the niche and lowers the long-term risk of water ingress.
The back wall is a workable option in larger showers where the niche can be positioned away from the direct spray zone. In a compact shower recess, the back wall puts the niche directly in the line of water flow, which increases the demand on the waterproofing membrane significantly.
Side wall placement also tends to produce a cleaner visual result, particularly when the niche is centred between the shower head and the opposite corner.
Avoiding Placement Mistakes That Cause Problems
The most serious placement mistake is building a niche into an external wall. External walls in Sydney homes often contain insulation batts, vapour barriers, and in some cases, structural bracing. Cutting a cavity into an external wall compromises thermal performance, creates a cold-bridging risk, and in some configurations, breaches the structural integrity of the wall.
Never place a niche on an external wall without a structural assessment. The risk is not worth the convenience.
The second most common mistake is positioning the niche directly behind the shower head. Water hits the niche at full pressure, the grout and membrane take constant impact, and failure happens faster than in any other position.
Waterproofing a Shower Niche: What You Cannot Skip
Waterproofing is the most critical part of building a shower niche. It is also the part most often done poorly, either skipped entirely on DIY builds or applied incorrectly by trades who treat the niche as an afterthought.
A niche that is not waterproofed correctly will leak. The only question is how long it takes.
Why Niches Are a High-Risk Waterproofing Zone
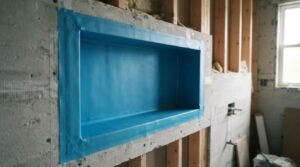
A shower niche creates five internal corners: two vertical, two horizontal, and one base. Every internal corner is a high-stress point for a waterproofing membrane. The membrane must bridge each corner continuously without gaps, voids, or bridging failures.
Water also pools at the base of the niche. Without a slight fall built into the niche floor, typically 5mm across the depth, water sits against the back wall and works its way through grout joints over time.
The combination of internal corners, pooling water, and constant wet-dry cycling makes the niche the highest-risk waterproofing zone in the entire shower.
The Correct Waterproofing Sequence for a Niche
The waterproofing sequence for a shower niche follows a specific order. Skipping or reversing any step creates a failure point.
First, the niche substrate, typically fibre cement sheet or compressed sheet, must be primed and fully dried. Second, corner tape is embedded in the first coat of membrane at every internal corner and the niche-to-wall junction. Third, a full bed coat of membrane is applied across the entire niche interior, including the base, sides, and back wall. Fourth, a second coat is applied after the first has cured, extending the membrane at least 50mm onto the surrounding wall at every edge.
Tile adhesive goes on only after the membrane has fully cured. Tiling over a wet or partially cured membrane is one of the most common causes of niche failure.
Waterproofing Standards in NSW (AS 3740)
In New South Wales, shower waterproofing must comply with AS/NZS 3740:2021, the Australian Standard for waterproofing of domestic wet areas. This standard classifies shower recesses as a high-risk wet area and requires membrane application to all walls, floors, and internal junctions within the shower zone.
A shower niche sits entirely within the shower zone and is subject to the full requirements of AS/NZS 3740. Compliance is not optional; it is a building code requirement in NSW.
Waterproofing in a licensed renovation must be carried out by a licensed waterproofer or a licensed builder with waterproofing endorsement. The work is inspectable and must meet the standard before tiling proceeds.
Shower Niche Design Ideas for Sydney Bathrooms
Once the structural and waterproofing requirements are locked in, the design of the niche is where the renovation gets interesting. Sydney bathrooms in 2025 and 2026 are leaning toward clean, considered finishes, and the niche is one of the best places to express that.
A well-designed niche does not need to be complicated. The right tile choice and a clean edge detail are often enough.
Material and Tile Choices for Niches
The most popular approach in Sydney renovations right now is a feature tile inside the niche that contrasts with the surrounding wall tile. A large-format matte porcelain on the walls paired with a mosaic or zellige-style tile inside the niche creates a clear visual focal point without overwhelming the space.
Natural stone, particularly marble-look porcelain, works well in niches because the smaller surface area makes it affordable to use a premium tile without blowing the budget. Slip rating matters even inside a niche. The base of the niche should have a minimum P3 slip rating per AS/NZS 4586 to prevent product bottles from sliding.
Avoid highly polished tiles on the niche base. They look sharp but become slippery and show water marks constantly.
Lighting, Shelving, and Feature Finishes
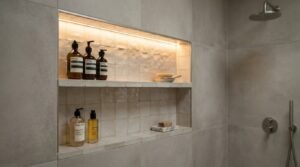
LED strip lighting inside a shower niche is one of the most effective upgrades in a bathroom renovation. A warm white LED strip recessed into the top of the niche creates a soft ambient glow that makes the entire shower feel more considered.
The LED strip must be rated for wet area use, IP67 minimum for a shower environment. Installation needs to be carried out by a licensed electrician. This is not a DIY addition.
A glass shelf inside a double-height niche adds a practical storage tier without breaking the visual line. Brushed nickel or matte black trim profiles at the niche edges give a sharp, finished look that ties into tapware and hardware selections across the bathroom.
Single vs. Double vs. Full-Height Niche Formats
A single-shelf niche suits most standard shower recesses. It holds four to six products comfortably and fits within a single stud bay without structural modification.
A double-shelf niche with two openings stacked vertically works well in larger showers and households with multiple users. Each shelf can be dedicated to a different person’s products, which keeps the shower organised without negotiation.
A full-height or floor-to-ceiling niche is a statement feature. It requires significant structural framing, a continuous waterproofing membrane across the full height, and careful tile layout planning. When executed well, it is one of the most striking design elements in a contemporary Sydney bathroom.
Common Shower Niche Mistakes and How to Avoid Them
Most shower niche problems are predictable. They come from the same handful of errors repeated across thousands of renovations. Knowing what they are before the build starts is the most effective way to avoid them.
Structural, Waterproofing, and Sizing Errors
Building the niche on an external wall is the most serious structural mistake. As covered above, external walls carry insulation, vapour barriers, and sometimes bracing, none of which should be compromised for a storage niche.
Skipping the niche floor slope is the most common waterproofing error. Without a fall toward the shower, water pools at the back of the niche and accelerates grout and membrane failure. Five millimetres of fall across the niche depth is the minimum.
Sizing the niche without reference to the tile module creates a cascade of cutting problems. Cut tiles inside the niche look unfinished and are harder to waterproof at the edges. Size the niche to the tile, not the other way around.
Finally, tiling over an uncured membrane is a failure that shows up six to twelve months after completion, usually as cracked grout, hollow tiles, or visible damp patches on the wall behind the niche. Cure time is not negotiable.
Conclusion
A shower niche is a small detail that carries significant technical weight. Size, placement, and waterproofing are not independent decisions; they work together, and getting one wrong affects all three outcomes.
Sydney bathrooms built to the right standard last decades without problems. The niche is no different. The structural framing, the membrane sequence, and the tile module alignment are what separate a niche that performs from one that fails.
At Sydney Home Renovation, we build shower niches the right way, compliant with AS/NZS 3740, sized to the tile, placed for daily usability, and finished to a standard that holds up long-term. Get in touch with our team to discuss your bathroom renovation.
Frequently Asked Questions
What is the standard size for a shower niche in Australia?
The standard shower niche width in Australian bathrooms is 300mm for a single niche or 600mm for a double-width niche. Depth runs at 100mm to 120mm, and height typically sits between 200mm and 300mm for a single-shelf format.
Where should a shower niche be placed on the wall?
The side wall is the preferred placement for a shower niche. It receives less direct water impact than the back wall, which reduces waterproofing stress. Height placement between 1,200mm and 1,500mm from the floor suits most adult users.
Does a shower niche need to be waterproofed?
Yes. A shower niche must be fully waterproofed to comply with AS/NZS 3740 in NSW. The niche interior, including all five internal corners and the base, requires membrane application before any tiling proceeds.
Can a shower niche be built on an external wall?
Building a shower niche on an external wall is not recommended. External walls contain insulation, vapour barriers, and sometimes structural bracing. Cutting a cavity into an external wall creates thermal, structural, and waterproofing risks that are difficult to manage.
How deep should a shower niche be?
A shower niche should be at least 100mm deep to hold standard-size product bottles upright. A depth of 120mm is more practical for larger bottles. The niche floor should have a 5mm fall toward the shower to prevent water pooling at the back.
What tiles work best inside a shower niche?
Porcelain tiles with a matte or textured finish work best inside a shower niche. The base of the niche requires a minimum P3 slip rating per AS/NZS 4586. A feature tile that contrasts with the surrounding wall tile is a popular design choice in Sydney bathrooms.
How much does it cost to add a shower niche in Sydney?
A standard single shower niche in a Sydney bathroom renovation typically costs between $300 and $800 as part of a full bathroom build, depending on tile selection, framing requirements, and finish. A feature niche with LED lighting or premium tiles sits at the higher end of that range.


