
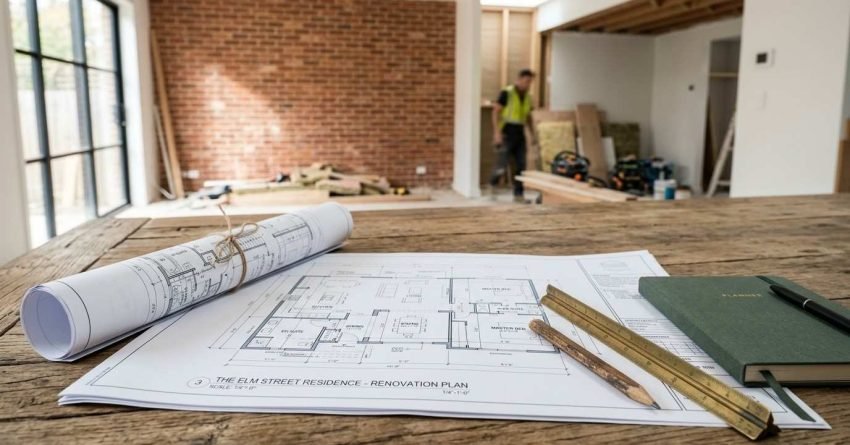
Starting a house renovation comes down to three foundational moves: setting a realistic budget with 15–20% contingency, defining scope and priorities before anyone quotes, and securing council approval before a single wall comes down. I have watched these three decisions determine whether a project runs smoothly or spirals into delays and blowouts.
For Sydney homeowners, first-time renovators and property investors, getting the starting sequence right saves thousands of dollars and months of frustration.
The difference between a smooth renovation and a stressful one usually comes down to preparation quality, not construction quality. We see it on every job we take over mid-project.
This guide walks you through the essential first steps, from budget planning through contractor selection, so you build a solid foundation before the first hammer swings.
Your First Ten Steps in Order
Sequence matters more than speed. Here is the order I give every homeowner who asks where to begin:
- Walk the property and document existing condition, room by room.
- Commission a building inspection for anything built before 2005.
- Test for asbestos in any home built before 1990, before demolition planning.
- Write three priority lists: must-do repairs, high-impact upgrades, nice-to-haves.
- Set a total budget including professional fees, then add contingency on top.
- Confirm your approval pathway with the council duty planner or a private certifier.
- Engage your designer or architect and lock the drawings.
- Lodge the DA or CDC and use the waiting period productively.
- Finalise material and fixture selections while approval is in progress.
- Tender to three licensed builders with complete documentation in hand.
Notice that builders come tenth, not first. Most first-timers reverse this order, calling builders before they have drawings or a scope, and every quote they receive is a guess.
Complete documentation is what turns three guesses into three comparable prices.
Assess Your Property and Define Renovation Goals
Before spending a dollar, you need clarity on what you are renovating and why. This assessment phase prevents scope creep and makes every renovation dollar work harder.
Conduct a Thorough Property Inspection
Walk your entire property with fresh eyes. Document existing conditions across structural elements, electrical systems, plumbing, roofing, and insulation, noting what works, what needs repair, and what needs full replacement.
Pay close attention to warning signs. Water stains point to plumbing or roofing faults, cracks in walls suggest foundation movement, and outdated electrical panels create safety risks while limiting what you can add later.
These hidden issues surface mid-renovation and blow budgets apart when they are discovered late.
For properties over 20 years old, I recommend a building inspector. A $400–$800 inspection fee finds problems you will miss and gives you leverage when contractors quote.
Asbestos deserves its own attention. Any Sydney home built before 1990 carries real risk, and Asbestos Awareness confirms that homes built before 1990 may contain asbestos in eaves, wet-area sheeting, vinyl backing and fencing.
We arrange licensed asbestos testing before demolition planning, not after. Discovering bonded asbestos once the walls are open turns a scheduled week into a licensed removal job with its own timeline and cost.
Decide Whether to Renovate or Rebuild
Some properties fail the renovation test before you start. When structural repairs, rewiring, replumbing, and a new roof all land in the same scope, you are funding a rebuild while paying renovation prices for access and staging.
I use a rough threshold. Once projected spend passes 50–60% of what a comparable new build costs on the same block, rebuilding usually delivers better value and a better result.
Two things push the decision toward renovating anyway. Heritage listing removes the demolition option entirely, and a floor plan that already works is worth keeping even when the services behind it need replacing.
Get this call made before you commission drawings. Reversing it later means paying for design work twice.
Prioritise Renovation Areas by Impact and Necessity
Not all renovations deliver equal value. Structural repairs and safety upgrades come first, always, because everything else sits on top of them.
After that, the return hierarchy is reasonably consistent. Kitchens and bathrooms deliver the strongest resale returns, with a well-executed kitchen renovation commonly returning around 10% of property value against a spend closer to 5%.
Bathrooms follow closely, with the added benefit that they are the room buyers inspect hardest. Living areas and bedrooms improve daily life but return far less financially, and cosmetic work in low-traffic rooms returns least of all.
Build three lists: must-do repairs, high-impact upgrades, nice-to-have improvements. This hierarchy drives budget allocation and gives you a defensible answer when costs run over and something has to go.
For investment properties, I focus spending on whatever lifts rental yield or valuation. Owner-occupiers get to balance financial return against how they actually live.
First-time renovators should finish one major area properly rather than spreading a budget thin across three rooms and finishing none of them well.
Set Clear Objectives and Success Metrics
Define what success looks like before you start. Renovating to sell within two years, settling in for decades, and preparing for a growing family each produce completely different decisions about materials, layout, and spend.
Set measurable goals. Name a budget range, name a completion date, and name your quality standard for finishes and fittings.
These metrics do real work later. They let you evaluate contractor proposals objectively and keep the project anchored once the decisions start multiplying.
Establish a Realistic Renovation Budget
Budget accuracy separates smooth renovations from financial disasters. Sydney costs swing widely depending on scope, quality level,l and what the property is hiding.
Calculate Total Project Costs
Renovation budgets cover far more than construction. Design fees, council application costs, building certification, temporary accommodation and post-renovation spending on landscaping or furniture all belong in the number.
For Sydney house renovations, plan around these baseline rates per square metre:
- Basic cosmetic updates: $1,000–$2,000/sqm
- Mid-range renovations: $2,500–$4,000/sqm
- High-end transformations: $4,500–$7,000+/sqm
Room-level numbers follow the same pattern. A bathroom renovation runs from $15,000 for basic updates to $50,000+ for luxury fitouts, and a kitchen renovation spans $20,000 to $80,000 depending on size and specification.
Those figures include labour, materials and standard fittings. They do not include the surprises, which is why contingency is a separate line.
Build Contingency Into Your Budget
Allocate 15–20% contingency for properties under 30 years old, and 25–30% for older homes where hidden issues are close to guaranteed. Contingency covers structural repairs, asbestos removal, electrical upgrades demanded by current codes, and plumbing faults exposed during demolition.
Every experienced renovator budgets for surprises. Hidden problems emerge the moment walls open, material prices move, and design changes happen on almost every job.
Without contingency, these entirely normal events become financial crises. This buffer is not optional padding; it is financial protection.
Unused contingency comes back to you as savings, never as waste.
Account for the Costs Nobody Quotes
Builder quotes cover construction. They rarely cover the surrounding costs that still come out of your account, and this is where first-timers get caught.
Budget separately for waste removal and skip hire across the project, temporary fencing and site security, and utility disconnection and reconnection fees. Add storage for furniture you cannot keep on site and cleaning at completion.
Then there are the costs of simply living through it. Eating out while the kitchen is gone, laundromat runs, and higher energy bills from portable heating in an unsealed house all add up quietly.
I tell clients to add 5% on top of contingency for these. They are predictable in aggregate even though no single one appears on a quote.
Explore Financing Options
Cash reserves make the simplest funding source. No interest, no approval delays, complete flexibility, though draining your emergency fund for a renovation creates a different kind of exposure.
Home equity loans and lines of credit carry lower rates than personal loans, and construction loans release funds in stages that match build progress. Personal loans are approved fastest and cost most.
Compare total borrowing cost rather than headline rates. Application fees, ongoing charges and early repayment penalties change the ranking more often than people expect.
For renovations under $50,000, personal loans work out more practically for most borrowers despite the higher rate, because setup costs stay low.

Understand Council Approvals and Building Regulations
Sydney council requirements catch first-time renovators off guard constantly. Approvals take weeks to months, which makes early application one of the highest-leverage moves available to you.
Determine What Approvals You Need
Not every renovation needs council approval. Internal cosmetic changes, like-for-like replacements and minor repairs, generally proceed as exempt development without formal consent.
Structural changes, extensions, and anything altering external appearance usually require Development Application approval.
Complying Development Certificates offer a faster path for work that meets set standards. The NSW Planning Portal confirms that a registered certifier issues a CDC without a full council assessment, which compresses the timeline dramatically.
Contact your council’s duty planner for free preliminary advice. Describe the work, ask which pathway applies, and you avoid the most expensive category of mistake before it costs anything.
Navigate Heritage and Conservation Requirements
Heritage-listed properties and conservation areas carry extra restrictions. External changes need heritage approval, and internal work gets assessed whenever it touches heritage significance.
Check your council’s Local Environmental Plan heritage maps before you commission any design work. A property inside a conservation area faces controls on rooflines, window profiles, front-facade changes and even paint colours, whether or not it is individually listed.
Heritage consultants earn their fee here. Their involvement adds project cost and prevents rejected applications and forced redesigns, which cost considerably more.
For anything inside a heritage conservation area, plan for longer approval timeframes and tighter design parameters from the outset. Assume a heritage pathway adds 8–12 weeks to your programme and constrains material choices you had assumed were open.
Prepare Documentation for Approval Applications
Council applications demand detailed documentation. That means architectural drawings showing existing and proposed layouts, site plans marking setbacks and boundaries, specifications covering materials and finishes, a BASIX certificate where the work triggers energy and water requirements, and a Statement of Environmental Effects addressing neighbour impact.
Professional documentation lifts approval rates and cuts requests for additional information. DIY applications succeed sometimes, though architect or draftsperson involvement produces faster and cleaner outcomes on almost every project I see.
Budget $3,000–$10,000 for architectural drawings depending on complexity. Council application fees run from $500 into the thousands based on project value, so build both into the budget from day one.
Assemble Your Renovation Team
The right professionals turn renovation stress into a managed process. The wrong ones create delays, cost overruns, and quality problems you pay to fix twice.
Decide Between Architect, Designer, or Direct Builder Engagement
Architects deliver full design services, council application management, and construction oversight. Their fees run 8–15% of construction cost and return that value through better design resolution and tighter project coordination.
Building designers cover similar ground at 5–10% of construction value. They handle most residential renovations capably, though complex structural work still calls for architect involvement.
Direct builder engagement suits straightforward projects with a clear, fixed scope. You take on design decisions and council applications yourself, which cuts professional fees and increases both your time commitment and your risk.
Select and Vet Contractors Carefully
Quality contractors turn plans into reality. Poor contractors create nightmares, and thorough vetting is the cheapest insurance available to you.
Request quotes from at least three licensed contractors. Verify licence status through the NSW Fair Trading public register, check insurance certificates for public liability and workers’ compensation, review recent project photos, and phone the references rather than emailing them.
Compare quotes carefully. Unusually low prices signal corner-cutting, hidden exclusions, or financial instability far more often than genuine efficiency.
Detailed quotes listing specific materials, quantities and labour allocations let you compare like with like. Vague quotes are a warning in themselves.
Confirm Insurance and Warranty Cover
Insurance is the step homeowners skip and regret. In NSW, Home Building Compensation Cover is required for residential work above $20,000, and the builder pays for it before work starts.
Ask for the certificate in your name before you pay a deposit. No certificate means no cover if the builder becomes insolvent or fails to finish.
Check public liability cover separately, and confirm workers’ compensation for everyone on site. A subcontractor injured on an uninsured site becomes your exposure.
Then confirm the statutory warranty period. NSW gives you six years for major defects and two years for everything else from completion.
Knowing those dates protects you long after the site is clean.
Establish Clear Contracts and Communication Protocols
Written contracts protect both sides. Include detailed scope, fixed price or cost-plus terms, payment schedule, timeline with milestones, a variation process, and dispute resolution.
The NSW Home Building Act requires a written contract for residential work over $5,000, with specified consumer protections attached. Never proceed without one, regardless of how well the builder comes recommended.
Payment structure deserves real attention. NSW caps the deposit at 10% for contracts over $20,000, and any builder pushing for more than that is telling you something about their cash position.
Tie every subsequent payment to a completed, inspectable milestone rather than a calendar date. Slab down, frame up, lock-up, fit-out complete, practical completion.
Paying ahead of progress removes your only real leverage.
Set communication expectations upfront. Weekly site meetings, progress photo requirements, and preferred contact methods prevent the misunderstandings that turn into disputes.
Define who makes decisions and how variations get approved and priced before you need the answer.

Decide What to DIY and What to Delegate
Doing some work yourself saves real money. Doing the wrong work yourself costs more than hiring out the whole job, and the line between them is clearer than most people assume.
Know Which Work Legally Requires a Licence
Some decisions are made for you. In NSW, all plumbing, drainage, gasfitting and electrical work must be carried out by a licensed tradesperson.
NSW Fair Trading licensing rules confirm that any residential building work valued above $5,000 in labour and materials requires a licensed contractor.
Waterproofing belongs on that list in practice. It is the single most common defect in Australian bathrooms, and an unlicensed waterproofing job voids warranties and fails at the worst possible moment.
Structural work needs an engineer regardless of who swings the hammer.
Match DIY Scope to Your Actual Skill and Time
The work that genuinely suits DIY sits at the start and end of the project. Demolition of non-structural elements, site clean-up, painting, landscaping and basic tiling in low-visibility areas all reward effort more than expertise.
Be honest about time. A tradesperson tiles a bathroom in two days, and you will take two weekends, which means two extra weeks of a bathroom you cannot use.
I have seen DIY demolition save $2,000 and DIY tiling cost $6,000 to strip out and redo. The difference is whether a mistake is visible and permanent.
Understand How DIY Affects Your Builder Relationship
Splitting scope creates coordination risk. A builder who controls the whole job carries responsibility for the whole job, and the moment you insert your own work into the middle of their programme, that clarity disappears.
Agree the split in writing before work starts. Name exactly which items you are doing, when they will be finished, and what happens to the programme if they are not.
Expect your builder to exclude your work from their warranty. That is reasonable, and you should plan for it rather than argue about it later.
Plan Your Renovation Sequence and Timeline
Sequencing drives cost, duration, and whether you can live in the house while it happens. Strategic planning here minimises disruption and prevents the rework that eats contingency.
Understand Logical Construction Sequence
Renovations follow a predictable order. Demolition precedes construction, structural work precedes finishing, rough-in trades install before walls close, and finishing trades follow painting.
Break that order, and you pay for it twice.
Installing flooring before painting means paint on new floors. Closing walls before electrical rough-in means cutting open finished surfaces to run cable that should have gone in a week earlier.
For whole-house renovations, the typical run is demolition, structural modifications, roofing, external cladding, windows, internal framing, rough-in services, insulation, wall linings, wet area waterproofing, tiling, cabinetry, second-fix services, painting, flooring, final fixtures.
Know Your Critical Stage Inspections
Approved work carries mandatory inspection points, and missing one stalls the whole job. Your certifier signs off at set stages before the next trade covers anything up.
On a typical Sydney renovation, those points land at footings before pour, structural framing before linings, waterproofing before tiling, and stormwater connection before backfill. Occupation certificate inspection closes the project out.
Confirm at contract stage who books each inspection and who carries the cost of a failed one. Builders usually book them, and the answer belongs in writing rather than in memory.
Waterproofing sign-off matters most. Tiling over unapproved membrane means stripping a finished bathroom to prove compliance.
Create Realistic Timeline Expectations
Sydney renovations take longer than homeowners expect, consistently. Simple bathroom renovations need 3–6 weeks of construction, kitchens run 6–12 weeks, and whole-house projects extend 4–12 months depending on scope.
Approval time sits on top of that. DA approvals average 6–12 weeks across NSW councils, CDC approvals clear in 1–3 weeks, and heritage applications stretch to six months on complex sites.
Build buffer into the schedule. Material deliveries slip, tradespeople get sick, and weather stops external work.
A timeline with no flexibility is a timeline that fails.
Prepare for Living Through Renovation
Renovating while living in the house takes planning. Dust, noise, and disrupted utilities affect daily life, and some phases make occupation genuinely impractical.
Set up a temporary kitchen before the real one goes. Arrange bathroom access before the bathroom comes out, build dust barriers between construction zones and living areas, and plan around noise during demolition.
Consider temporary relocation for major work. Short-term rental costs stack up favourably against months of living in a construction site, so we price accommodation into the budget whenever the scope suggests it will be needed.

Manage Materials and Design Selections
Material choices drive budget, timeline, and final quality. Early selection prevents delays and makes accurate costing possible in the first place.
Make Design Selections Before Construction Starts
Late selections stop construction dead. Contractors cannot tile without tiles, electricians cannot install fixtures without specifications, and cabinetmakers cannot build without final designs.
Build a selections schedule working backwards from installation dates. Allow 4–8 weeks lead time for standard items and 12–16 weeks for imported or custom products, then order long-lead items immediately after contract signing.
Visit showrooms, collect samples, and decide systematically. Rushed selections made mid-construction produce regret, and thoughtful early ones produce a result that hangs together.
Balance Quality, Cost, and Availability
Premium materials do not guarantee premium results. Mid-range products deliver excellent outcomes at sustainable cost, so the skill lies in knowing where quality actually shows.
Invest in what you touch daily. Tapware, door handles and light switches shape the everyday experience out of all proportion to their price.
Save on what stays hidden. Basic plumbing fittings, standard electrical components and code-compliant structural materials do their job without a premium.
Check availability before you commit to anything. Supply chain disruption continues to affect Australian construction, and a readily available alternative beats a perfect product sitting on a ship.
I ask clients to nominate a second choice for every long-lead item. That single habit has saved more programmes than any other planning step.
Document All Selections Thoroughly
Build a comprehensive selections document covering every material, finish and fixture. Include product codes, suppliers, colours, quantities and costs, then share it with your contractor and keep it current.
Detailed documentation prevents installation errors because contractors reference specifications instead of memory. Disagreements about what was agreed become a document check rather than an argument.
That administrative effort is the cheapest correction insurance in the project.
Avoid the Mistakes That Derail First Renovations
Most renovation failures repeat a small set of errors. I see the same three on nearly every rescue job we take on.
Signing a Builder Before the Scope Is Fixed
The most expensive mistake happens before construction starts. Homeowners engage a builder off preliminary drawings, then keep making decisions during the build, and every one of those decisions becomes a variation priced without competitive pressure.
Variations carry no market discipline. The builder is already on site, you have no alternative, and the price reflects that.
Lock the scope, finalise selections, and tender complete documentation. Every hour spent finishing the scope before signing returns several times over in variation costs you never incur.
Budgeting the Build and Forgetting Everything Else
Homeowners budget construction and treat everything else as noise. Design fees, certification, approvals, insurance, temporary accommodation, and finance costs together add 15–25% on top of the build figure.
A $100,000 kitchen and bathroom project rarely costs $100,000. It costs the build, plus the professionals, plus the approvals, plus the contingency, plus the weeks of eating out.
Budget the whole project from the start,t and the numbers stop being a shock.
Chasing the Cheapest Quote
The lowest quote wins on price and loses on everything else. Underquoting is a strategy, not an accident, and the gap gets recovered through variations, substituted materials, or an abandoned site.
Compare quotes line by line for what each one excludes. A quote 20% cheaper than the others is almost always missing scope the others included.
The middle quote from a licensed, insured, well-referenced builder is the safest bet in this market.
Conclusion
Starting a house renovation successfully comes down to preparation before construction. Budget accuracy, correct approvals, qualified and insured contractors, and realistic timelines build the foundation everything else rests on.
Sydney homeowners who invest properly in these first steps avoid the cost blowouts and timeline disasters that catch unprepared renovators. The effort you put into planning tracks directly to how satisfied you feel at handover.
At Sydney Home Renovation, we help homeowners lock scope, budget, and approvals before the first invoice arrives, so projects finish on budget and on schedule. Contact our team to walk through your plans and get an honest picture of what your renovation will actually cost.
Frequently Asked Questions
What is the first thing to do when renovating a house?
Assess your property’s current condition and define clear renovation goals. Document existing issues, prioritise improvement areas, and decide what success looks like before setting budgets or contacting contractors.
How much contingency should I budget for a house renovation?
Budget 15–20% contingency for properties under 30 years old and 25–30% for older homes. This buffer covers hidden structural problems, asbestos removal, and electrical upgrades demanded by current codes.
Do I need council approval for my renovation in Sydney?
Internal cosmetic changes generally proceed without approval. Structural modifications, extensions and external changes need Development Application or Complying Development Certificate approval, so confirm your pathway with the council duty planner.
How long does a typical house renovation take in Sydney?
Bathroom renovations take 3–6 weeks of construction, kitchens run 6–12 weeks, and whole-house projects extend 4–12 months. Add 1–12 weeks of approval time before construction starts.
Should I hire an architect or go directly to a builder?
Architects add value on complex renovations through better design resolution and coordination, charging 8–15% of construction cost. Straightforward projects with a fixed scope suit direct builder engagement at lower fees.
How do I choose the right renovation contractor?
Get quotes from three licensed contractors, verify licence status with NSW Fair Trading, check insurance certificates, and phone references directly. Treat unusually low prices as a warning about excluded scope.
Can I live in my house during renovation?
Yes, with planning. Set up temporary facilities before services get disconnected, build dust barriers, and prepare for demolition noise. Major renovations usually justify temporary relocation.
In what order should I renovate rooms in my house?
Structural repairs and safety upgrades come first, then kitchen and bathroom for strongest returns, then living areas and bedrooms. Finish one area properly before starting the next.
What renovation work can I legally do myself in NSW?
Painting, non-structural demolition, landscaping and site clean-up suit DIY. Plumbing, gasfitting, electrical, waterproofing and any building work above $5,000 require a licensed tradesperson.
How much does a renovation add to property value?
A well-executed kitchen renovation returns around 10% of property value against roughly 5% spend. Bathrooms follow closely, while bedrooms and living areas return considerably less.


