
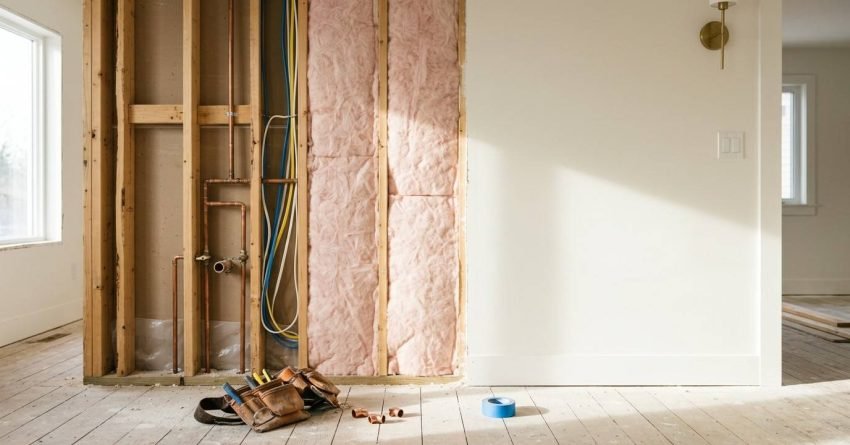
The correct order to renovate a house runs demolition, structural work, rough-in services, insulation, wall and ceiling linings, flooring, cabinetry, second fix fixtures, then painting and final finishes. We follow that sequence on every project because each phase physically depends on the one before it.
Get the order wrong, and the cost lands hard. Sydney homeowners pay for return trade visits, damaged materials, and reopened walls, and the timeline stretches by weeks. I have re-sequenced a stalled job on a Tuesday and handed the owner back three weeks of program by Friday.
Here is the full phase-by-phase map we work to, from the first planning meeting through final handover, including the durations we plan against and the inspection points that govern them.
The House Renovation Order at a Glance
A full house renovation follows ten stages in a fixed dependency order. Each stage closes before the next opens, because every later trade needs the earlier work finished and inspected.
- Planning, budget and council approvals
- Demolition and site preparation
- Structural work and framing
- Rough-in services: plumbing, electrical, HVAC
- Insulation, vapour barriers and waterproofing
- Wall and ceiling linings
- Flooring (timing depends on material)
- Cabinetry and built-in joinery
- Second fix fixtures and fittings
- Painting, final finishes and handover
The only genuine flexibility sits at stage 7, where the flooring material decides whether it lands before or after cabinetry.
Cosmetic-only projects compress this order rather than change it. Painting, flooring, and fixture swaps still run last, and any service change still happens while the walls are open.
Why Renovation Order Matters for Your Budget and Timeline
Renovating in the wrong order creates a cascade of expensive problems that compound through the project. Installing flooring before ceiling work finishes exposes new surfaces to dust, debris, and impact damage. Painting before electrical rough-in means patching and repainting after the electrician cuts every outlet and switch.
The financial damage runs past wasted material. Trades charge premium rates for return visits, and one scheduling conflict pushes the whole program out by weeks.
Sequencing also governs your council approval process. NSW building inspectors sign off at set stages, particularly after structural work and before wall coverings conceal rough-in services. Miss those inspection windows, and you open completed work back up for verification.
The Hidden Costs of Incorrect Sequencing
Trade coordination failure is the largest hidden renovation cost we see on residential jobs. When the plasterer arrives before the electrician finishes rough-in, you pay for a wasted site visit. Multiply that across plumbers, HVAC installers, and carpenters, and the leakage compounds fast.
Material damage from premature installation stacks on top. Hardwood flooring laid before wet trades finish absorbs moisture and cups, and cabinetry installed before painting demands heavy masking with real overspray risk.
I have watched a three-week bathroom program stretch to eight weeks purely from sequencing errors. Sydney’s humidity adds to it, because drying times for plaster, paint and adhesives all extend through the wetter months.
Pre-Renovation Planning and Preparation
Successful renovations begin months before demolition. This phase sets your budget, secures approvals and produces the detailed scope that governs every later decision.
Establishing Your Renovation Budget
Your budget determines the achievable scope and drives material selection across the whole project. Sydney whole home renovation costs vary sharply by location, with inner-city projects running roughly 15 to 25 percent higher than outer suburbs on access constraints and parking alone.
We allocate 10 to 15 percent of the total budget as contingency for what the walls hide. Older Sydney homes regularly reveal deteriorated framing, outdated wiring, and asbestos-containing materials that need licensed removal.
Break the budget into categories that mirror the renovation sequence rather than by room. Structural and rough-in money gets committed early and cannot be clawed back, so front-loading the wrong line item leaves nothing for the finishes buyers actually see.
Securing Council Approvals and Permits
Most structural renovations in Sydney need Development Application approval or a Complying Development Certificate before work starts, and the pathways are set out on the NSW Planning Portal. Processing runs from around 20 days for a CDC to several months for a complex DA.
Identify your approval pathway at the very start of planning. Work affecting load-bearing walls, rooflines, or external appearance triggers formal approval, while internal cosmetic renovations generally proceed without council involvement.
For projects that meet complying development standards, we engage a private certifier and take the CDC approval pathway instead. It suits straightforward renovations inside established parameters and cuts the approval wait substantially.
Creating Detailed Scope and Specifications
Document every element of the renovation before you compare renovation quotes. Detailed specifications produce comparable pricing and shut down variation claims during construction, so we include fixture selections, material grades, and finish standards in the scope.
Architectural drawings carry your intent to the trades and give quantity surveyors something real to price. Even modest renovations benefit from scaled floor plans marking layouts, electrical positions, and plumbing locations.
Set a decision deadline for every selection. Window sizes and door configurations get locked before framing begins, and late decisions there create both delays and rework.
Staging a Renovation Across Multiple Budgets
Plenty of Sydney owners renovate in stages rather than in one hit, and the phase order still holds inside each stage. We front-load every service and structural change while the walls are open, then finish rooms progressively as budget allows.
Stage one carries the disruption: approvals, structural work, rough-in and waterproofing across the whole property. Later stages become finishing work only, which keeps a home extension or a spare bedroom fit-out from reopening completed rooms.

Who You Book and When: The Trade Sequence
Sequencing trades is a booking problem before it is a site problem. We lock the program backwards from the trades with the longest lead times, then confirm each trade a fortnight before its window opens.
Demolition crews, asbestos assessors and the structural engineer get committed first. Plumbers, electricians and HVAC installers get booked as one coordinated rough-in block rather than three separate visits.
Plasterers, tilers, joiners, painters and floor layers follow in that order, each confirmed only once the trade before them holds a firm finish date. Choosing a renovation contractor who holds that calendar centrally removes most of the coordination risk from the homeowner.
Phase 1: Demolition and Site Preparation
Demolition is the physical start of the renovation, and it sets the conditions for everything after. Good demolition technique protects what you keep and hands the next trade a safe, clean site.
Safe Demolition Practices
We engage licensed asbestos assessors before touching any Sydney home built before 1990. Fibro sheeting, vinyl flooring, and insulation products all carried asbestos, and SafeWork NSW treats disturbance without controls as a serious exposure risk, carrying substantial fines. Booking licensed asbestos removal into the program early prevents a mid-demolition stop-work.
All services get disconnected before demolition begins. Electrical isolation removes shock risk, and water and gas disconnection prevents flooding and leaks, with the electrician and plumber capping everything properly.
Protect every area outside the renovation scope. Dust barriers, floor coverings and sealed doorways stop debris migrating through the house, which matters enormously when you stay living in the property.
Structural Assessment and Engineering
Demolition exposes the structure and gives us the first honest look at it. Termite damage, water ingress and previous poor workmanship stay invisible until the wall linings come off.
We bring in a structural engineer the moment a renovation touches load-bearing elements. Engineering certification is mandatory for removing or modifying structural walls, and your certifier demands those documents before signing off later stages.
Photograph existing conditions before and during demolition. That record settles insurance questions and resolves arguments about pre-existing damage versus renovation damage.
Phase 2: Structural Work and Framing
Structural modifications set the bones of the renovated space. The phase covers new wall framing, beam installation, window and door openings, and changes to floor or ceiling structure.
Load-Bearing Wall Modifications
Removing a load-bearing wall requires temporary propping through the whole operation. Steel or timber beams take over the wall’s structural job and transfer load to new support points, with the engineer dictating beam size, connection detail, and footing requirements.
Budgeting for load-bearing wall removal separately keeps that engineering cost visible from day one. Larger steel members need crane access, so we assess access constraints during planning, particularly for inner-city properties with narrow frontage or a tight rear lane.
Concrete footings cure fully before we load the new beams. Rushing that step invites settlement and cracking through the finished surfaces above, and the engineer sets minimum cure times based on the mix and the load.
New Wall Framing and Layout Changes
We frame new walls to the approved plans and hold consistent stud spacing for the lining that follows. Standard 450mm or 600mm centres take sheet goods with minimal cutting and waste.
Blocking goes in during framing for everything you mount later. Grab rails, towel rails and heavy mirrors all need solid backing, and adding it after the linings close up is genuinely painful, so we work straight from the fixture schedule.
Framing gets coordinated with the rough-in trades before a single stud is fixed. Plumbing waste lines, ducted air conditioning and switchboards each demand clearances that reshape the framing layout.
Phase 3: Rough-In Services
Rough-in covers every service that lives inside wall, floor and ceiling cavities before linings conceal them. This phase demands tight coordination between plumbing, electrical, and HVAC to prevent clashes and maintain code compliance.
Plumbing Rough-In
Plumbing rough-in sets water supply lines, drainage, waste and vent piping, and gas lines where they apply. We position fixtures to plan and allow for the final connection heights and offsets the manufacturer specifies. Locking the bathroom plumbing layout at this point prevents the most expensive change of the whole job.
Sydney water pressure varies significantly across suburbs. Our plumber tests supply pressure and fits pressure limiting valves or a booster pump to suit, because low pressure kills fixture performance and high pressure accelerates wear and leaks.
Drainage runs hold minimum grades for waste flow. We verify grade compliance before anything gets concealed, since a correction after lining means destructive access, and the plumber issues compliance certificates for inspection.
Electrical Rough-In
Electrical rough-in places cables, conduits, and back boxes for every power, lighting, and communication point. We work from the electrical plan to confirm circuit capacity and set outlet positions against real furniture layouts and appliance locations.
Modern renovations demand far more circuits than the original house carried. Kitchen appliances, heated towel rails and home office equipment each want dedicated circuits, and planning electrical upgrades during renovation at rough-in avoids nuisance tripping later.
We install data cabling at rough-in even for households running mostly wireless. Hardwired connections hold up better for home offices, entertainment systems and security equipment, and the marginal cost now is a fraction of retrofitting through finished walls.
HVAC Installation
Ducted heating and cooling goes in before ceiling linings close. Duct routing, diffuser positions and return air grille locations all get coordinated against the lighting layout and the structure.
Split systems are less sequence-critical but still reward early planning. Refrigerant pipe routes, condensate drainage and outdoor unit positions shape both the finished appearance and the system’s performance.
Efficiency ratings deserve real attention at selection. Higher-rated equipment costs more up front and returns it through lower running costs, which matters through Sydney’s long summer cooling season.
Phase 4: Insulation and Vapour Barriers
Insulation follows rough-in completion and precedes wall linings. That timing gives complete coverage around every service while keeping access open for any rough-in correction the inspection turns up.
Wall and Ceiling Insulation
We select R-values suited to Sydney’s climate zone. National Construction Code minimums set the floor, and higher R-values buy noticeably better comfort and lower running costs.
Insulation goes in without compression or gaps, because both destroy thermal performance. Batts fit snugly between framing members with careful cutting around electrical boxes and plumbing penetrations, and loose-fill handles the irregular cavities batts fight.
Acoustic insulation earns its place in bedrooms next to living areas, bathrooms and laundries. Sound transmission through internal walls shapes daily comfort more than most homeowners expect, especially in open-plan renovations.
Moisture Management and Wet Area Waterproofing
Vapour barriers stop moisture migrating into wall cavities where it feeds mould and rots framing. Requirements shift with climate zone and wall construction type.
Wet areas run to a stricter rule. Waterproof membranes go down after the substrate is fixed and fully cured, and they always precede tiling, never follow it, with the membrane turned up the walls to the specified height and dressed into the floor waste.
Australian wet area waterproofing requirements demand certification against AS 3740, published by Standards Australia. Retiling to fix a failed membrane is one of the most expensive corrections in residential work.
Ventilation completes the picture. Exhaust fans ducted to outside air, not into the roof cavity, carry the moisture out of the building rather than parking it above your ceiling.
Deal with existing moisture problems before any new lining goes up. Water stains, musty odours and visible mould all signal remediation work that has to happen first, because concealing them guarantees a failure later.

Phase 5: Wall and Ceiling Linings
Lining turns a construction site into a recognisable living space. The phase covers plasterboard installation, plastering and preparation for final finishes.
Plasterboard Installation
Ceilings get lined before walls, which produces clean corner joints. We match board thickness and type to the application: standard board through general areas, moisture-resistant board in bathrooms and laundries, and fire-rated board wherever code demands it.
Screw patterns and joint treatment decide the finished surface quality. Rushed installation telegraphs straight through the paint, and proper plastering needs multiple coats with real drying time between them.
Access panel positions get agreed with every trade before the boards go up. Plumbing valves, electrical junction boxes and HVAC components all need future access rather than permanent burial.
Specialty Wall Treatments
Feature walls, niches and architectural details need framing and lining coordinated together. Recessed shelving, TV mounting zones and decorative mouldings all get planned before lining starts.
Tile backer boards replace standard plasterboard behind tile. These cement-based sheets give a stable, moisture-resistant substrate for adhesion, and we install them to manufacturer specification, including the membrane application.
Design in maintenance access from the start. Concealed cisterns, in-wall storage, and integrated lighting all need service access, and it gets overlooked constantly.
Phase 6: Flooring Installation
Flooring timing depends on the material and on what happens after it. Some floors go in before cabinetry, others wait until later to survive the build.
Flooring Sequence Considerations
Tile typically installs before cabinetry, with cabinets sitting on the finished floor. That approach simplifies future cabinet replacement and holds consistent floor levels across the space.
Timber and laminate usually wait until after cabinetry and painting to avoid construction damage. Cabinets sit on the subfloor with the flooring running to the toe kicks, which uses less material but complicates any later cabinet change. Weighing that trade-off during flooring selection shapes the whole back half of the program.
Carpet always goes last. Laying carpet ahead of painting, cabinetry, or fixture installation guarantees damage and a replacement bill.
Subfloor Preparation
Subfloor condition drives finished floor performance directly. Uneven subfloors telegraph through thin coverings and wear early, so levelling compounds correct minor variation, and serious problems get the subfloor replaced.
Moisture testing comes before any moisture-sensitive floor. Concrete slabs hold moisture for months after pouring, and timber laid over damp concrete cups, warps and loses adhesion.
Acoustic underlays cut impact noise transmission downward. That matters most in apartments and multi-storey renovations where floor noise reaches other occupants.
Phase 7: Cabinetry and Built-In Elements
Cabinetry turns empty rooms into working spaces. Kitchen cabinets, bathroom vanities, wardrobes and storage systems all land in this phase.
Kitchen Cabinet Installation
Kitchen cabinets demand precise levelling and alignment. Small errors compound across a cabinet run and surface as visible gaps against benchtops and appliances, which is one reason kitchen renovation costs sit so heavily in labour rather than materials.
We install base cabinets first and establish the level reference for wall cabinets from there. Standard wall cabinet heights put the bottom edge 450mm above the benchtop, adjusted for user preference and rangehood requirements.
Appliance delivery is timed to cabinet installation. Built-in ovens, dishwashers and refrigerators need openings matched to their specifications, so we verify dimensions before manufacture rather than after.
Bathroom Vanity and Storage
Bathroom vanities are installed after floor tiling and before final plumbing connections. Wall-hung units rely on the blocking we set during framing, and floor-standing units need a genuinely level floor.
Vanity, basin and tapware get selected together. Undermount basins need specific benchtop cutouts, vessel basins change the height allowance, and tapware reach has to suit basin depth and shape, which makes early bathroom vanity selection a sequencing decision as much as a style one.
Mirror cabinets and storage units follow the vanity. Electrical connections for cabinet lighting and shaver outlets get roughed in earlier, based on the final cabinet specification.
Phase 8: Second Fix and Fixture Installation
Second fix completes what rough-in started. Electricians, plumbers and HVAC technicians return to install the final fixtures, fittings and equipment.
Electrical Second Fix
Electrical second fix covers power points, switches, light fittings and final circuit connections. It follows painting, which keeps the finished surfaces intact.
We test every circuit before handover and confirm switches, dimmers and smart controls all behave. Any automated system gets documented, with operating instructions and access credentials handed to the homeowner.
Electrical compliance certificates get issued for all work. Those certificates confirm the installation meets Australian Standards and support both insurance and resale.
Plumbing Second Fix
Plumbing second fix connects fixtures to the rough-in points. Toilets, basins, showers, baths and kitchen sinks all get their final connections here.
Every fixture gets leak-tested before we call the work complete. We run water through each outlet and check supply connections, waste seals, and overflow function, because water damage to new finishes is brutally expensive to repair.
Hot water systems get commissioned and temperature settings verified against regulation. Tempering valves cap delivery temperature to prevent scalding, with specific requirements for bathrooms and kitchens.
Phase 9: Painting and Final Finishes
Painting is the last major trade activity before completion. Quality application rests on surface preparation and correct product selection.
Interior Painting Sequence
Ceilings first, then walls, then trim. That order lets each element cut in cleanly against the previous surface without visible overlap.
Primer selection follows the substrate and the topcoat. New plasterboard takes a sealer coat, and previously painted surfaces often need a stain-blocking primer to stop bleed-through.
Sheen gets matched to the room. Flat finishes suit ceilings and low-traffic walls, while semi-gloss and gloss deliver the durability and washability kitchens, bathrooms and hallways demand.
Final Finishing Details
Door hardware, window furnishings and decorative elements are installed after painting. These items are easily damaged during painting and go on best over clean, cured surfaces.
Touch-up painting follows fixture installation, not the other way around. Minor wall damage during installation is normal on every job, and a planned touch-up pass absorbs it instead of triggering a full recoat.
Thorough cleaning closes the project. Construction dust settles into every corner, so we work through all surfaces systematically, including inside cabinets, behind appliances, and through the ventilation.
Where Exterior Work Fits in the Renovation Order
Exterior work splits across the program rather than sitting in one block. Anything that keeps weather out belongs early, and anything decorative belongs at the very end.
Roofing, gutters, external cladding and window replacement all happen before or alongside structural work. The building envelope has to be watertight before insulation, linings and any finish goes in, because a single storm through an open roof destroys weeks of internal progress.
Rendering, external painting and any facade work follow once the envelope is sealed and the structural changes are certified. Scaffolding usually stays up across these stages, so we group them to avoid paying for a second set-up.
Landscaping, driveways, decking and fencing go last, after every heavy delivery and skip movement is finished. New turf and fresh concrete lose badly to a bobcat or a tile pallet.
How Long Each Renovation Phase Takes
Duration matters as much as order, because trade availability is what actually sets your finish date. These are the ranges we plan against for a full house renovation in Sydney.
Phase | Typical Duration | Critical Dependency |
Planning, design and approvals | 6–16 weeks | Council or private certifier |
Demolition and site prep | 3–10 days | Asbestos clearance |
Structural work and framing | 1–3 weeks | Engineering certification |
Rough-in services | 1–2 weeks | Three trades coordinated |
Insulation and waterproofing | 3–5 days | Membrane cure time |
Wall and ceiling linings | 1–2 weeks | Plaster drying time |
Flooring | 3–7 days | Subfloor moisture testing |
Cabinetry and joinery | 1–2 weeks | Joinery lead time (6–10 weeks) |
Second fix and fixtures | 3–7 days | Painting complete |
Painting and finishes | 1–2 weeks | Humidity and drying |
Final inspection and handover | 1–2 weeks | Certifier availability |
Joinery lead time is the trap in that table. Cabinetry gets measured and ordered during framing, not when its installation week arrives, and the same early-order logic applies to a bathroom renovation timeline where tapware and tile availability drive everything downstream.
Renovating a Bathroom or Kitchen Within a Whole-House Sequence
Wet rooms and kitchens follow the same ten-phase logic in miniature, but they carry more trades per square metre than any other space. On a whole-house job, we complete structural and rough-in work across the entire property before finishing either room.
Bathroom Renovation Order
A bathroom runs strip-out, then plumbing and electrical rough-in, then screeding and falls to the floor waste. Waterproofing follows the screed, then tiling, then the vanity, then second fix tapware and accessories.
The two hard rules are that waterproofing always precedes tiling and second fix always follows tiling. Working through a bathroom renovation checklist in that order is what keeps a three-week bathroom renovation to three weeks.
Kitchen Renovation Order
A kitchen runs strip-out, rough-in for plumbing, gas and dedicated circuits, then linings, then flooring where tile is specified. Cabinets install next, benchtops get template-measured on the installed cabinets, and splashback, appliances and second fix close it out.
Benchtop templating is the pinch point. Stone fabricators measure the installed cabinets and then need one to two weeks, so we plan the kitchen unusable for that window rather than pretending it disappears.
Apartment and Strata Renovation Order in Sydney
Apartment renovations follow the same ten phases with one extra gate at the front. Strata renovation approval <!–NEW PAGE NEEDED–> sits before council approval and before any trade sets foot in the building.
We submit the scope, waterproofing details and acoustic ratings to the owners corporation early, because minor and major works get treated differently under building by-laws. Access hours, lift bookings and waste removal windows then shape the whole program.
Wet area work in apartments carries the tightest scrutiny. Membrane certification and acoustic underlay compliance both get documented for the owners corporation as well as for the certifier.

Common Renovation Sequencing Mistakes We See
Five errors account for most of the rework we get called in to fix.
Painting before second fix tops the list, because every fitting installed afterwards marks the fresh wall and forces a touch-up pass anyway. Tiling before waterproofing runs a close second, and that one costs the entire tiled area.
Ordering joinery late is the quietest and most expensive mistake. Cabinetry carries a six- to ten-week lead time, so a late order stalls a finished, lined, painted house waiting on a delivery truck.
Booking trades in parallel rather than sequence looks efficient on a spreadsheet and fails on site. Two trades competing for the same wall cavity produce clashes, damage, and an argument nobody wins.
Skipping the certifier’s inspection windows is the fifth. Covering rough-in before sign-off means reopening finished walls, which is exactly why we build renovation project management around the inspection calendar rather than around the trades’ preferred dates.
Final Inspections and Project Completion
Formal inspection confirms the renovation complies with the approved plans and applicable codes. It protects your investment and makes occupation of the renovated space legal.
Council and Certifier Inspections
Your private certifier or council inspector runs the final inspection before issuing the occupation certificate. That inspection covers structural compliance, fire safety provisions and essential services.
We prepare the documentation pack in advance: trade compliance certificates, engineering certifications and as-built drawings where the certifier requires them. Missing paperwork delays the certificate and triggers additional inspections.
Every defect raised at inspection gets rectified before we request a re-inspection. Chasing a certificate with outstanding defects wastes the inspection fee and stretches the program.
Defect Identification and Rectification
We run a systematic defect inspection before final payment to any builder or trade. That means checking every surface, fixture and fitting for damage, incomplete work and quality issues.
Photograph and describe each defect in writing, then issue the list with reasonable rectification timeframes. Most contracts include a defect liability period under NSW Fair Trading home building rules, and a documented defect inspection checklist makes that period usable rather than theoretical.
Hold final payment until rectification is complete and verified. Retention is the only real leverage you keep, and it protects you against abandoned punch-list work.
Conclusion
Following the correct renovation sequence protects your budget, your timeline, and the quality of the finished result. Each phase builds on the one before it, and reversing or skipping a step creates compounding problems that reach every stage that follows.
At Sydney Home Renovation, we coordinate every trade and every phase so the sequence holds from demolition through handover. Our project management keeps inspections on time, trades in order, and the program moving.
Talk to our team about your renovation plans, and we will map the full sequence, the realistic durations, and the budget by phase before a single wall comes down. We guide you through every stage, from the first planning meeting to final handover.
Frequently Asked Questions
What is the first thing you should do when renovating a house?
Start with planning: set the budget, finalise the design and secure council approvals. Physical work begins at demolition only once every approval and permit is in hand.
Can you live in a house while renovating?
You can live on site comfortably through smaller projects. Major work affecting kitchens, bathrooms, or multiple rooms brings dust, noise, and service disconnections that make daily life genuinely difficult.
How long does a full house renovation take in Sydney?
We plan full house renovations at four to eight months depending on scope, with larger projects reaching twelve months. Approvals, material lead times, and trade availability drive the total.
Should I renovate my kitchen or bathroom first?
We sequence by project stage rather than by room. On a whole-house job, all structural and rough-in work finishes across the property before we complete either room.
Does flooring or painting come first?
It depends on the material. Tile goes down before painting and cabinetry, while timber, laminate, and carpet are all installed after painting to avoid damage during the build.
Does waterproofing go before or after tiling?
Waterproofing always goes in before tiling. The membrane is applied to the prepared substrate, cured, then certified, and tile bonds on top of it.
What is the most expensive part of renovating a house?
Kitchens and bathrooms carry the highest cost per square metre through cabinetry, fixtures and concentrated plumbing and electrical work. Structural changes involving steel and engineering also run high.
Do I need council approval for internal renovations in Sydney?
Internal cosmetic renovations generally proceed without approval. Work affecting structure, changing room use, or modifying services needs it, so confirm your pathway with council or a private certifier.
How much contingency should I allow for renovation surprises?
We allow 10 to 15 percent for unexpected discoveries and scope changes. Older homes and properties with unknown modification history warrant more, because hidden issues surface more often.


