
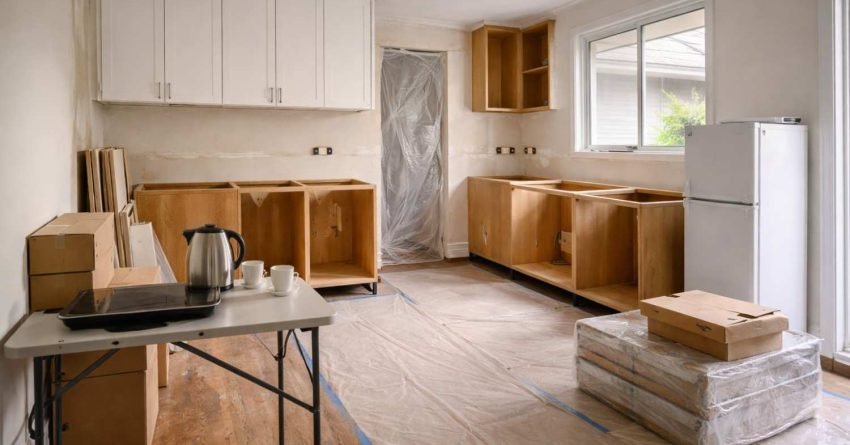
A well-planned bathroom renovation design and layout is the foundation of cost control, rework prevention, and long-term function. Most budget blowouts in Sydney bathroom renovations trace back to layout decisions made too late or not made at all.
Whether you are a homeowner updating a dated bathroom, a first-time renovator unsure where to start, or a property investor maximising rental returns, the layout phase is where every dollar gets its direction. Get this right, and your materials, labour, and fittings all fall into place.
This guide covers what renovation design and layout actually involves, the core principles behind functional bathroom planning, common layouts for Sydney homes, a step-by-step planning process, and the design decisions that directly affect your renovation budget.
What Is Renovation Design and Layout?
Renovation design and layout refers to the process of planning the spatial arrangement, functional zones, fixture placement, and structural modifications of a room before any construction begins. In the context of a bathroom renovation, it covers everything from where the shower, toilet, vanity, and bath are positioned to how plumbing routes, door swings, waterproofing zones, and ventilation are integrated into the final plan.
This is the blueprint stage. It determines what your renovation will look like, how it will function, and what it will cost. Every trade from the plumber to the tiler works from the approved layout, and changes after construction starts are where costs escalate quickly.
How Design and Layout Differ from Decorating
Design and layout are a structural and functional discipline. It deals with spatial planning, plumbing locations, building code compliance, waterproofing requirements, and how people physically move through the room. Decorating, by contrast, focuses on surface finishes, colour palettes, accessories, and styling choices.
Many homeowners jump straight to choosing tiles, tapware finishes, and vanity styles before confirming whether their preferred fixtures even fit the available space. A freestanding bath looks stunning in a showroom in a 3.5 square metre bathroom with a single drain point; it often requires significant plumbing relocation and added cost.
Layout comes first. Decorating follows.
Why Layout Planning Comes Before Material Selection
Your layout dictates your material quantities, tile cuts, waterproofing scope, and labour hours. A bathroom with a simple, plumbing-aligned layout requires fewer labour hours and less material waste than one where fixtures are relocated across the room.
Selecting materials before confirming the layout often leads to costly changes. If you purchase a 1500mm vanity and the finalised layout only accommodates 1200mm, you are either returning the vanity or redesigning the layout, both of which cost time and money.
Locking in the layout first gives you exact measurements for every fixture, accurate tile quantities with appropriate waste allowances, and a clear scope for your plumber, electrician, and waterproofer to quote against.
Why Bathroom Layout Matters More Than You Think
The layout is not just a floor plan. It is the financial and functional backbone of your entire renovation. Every cost line item from demolition scope to tiling labour connects back to what the layout requires.
A bathroom that flows well, stores efficiently, and meets Australian waterproofing and ventilation standards serves you for 15 to 20 years without major intervention. A poorly planned layout creates daily frustrations, maintenance issues, and reduced property value.
How Poor Layout Decisions Increase Renovation Costs
Relocating a toilet from one wall to another adds high cost in plumbing and floor work, typically several thousand dollars on a concrete slab, depending on distance and access. Moving a shower from one corner to the opposite side of the room means rerouting hot and cold water lines, relocating the floor waste, and extending waterproofing membranes to cover the new wet zone.
These are not cosmetic changes. They involve cutting into concrete slabs, rerouting drainage at correct fall gradients, and often require additional structural assessment. In Sydney, where many homes sit on concrete slab foundations, even minor plumbing relocations carry significant cost implications.
The most budget-efficient renovations keep wet points close to their original positions. When the layout respects existing plumbing infrastructure, labour hours drop and material costs stay predictable.
The Connection Between Layout Efficiency and Long-Term Value
For property investors and owner-occupiers alike, a well-designed bathroom layout adds measurable value. Buyers and tenants notice when a bathroom feels cramped, when the door hits the vanity, or when there is no logical place to put a towel.
A renovation with a smart layout consistently outperforms one that prioritises expensive finishes over spatial planning in daily liveability and resale appeal. The layout is where lasting value is built, not the tapware finish.
Key Principles of Bathroom Renovation Design
Effective bathroom design follows a set of principles grounded in building standards, ergonomic research, and practical construction experience. These are not style preferences; they are functional requirements that determine whether your renovation works properly.
Functional Zoning and Wet Area Planning
Every bathroom has distinct functional zones: the wet zone (shower, bath), the dry zone (vanity, storage), and the toilet zone. How these zones relate to each other affects waterproofing scope, ventilation requirements, and daily usability.
The wet zone should be positioned closest to existing drainage points where possible. This minimises plumbing modification costs and ensures correct fall gradients to the floor waste. In Australian bathrooms, the entire floor is typically waterproofed, but the shower zone requires additional membrane height on walls, a minimum of 1800mm as specified under Australian Standard AS 3740.
Separating the toilet zone from the shower zone, even with a partial wall or glass screen, improves both hygiene and the perception of space. In smaller bathrooms, this separation is often achieved through fixture orientation rather than physical barriers.
Traffic Flow and Door Clearances
A bathroom must allow comfortable movement between fixtures without obstruction. The Building Code of Australia (BCA) Part F2 and Australian Standards provide minimum clearance guidelines, but practical comfort often requires more than the bare minimum, and the difference matters in daily use.
Key clearance benchmarks include a minimum of 600mm clear space in front of the toilet, at least 500mm clearance beside the toilet for access, and a minimum shower recess of 900mm x 900mm (though 1000mm x 1200mm is far more comfortable for everyday use). The bathroom door must open fully without hitting any fixture, a requirement that catches many layouts off guard.
In many older Sydney homes, bathroom doors swing inward. Switching to a sliding door or outward-opening door during the renovation recovers significant usable floor space without changing the room’s footprint and brings the layout into closer alignment with BCA intent.
Natural Light, Ventilation, and Waterproofing Considerations
Ventilation is not optional. Bathrooms generate significant moisture, and without adequate airflow, you risk mould growth, paint deterioration, and damage to structural timber. If your bathroom has an external window, the layout should preserve access to that natural light and ventilation source.
Where no window exists, a mechanical exhaust fan ducted to the exterior is mandatory. The layout should account for fan placement, duct routing, and proximity to the shower zone where moisture concentration is highest.
Waterproofing is governed by AS 3740 and must be completed by a licensed waterproofer in NSW. The standard requires a continuous membrane across the entire floor, with wall membranes extending a minimum of 1800mm in the shower zone and 150mm above the floor in other wet areas. Critically, waterproofing is a mandatory inspection hold point; tiling cannot legally begin until the waterproofing membrane has been inspected and approved. A layout with a walk-in shower and no screen requires waterproofing across a much larger floor and wall area than a fully enclosed shower recess, and this scope difference directly affects your budget.
Common Bathroom Layouts for Sydney Homes
Sydney’s housing stock ranges from compact inner-city apartments to sprawling suburban homes, and bathroom sizes vary accordingly. Understanding which layout suits your available space helps you set realistic expectations for fixture selection and budget.
Small Bathroom Layouts (Under 4 sqm)
Small bathrooms demand disciplined layout planning. Every centimetre matters. In spaces under 4 square metres, the most functional layouts typically place the shower in one corner, the toilet adjacent to it along the same wall, and the vanity on the opposite wall.
Wall-hung vanities and toilets are particularly effective in small bathrooms because they free up visible floor space, making the room feel larger while also simplifying floor cleaning. A frameless glass shower screen, rather than a shower curtain or framed enclosure, further opens the visual space.
Recessed shaving cabinets and in-wall cisterns are layout decisions, not just style choices. They recover 100mm to 150mm of usable depth that would otherwise be lost to protruding fixtures.
Standard Bathroom Layouts (4–8 sqm)
This is the most common bathroom size range in Sydney houses. Standard layouts offer enough room for a separate shower and bath, a single or double vanity, and a toilet, though not always all four in complete comfort.
The most efficient standard layouts position the bath along the longest wall, the shower in a corner adjacent to the bath (sharing a plumbing wall), the vanity opposite or adjacent to the door, and the toilet in the least visually prominent position.
Sharing a plumbing wall between the shower and bath significantly reduces pipe runs and keeps hot water delivery efficient. This is a layout decision that directly reduces both installation cost and ongoing energy use.
Large and Master Ensuite Layouts (8+ sqm)
Larger bathrooms and master ensuites allow for design features that smaller spaces cannot accommodate. Freestanding baths, double vanities, walk-in showers without screens, separate toilet rooms, and dedicated storage zones all become viable.
More space does not mean less planning. Large bathrooms with poor layouts feel empty and disconnected rather than luxurious. The key is creating intentional zones with clear purpose — a freestanding bath positioned as a centrepiece needs adequate clearance on all sides (minimum 150mm, ideally 300mm) and a floor waste nearby for overflow.
Double vanities require careful plumbing planning. Two basins on a single vanity unit need independent trap assemblies and adequate water pressure to serve both simultaneously.
Laundry-Bathroom Combination Layouts
Combined laundry-bathroom layouts are increasingly common in Sydney apartments and smaller homes where space is limited. These layouts integrate a washing machine and sometimes a dryer into the bathroom footprint, typically concealed behind cabinetry or within a dedicated cupboard.
The layout must account for additional plumbing connections (hot and cold supply plus a separate drain for the washing machine), adequate ventilation for dryer moisture, and electrical requirements including a dedicated circuit for the washing machine.
Positioning the laundry zone away from the shower wet area is important for both waterproofing integrity and appliance longevity. The most successful combination layouts place the laundry cupboard near the bathroom entry, away from direct water exposure.
What Bathroom Renovation Costs Look Like by Layout Type
Layout complexity is one of the strongest predictors of total renovation cost. Understanding the cost profile of each layout type helps you set a realistic budget before any design work begins.
Small Bathroom Renovation Costs (Under 4 sqm)
Small bathroom renovations in Sydney typically represent the most cost-efficient scope but only when the layout respects existing plumbing positions. A compact layout that keeps the shower, toilet, and vanity close to their original positions minimises trade hours and material quantities.
Where costs escalate in small bathrooms is fixture relocation. Moving a toilet or shower drain in a tight space often requires the same slab-cutting and drainage rerouting work as a larger room, with less room to manoeuvre. The labour cost per square metre in a small bathroom renovation is frequently higher than in a standard-sized room.
Standard Bathroom Renovation Costs (4–8 sqm)
Standard bathroom renovations carry the widest cost range of any layout type, because the scope variables are greatest. A standard bathroom that keeps all wet points in place and uses mid-range fixtures sits at a very different price point from one that relocates the toilet, adds a freestanding bath, and specifies premium tapware.
The layout decision that most commonly drives standard bathroom costs upward is separating the shower and bath onto different plumbing walls. This requires independent drainage and supply runs for each fixture, adding both material and labour costs compared to a shared plumbing wall arrangement.
Master Ensuite and Large Bathroom Renovation Costs (8+ sqm)
Larger bathrooms and master ensuites carry higher base costs due to greater floor and wall area for waterproofing and tiling, longer plumbing and electrical runs, and the premium fixtures typically specified in these spaces. Double vanities, freestanding baths, and frameless shower enclosures each add to the scope.
The most effective way to control costs in a large bathroom is to plan the layout so that the two highest-cost elements, the shower and the bath, share a plumbing wall. This single layout decision reduces pipe runs, simplifies drainage, and keeps the waterproofing zone more contained.
How to Plan a Bathroom Renovation Layout Step by Step
A structured planning process prevents costly mid-project changes and ensures your layout supports both your functional needs and your budget. Follow these steps before any demolition begins.
Step 1: Assess Your Existing Plumbing and Structural Constraints
Before imagining your ideal bathroom, understand what you are working with. Identify the location of existing drain points, water supply lines, and the floor waste. Note which walls are load-bearing and which are partition walls that could potentially be moved.
In Sydney homes built on concrete slabs, relocating floor wastes and toilet drains involves cutting into the slab, which adds cost and complexity. Homes with raised timber floors offer more flexibility for plumbing relocation, though access and structural integrity still need assessment.
A qualified renovation contractor conducts a site assessment to map existing Plumbing and identify constraints before any design work begins. This assessment typically takes one to two hours and saves thousands in avoided redesign costs.
Step 2: Define Your Must-Haves Versus Nice-to-Haves
Every renovation involves trade-offs. Listing your non-negotiable requirements separately from your aspirational features helps you make clear decisions when the layout or budget requires compromise.
Must-haves include a separate shower and bath, a minimum vanity width of 900mm, or a heated towel rail. Nice-to-haves include a freestanding bath, a double vanity, or a frameless walk-in shower.
When your must-have list exceeds what the space or budget can accommodate, the layout planning process reveals this early before you have committed to purchases or signed trade contracts.
Step 3: Work With a Renovation Contractor on Spatial Design
A renovation contractor with bathroom experience brings practical construction knowledge to the design process. They understand which layout changes are straightforward and which trigger disproportionate cost increases.
A contractor advises that shifting the vanity 300mm to the left avoids cutting into a structural beam, or that rotating the toilet 90 degrees eliminates the need for a slab cut. These are insights that come from building bathrooms, not just designing them on screen.
Working with a contractor during the layout phase rather than after the design is finalised ensures that every design decision is buildable, compliant, and priced accurately.
Step 4: Finalise Layout Before Locking In Your Budget
Your renovation budget should be built on a confirmed layout, not the other way around. The layout determines your plumbing scope, waterproofing extent, tiling quantities, electrical requirements, and fixture specifications. Without a finalised layout, any budget figure is an estimate at best.
Once the layout is locked in, your contractor provides detailed trade quotes based on actual scope. This is when your budget becomes reliable. Changing the layout after trades have quoted, or worse, after work has started, is the most common cause of bathroom renovation cost overruns in Sydney.
How Long Does the Layout Planning Phase Take?
For a standard bathroom renovation, the layout planning phase typically runs one to three weeks from initial site assessment to signed-off plan. More complex projects those involving structural changes, slab cuts, or combined laundry-bathroom layouts take longer, particularly where engineering input or council approval is required.
Rushing this phase is one of the most expensive mistakes a renovator makes. Every week spent getting the layout right before construction starts saves multiples of that time in avoided variations and rework.
Design Choices That Affect Your Renovation Budget
Not all design decisions carry equal cost implications. Understanding which choices have the biggest budget impact helps you prioritise spending where it matters and save where it does not.
Relocating Plumbing and Wet Points
Moving plumbing is one of the most expensive layout changes in a bathroom renovation. Relocating a toilet on a concrete slab involves slab cutting, drainage rerouting, concrete patching, and waterproofing each a separate trade cost. Moving a shower drain point involves similar slab work plus re-establishing correct fall gradients across the floor.
The cost is not just in the plumbing itself. Slab cutting requires a concrete cutter, the plumber to reroute drainage, a concreter to patch and level the slab, and then the waterproofer to membrane the entire area before tiling can begin. Each trade adds cost and time.
Keeping fixtures close to their original plumbing positions is the single most effective way to control renovation costs without compromising design quality.
Structural Changes: Walls, Niches, and Recesses
Removing or adding walls changes the scope of work significantly. Removing a non-load-bearing partition wall involves demolition, patching, and making good at a manageable cost. Modifying a load-bearing wall requires engineering assessment, temporary propping, and a steel or timber lintel a substantially larger investment.
Shower niches and recessed shelving are popular design features that require careful planning. A niche built into a stud wall is relatively straightforward. A niche in a masonry or concrete wall requires cutting, waterproofing the recess, and tiling inside the niche, all of which add labour hours.
The layout should specify niche locations, dimensions, and wall types so that costs are captured in the initial quote rather than appearing as variations during construction.
Fixture Sizing and Placement Costs
Fixture size directly affects layout feasibility and cost. A 1700mm freestanding bath requires more floor space, a larger floor waste, and potentially a wider doorway for delivery than a 1500mm built-in bath.
Oversized rain shower heads need higher water pressure and larger diameter supply pipes. Wall-mounted tapware requires in-wall rough-in plumbing that must be positioned precisely before the wall is tiled. These are layout and design decisions that carry direct cost consequences.
Specifying fixtures during the layout phase, not after tiling, ensures that rough-in plumbing, electrical points, and structural supports are positioned the first time correctly.
Tile Layout, Pattern Complexity, and Waste Factors
Tile selection is a design choice, but tile layout is a cost factor. Large format tiles (600mm x 600mm and above) require fewer grout lines and install faster on large, uninterrupted walls. They generate more waste when cut around fixtures, niches, and corners.
Complex patterns such as herringbone, chevron, or feature walls with mixed tile sizes increase labour time significantly. A straightforward stack bond or brick bond pattern installs significantly faster than a herringbone or chevron layout; the difference in labour hours is meaningful and worth discussing with your tiler before committing to a pattern.
A standard waste allowance for bathroom tiles is 10 percent. For complex layouts with many cuts, niches, and angled walls, a 15 percent waste allowance is more realistic. Your layout determines which allowance applies.

Renovation Design Mistakes That Cost Sydney Homeowners
Certain design and layout errors appear repeatedly in Sydney bathroom renovations. Recognising them before your project starts is far cheaper than correcting them during construction.
Ignoring Building Codes and Waterproofing Standards
Every bathroom renovation in NSW must comply with the Building Code of Australia and Australian Standard AS 3740 for waterproofing. Layouts that position showers without adequate fall to the floor waste, place electrical outlets too close to water sources, or fail to allow for required waterproofing membrane heights will fail inspection.
Non-compliant work must be rectified at the homeowner’s expense. In some cases, this means stripping completed tiling to redo waterproofing underneath. The cost of rectification consistently exceeds the cost of doing it correctly the first time, often by a substantial margin.
A layout reviewed by an experienced renovation contractor accounts for compliance requirements from the outset.
Choosing Aesthetics Over Functionality
A bathroom that looks beautiful in a photograph but does not function well in daily use is a failed renovation. Common examples include walk-in showers without adequate drainage that pool water, vanities positioned where they block natural light from the window, toilets placed directly opposite the door with no visual screening, and bath placement that prevents comfortable entry and exit.
The layout phase is where functionality and aesthetics must be balanced. Every fixture position should be tested against daily use scenarios: can two people use the bathroom simultaneously, is there somewhere to place toiletries within arm’s reach of the shower, and can the door close fully with someone standing at the vanity?
Skipping Professional Design Input to Save Money
Some homeowners attempt to design their bathroom layout using free online tools or by sketching on graph paper. While these approaches help visualise ideas, they rarely account for plumbing constraints, structural limitations, building code requirements, or accurate fixture dimensions including clearance zones.
The cost of professional layout input during the planning phase is a fraction of the cost of mid-project redesign. A renovation contractor who reviews your layout before quoting identifies issues that would otherwise surface during construction, when changes are most expensive.
Accessibility and Universal Design in Bathroom Layouts
Accessibility planning is no longer just for homeowners with mobility needs. Incorporating universal design principles into your bathroom layout future-proofs the space for aging in place, improves usability for all household members, and adds genuine long-term value, particularly for owner-occupiers planning to stay in their home for 10 or more years.
Australian Standard AS 1428 and What It Means for Your Layout
Australian Standard AS 1428 sets out design requirements for access and mobility in buildings. While full AS 1428 compliance is mandatory for commercial and public buildings, the clearance dimensions and fixture placement principles it establishes are directly applicable to residential bathroom planning.
Key AS 1428-informed layout considerations include a minimum 900mm clear turning circle within the bathroom, a step-free shower recess with a linear drain rather than a central floor waste, and a toilet positioned with at least 900mm clear space on one side for transfer access. These are not difficult to achieve in a standard bathroom, but they must be planned into the layout from the start, not retrofitted later.
Practical Accessibility Features Worth Planning Into Your Layout
Grab rail blocking is one of the most cost-effective accessibility investments available in a bathroom renovation. Installing timber blocking behind the wall lining in the shower zone and beside the toilet during construction costs very little; removing tiles and retrofitting blocking later costs significantly more.
Step-free shower entries, wider doorways (minimum 820mm clear opening), and lever-style tapware are all layout and specification decisions that improve usability for everyone, not just those with mobility limitations. A bathroom designed with these principles in place serves its occupants across every life stage.
How a Renovation Contractor Supports the Design and Layout Process
A renovation contractor is not just the team that builds your bathroom. The right contractor is involved from the earliest planning stages, including when bathroom work is part of a broader whole-home renovation, ensuring design decisions are practical, compliant, and aligned with your budget.
Site Assessment and Feasibility Review
Before any design work begins, a thorough site assessment identifies the existing conditions that shape your layout options. This includes mapping plumbing and electrical, identifying wall types (stud, masonry, or concrete), checking floor levels and slab condition, assessing ventilation options, and noting access constraints for material delivery.
This assessment transforms your renovation from a wish list into a feasible project scope. It is the foundation on which accurate quoting and realistic timelines are built.
Coordinating Trades Around the Approved Layout
A bathroom renovation involves multiple trades working in sequence: demolition, plumbing rough-in, electrical rough-in, waterproofing, tiling, cabinetry installation, final plumbing fit-off, and final electrical fit-off. Each trade works from the approved layout.
The contractor coordinates this sequence so that each trade arrives at the right time, with the right information, and works to the same plan. Layout changes mid-project disrupt this sequence, causing delays and additional costs as trades need to revisit or redo work.
A locked-in layout before construction starts is the contractor’s most important project management tool.
Keeping Design Decisions Aligned With Budget
Throughout the design and layout process, a good contractor provides cost feedback on every decision. Want to move the toilet to the opposite wall? Here is what that costs. Prefer a larger shower recess? Here is the additional tiling and waterproofing scope.
This ongoing cost dialogue prevents the common scenario where a homeowner finalises a design they love, only to discover it significantly exceeds their budget. When design and budget conversations happen simultaneously, the final layout reflects both your preferences and your financial reality.
Conclusion
Renovation design and layout are the foundation of every successful bathroom renovation. It determines your costs, your construction timeline, your compliance with Australian building standards, and how well your bathroom functions for years after the project is complete. Prioritising layout planning before material selection and trade engagement is the most effective way to stay on budget and avoid costly mid-project changes.
For Sydney homeowners, first-time renovators, and property investors, working with an experienced contractor during the design phase transforms uncertainty into a clear, buildable plan. The layout is where construction expertise, honest pricing, and practical design thinking come together to protect your investment.
At Sydney Home Renovation, we guide our clients through every stage of the design and layout process from initial site assessment to final layout sign-off. Talk to us about your bathroom: we will assess your space, map your constraints, and give you a layout plan built for your budget and your home.
Frequently Asked Questions
What is the best bathroom layout for a small space in Sydney?
The most effective small bathroom layout places the shower in the corner nearest the existing floor waste, the toilet adjacent along the same wall, and a wall-hung vanity on the opposite wall. We find this arrangement minimises plumbing relocation costs and maximises usable floor space.
How much does it cost to relocate plumbing during a bathroom renovation?
Relocating a toilet on a concrete slab involves slab cutting, drainage rerouting, concrete patching, and waterproofing each a separate trade cost that adds up quickly. Keeping fixtures close to their original plumbing positions is the most effective way to control costs.
Should I finalise my bathroom layout before choosing tiles and fixtures?
Yes. Your layout determines exact measurements, fixture clearances, tile quantities, and waste allowances. Selecting materials before confirming the layout often leads to returns, redesigns, and budget overruns. Lock in the layout first.
What are the minimum clearance requirements for bathroom fixtures?
Australian standards and practical comfort require a minimum of 600mm clear space in front of the toilet, at least 500mm beside the toilet, and a shower recess no smaller than 900mm x 900mm. Door swings must not obstruct any fixture.
Can I combine my laundry and bathroom in one room?
Yes, laundry-bathroom combinations are common in Sydney apartments and smaller homes. The layout must account for separate plumbing connections for the washing machine, adequate ventilation for dryer moisture, and positioning the laundry zone away from the shower wet area.
How does bathroom layout affect renovation budget?
Layout is the primary cost driver. Decisions about plumbing relocation, wall removal, fixture sizing, tile pattern complexity, and waterproofing extent all stem from the layout. A layout that respects existing plumbing positions and avoids structural modifications costs significantly less.
Why should I involve a renovation contractor in the design phase?
A contractor brings practical construction knowledge that identifies costly issues before they become mid-project surprises. We advise on plumbing constraints, structural limitations, building code compliance, and accurate cost implications of every layout decision.
How long does the bathroom layout planning phase typically take?
For a standard bathroom renovation, the layout planning phase runs one to three weeks from initial site assessment to signed-off plan. More complex projects involving structural changes or slab cuts take longer, and rushing this phase is one of the most expensive mistakes a renovator makes.


