
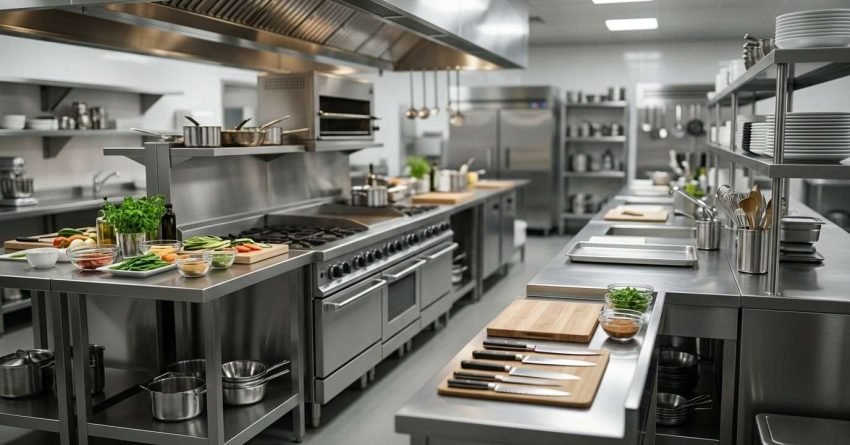
A well-designed commercial kitchen layout is the single biggest factor separating a smooth, profitable service from a chaotic, costly one. Layout determines how fast food moves from prep to plate, how safely staff operate under pressure, and how well your kitchen holds up during a full-house dinner service. Getting it right from the start saves time, money, and a lot of operational headaches.
Most kitchen operators underestimate how much layout affects daily performance. Poor spatial planning creates bottlenecks, increases staff fatigue, and raises food safety risks that regulators notice quickly.
In this guide, I cover the five core layout types, the workflow zones every commercial kitchen needs, the efficiency principles that should drive every design decision, and the planning steps specific to Sydney operators.
What Makes a Commercial Kitchen Layout Work
A commercial kitchen layout works when it moves food, people, and equipment in one logical, uninterrupted direction. The goal is always the same: reduce unnecessary movement, eliminate cross-traffic, and keep every station within reach of the next step in the process.
Efficiency is not about fitting the most equipment into the smallest space. It is about designing a space where the work flows naturally, staff are not fighting each other for room, and the kitchen can sustain output during peak service without breaking down.
The Relationship Between Space and Speed
Circulation space is one of the most undervalued elements in commercial kitchen planning. When two staff members cannot pass each other without stopping, service slows. When a chef has to walk across the kitchen to reach a refrigerator that should be at their station, time is lost on every single ticket.
The National Restaurant Association consistently identifies kitchen layout as a primary driver of service speed and operational cost. Tight, poorly planned circulation paths create bottlenecks that compound during peak periods, a problem that is expensive to fix after fit-out.
I always tell clients: the space between your equipment matters as much as the equipment itself.
How Layout Decisions Affect Staff Performance
Staff fatigue is a direct product of poor layout. When a kitchen forces unnecessary steps, walking further than needed, reaching awkwardly for tools, navigating cross-traffic during service, it accumulates into physical strain and slower output over a full shift.
Ergonomic kitchen design reduces that strain. Workstations positioned at the correct height, equipment placed at the point of use, and clear traffic lanes all contribute to a kitchen where staff can work at full capacity for longer. A layout that respects how people actually move during service is a layout that retains good staff and produces consistent food quality.
The Five Core Commercial Kitchen Layout Types
Commercial kitchens are not one-size-fits-all. The right layout depends on your menu, your service style, your volume, and your available footprint. These five layout types cover the full range of commercial kitchen configurations in use today.
Assembly Line Layout
The assembly line layout organises the kitchen as a straight or parallel production line, with each station feeding directly into the next. It suits high-volume operations, fast food, cafeterias, and large-scale catering, where speed and consistency matter more than menu complexity.
Every station has one job. Food moves in one direction. There is minimal cross-traffic and very little ambiguity about who does what and when.
Island Layout
The island layout places the primary cooking equipment, ranges, grills, fryers, in a central island, with prep and storage running along the perimeter walls. It works well in larger kitchens where multiple chefs need access to cooking equipment simultaneously.
The island creates a natural circulation loop around the kitchen. It also makes supervision easier, since the head chef can see every station from the centre of the room.
Zone-Style Layout
The zone-style layout divides the kitchen into dedicated functional areas, a prep zone, a cooking zone, a plating zone, a warewashing zone, each operating semi-independently. It suits full-service restaurants with complex menus and multiple concurrent service demands.
This layout requires more square footage than an assembly line, but it gives each function the dedicated space it needs to operate without interference from adjacent tasks.
Galley Layout
The galley layout runs two parallel lines of equipment and workstations along opposite walls, with a central corridor between them. It is the most space-efficient layout for narrow or rectangular kitchens, and it works well in smaller restaurants, cafes, and food trucks.
The limitation is traffic flow. In a busy galley kitchen, staff moving in opposite directions create congestion quickly. It requires disciplined workflow management to operate smoothly at volume.
Open Kitchen Layout
The open kitchen layout removes the wall between the kitchen and the dining room, making the kitchen visible to guests. It suits restaurants where the cooking process is part of the dining experience, teppanyaki, wood-fired pizza, and fine dining theatre kitchens.
Open kitchens demand a higher standard of organisation and cleanliness at all times. They also require careful acoustic and ventilation planning, since noise and heat management become guest experience factors, not just operational ones.

Workflow Zones Every Commercial Kitchen Needs
Regardless of which layout type you choose, every commercial kitchen operates through the same sequence of functional zones. Designing these zones in the correct order, and giving each one the right amount of space, is the foundation of an efficient kitchen.
Receiving and Storage Zone
The receiving zone is where all deliveries enter the kitchen. It needs direct access to the loading area, enough clear floor space to inspect and sort deliveries, and immediate proximity to both dry storage and refrigerated storage.
Placing receiving too far from storage forces staff to carry heavy loads across the kitchen, creating traffic conflicts and physical strain. This zone sets the starting point for every ingredient that enters your operation.
Preparation Zone
The prep zone is where raw ingredients are cleaned, cut, portioned, and made ready for cooking. It needs ample bench space, access to cold storage, proximity to the cooking zone, and clear separation from the warewashing area to prevent cross-contamination.
Undersizing the prep zone is one of the most common and costly layout mistakes I see. When prep space is tight, mise en place suffers, service slows, and food safety risks increase.
Cooking Zone
The cooking zone houses your primary heat-producing equipment, ranges, ovens, grills, fryers, steamers, and woks. It is the highest-energy zone in the kitchen and requires the most careful planning around ventilation, gas and electrical supply, and clearance distances.
This zone should sit at the centre of the workflow, with the prep zone feeding into it from one side and the plating zone receiving from the other. Equipment placement within the cooking zone should reflect your menu, the equipment you use most goes closest to the pass.
Plating and Service Zone
The plating zone is where finished dishes are assembled, garnished, and handed to front-of-house staff. It needs a clear, unobstructed connection to the cooking zone and a direct, fast path to the dining room.
Heat lamps, pass-through windows, and ticket rails all belong here. This zone is the final quality checkpoint before food reaches the guest, so it needs enough space for the head chef to inspect and expedite without creating a bottleneck at the pass.
Warewashing and Waste Zone
The warewashing zone handles dirty dishes, pots, and utensils. It needs to be physically separated from food preparation and cooking areas to meet Food Standards Australia New Zealand HACCP requirements, with a clear, logical path for soiled items to travel from the dining room to the wash station without crossing clean food zones.
Waste management, bins, recycling, and organic waste, belongs in this zone too. Keeping waste contained and away from food preparation is a compliance requirement, not just a preference.

Efficiency Principles That Drive Layout Decisions
Layout type and zone placement are the structure. These efficiency principles are the logic that makes the structure work. Every design decision I make in a commercial kitchen fit-out comes back to at least one of these principles.
The Work Triangle and Its Commercial Equivalent
The residential work triangle, the relationship between the sink, stove, and refrigerator, has a commercial equivalent: the relationship between storage, prep, and cooking. In a commercial kitchen, the goal is to minimise the total distance a chef travels between these three points during a service.
The shorter and more direct that triangle, the faster and less fatiguing the work. When storage is on one side of the kitchen, prep is in the middle, and cooking is on the other side, every ingredient travels the full length of the kitchen before it reaches the pass. That distance adds up across hundreds of covers.
Traffic Flow and Cross-Contamination Prevention
Traffic flow in a commercial kitchen has two dimensions: physical movement and food safety. Staff moving in conflicting directions create collisions, spills, and delays. Raw ingredients moving through the same space as cooked food create cross-contamination risks that violate Food Standards Australia New Zealand Code Standard 3.2.3.
A well-designed layout creates one-directional flow wherever possible. Raw food travels one way. Cooked food travels another. Dirty dishes travel a third path that never intersects with clean food zones. This is not just good design, it is a compliance requirement that council inspectors check during fit-out approval.
Equipment Placement for Peak Service Periods
Equipment placement decisions made during a quiet planning session look very different during a 200-cover Saturday night service. I always ask clients to map out their busiest service scenario before finalising equipment positions.
Which stations are running simultaneously? Which chefs need access to the same equipment? Where do the bottlenecks form when every burner is lit and every ticket rail is full? Placing equipment based on peak-service logic, not average-service logic — is what separates a kitchen that holds up under pressure from one that falls apart exactly when it matters most.
Common Layout Mistakes That Kill Kitchen Efficiency
Most layout problems are not discovered during the design phase. They show up during the first busy service, when it is expensive and disruptive to fix them. These are the mistakes I see most often — and the ones that are entirely avoidable with proper planning.
Ignoring the Flow Between Zones
Zones that are designed in isolation, without considering how they connect to each other, create friction at every handoff point. A prep zone that does not feed directly into the cooking zone forces chefs to carry prepped ingredients across traffic lanes. A plating zone that is not adjacent to the pass creates delays at the most critical moment of service.
Every zone boundary is a handoff point. Design the handoffs first, then design the zones around them.
Undersizing the Prep and Storage Areas
Prep and storage are consistently undersized in commercial kitchen designs, because they are not the glamorous parts of the kitchen. Operators focus on the cooking equipment and treat prep benches and cool rooms as afterthoughts.
The result is a kitchen where mise en place is always rushed, storage is always overflowing, and staff are constantly working around each other in too little space. Prep and storage should receive space proportional to your menu complexity and your delivery frequency, not whatever is left over after the cooking equipment is placed.
Placing Equipment Without Considering Utilities
Gas, electrical, water, and drainage infrastructure is fixed once the fit-out is complete. Placing equipment without mapping utility connections first leads to expensive compromises, equipment that cannot be positioned where it performs best because the gas point is in the wrong location, or a dishwasher that drains poorly because the floor waste is three metres away.
Utility planning and equipment placement must happen simultaneously. I always produce a services overlay drawing alongside the equipment layout plan, so every piece of equipment lands exactly where its utilities support it.

Planning Your Commercial Kitchen Layout in Sydney
Sydney operators face a specific set of regulatory and logistical considerations that affect layout planning from the earliest design stage. Getting these right before construction starts saves significant time and cost.
Compliance, Council Requirements, and Fit-Out Timing
Commercial kitchen fit-outs in Sydney require compliance with the Building Code of Australia and the NSW Food Act 2003, as well as approval from your local council if the fit-out involves structural changes, new ventilation penetrations, or changes to the building’s use classification.
Ventilation is the most commonly underestimated compliance requirement. Commercial exhaust canopies must meet specific airflow rates, and the ductwork routing often affects where cooking equipment can be positioned. Getting a ventilation engineer involved early, before the layout is finalised, prevents costly redesigns later.
Fit-out timelines in Sydney typically run eight to fourteen weeks from approved design to operational kitchen, depending on council approval timeframes, equipment lead times, and trade availability. We work with clients to sequence the fit-out so that long-lead items, custom canopies, coolroom panels, imported equipment, are ordered before construction begins, keeping the overall timeline as tight as possible.
Conclusion
Commercial kitchen layout design is not a cosmetic decision — it is an operational one. The layout you choose determines how fast your kitchen runs, how safely your staff work, and how well your operation holds up under the pressure of a full service. Getting the zones right, the flow right, and the equipment placement right from the start is always cheaper than fixing it after the fact.
Every layout decision connects back to workflow. And every workflow decision connects back to the people doing the work and the food reaching the guest.
At Sydney Home Renovation, we plan and deliver commercial kitchen fit-outs that are built around how your kitchen actually operates, not just how it looks on a plan. Reach out to our team and let us help you design a kitchen that works as hard as you do.
Frequently Asked Questions
What is the most efficient commercial kitchen layout?
The assembly line layout is the most efficient for high-volume, consistent-menu operations. For full-service restaurants with complex menus, a zone-style layout delivers better efficiency by giving each function dedicated, uninterrupted space.
How much space does a commercial kitchen need per staff member?
A working rule is five to ten square metres of kitchen space per staff member, depending on the service style and menu complexity. High-volume operations with multiple concurrent stations need more space per person to prevent cross-traffic and maintain safe working conditions.
What are the five zones of a commercial kitchen?
The five core zones are receiving and storage, preparation, cooking, plating and service, and warewashing and waste. Every commercial kitchen needs all five zones, sized and sequenced to match the specific menu and service volume.
How does kitchen layout affect food safety compliance?
Layout directly determines whether raw and cooked food pathways cross, whether warewashing is separated from food preparation, and whether waste is contained away from clean zones. These are all assessed during council inspections and must meet Food Standards Australia New Zealand requirements.
What is the difference between a galley and island kitchen layout?
A galley layout runs two parallel lines of equipment along opposite walls with a central corridor. An island layout places primary cooking equipment in a central island with prep and storage on the perimeter. Galley suits narrow spaces; island suits larger kitchens with multiple concurrent cooking stations.
How long does a commercial kitchen fit-out take in Sydney?
Most commercial kitchen fit-outs in Sydney take eight to fourteen weeks from approved design to operational kitchen. The timeline depends on council approval, equipment lead times, and trade scheduling. Starting the design and approval process early is the most effective way to protect your opening date.
Can I change my commercial kitchen layout after fit-out?
Yes, but it is expensive. Moving gas points, drainage, and electrical infrastructure after construction is complete involves significant trade work and potential council re-approval. The most cost-effective time to get the layout right is before a single wall is built or a single utility is run.


