
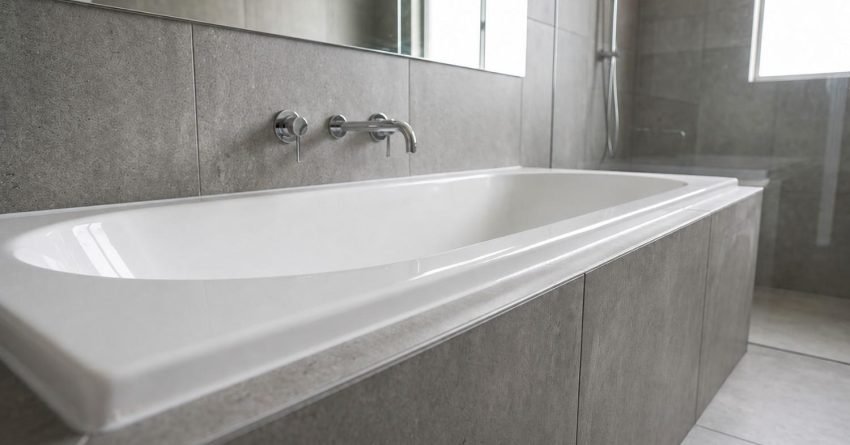
A back-to-wall bathtub sits flush against a wall with its exposed front face finished by tiling or a panel, giving you the clean look of a built-in bath without the full alcove enclosure. It is one of the most popular bath formats in Sydney renovations right now, and for good reason. The style works across compact ensuite layouts and larger family bathrooms alike.
Choosing the wrong bath format costs you time, money, and a renovation you will want to redo in five years. This guide covers everything you need: what back-to-wall baths are, where they shine, where they fall short, and exactly how installation works.
We walk through the full process here: definition and comparison, pros and cons, step-by-step installation, Sydney cost ranges, and a decision framework to help you choose with confidence.
What Is a Back-to-Wall Bathtub?
A back-to-wall bathtub is a bath unit designed so that one end or side sits directly against a wall, while the remaining exposed sides are enclosed by tiling, a bath panel, or a custom-built surround. The plumbing waste, overflow, and tapware connections are concealed within the wall or the surrounding structure.
It sits in a middle ground between a fully recessed alcove bath and a freestanding model. The bath shell itself is a finished product, but the installation requires surrounding buildwork to complete the look.
This format is common in bathroom renovation projects where the goal is a tailored, high-end finish without the cost or footprint of a fully custom build.
How It Differs from Freestanding and Alcove Baths
A freestanding bath stands completely clear of all walls. All four sides are finished by the manufacturer, tapware typically mounts to the floor or bath deck, and installation is relatively straightforward. The trade-off is floor space and cleaning access underneath.
An alcove bath slots into a three-wall recess. It is the most space-efficient format and the most common in older Australian homes. The surround is fully tiled, and the bath rim sits flush with the tile line on three sides.
A back-to-wall bath takes the visual appeal of a freestanding model and pairs it with the structural integration of an alcove install. One or two sides meet the wall; the remaining exposed face gets a tiled or panelled finish. You get a cleaner look than an alcove bath and better space use than a freestanding one.
Common Styles and Configurations in Australia
The most common back-to-wall configurations in Australian bathrooms are single-end models where the tapware end sits against the wall, and the bath face is tiled. Double-ended back-to-wall baths are also available, where both short ends are open, and the long side faces the room.
Shapes range from rectangular to oval and D-end profiles. Acrylic is the dominant material at the mid-range price point. Stone resin and cast iron options exist at the premium end and add significant weight, a structural consideration worth flagging early with your builder.
Pros of a Back-to-Wall Bathtub
Clean, Built-In Aesthetic
The defining advantage of a back-to-wall bath is the finish. When the front face is tiled to match the floor or wall, the bath reads as part of the room rather than a fixture sitting in it. That integration is what most renovation clients are chasing when they move away from a standard alcove bath.
It photographs well, it adds perceived value to the property, and it holds up stylistically across different tile choices and colour palettes. For property investors in Sydney, that visual consistency matters when the bathroom needs to appeal to a broad rental or resale market.
Space Efficiency for Smaller Bathrooms
A back-to-wall bath does not demand the clearance zone that a freestanding model does. Because one or two sides are built into the surrounding structure, you recover usable floor space, particularly important in Sydney homes where bathroom footprints are often tight.
In a bathroom where every centimetre counts, the difference between a freestanding and a back-to-wall bath can determine whether a separate shower and bath layout is even possible. That is a meaningful planning advantage.
Easier Cleaning Than Freestanding Models
Freestanding baths have a gap between the base and the floor. That gap collects dust, hair, and moisture, and it is awkward to clean. A back-to-wall bath eliminates that problem on the wall-adjacent sides, and a well-tiled front panel removes it entirely.
The cleaning surface is flat, accessible, and consistent with the rest of the tiled bathroom. For busy households and rental properties, that is a practical daily benefit that adds up over time.
Cons of a Back-to-Wall Bathtub
Higher Installation Complexity
A back-to-wall bath is not a drop-in install. The surrounding structure framing, waterproofing, tiling, and panel work add trades, time, and cost compared to a freestanding or standard alcove bath. You need a plumber, a waterproofer, and a tiler working in sequence, and the coordination between those trades needs to be managed properly.
Cutting corners on any one of those steps creates problems that are expensive to fix later. Waterproofing failures behind a tiled bath surround are among the most costly bathroom defects we see in Sydney renovation work.
Limited Repositioning After Install
Once a back-to-wall bath is tiled in, it is effectively permanent. Moving it means demolishing the surround, re-waterproofing, re-tiling, and replumbing. That is a full bathroom strip-out, not a minor adjustment.
This matters most for homeowners who are renovating a property they plan to sell or significantly alter in the next five to ten years. A freestanding bath offers more flexibility. A back-to-wall bath is a long-term commitment to that layout.
Access Restrictions for Plumbing Repairs
Concealing the plumbing inside the wall or surround is part of what makes a back-to-wall bath look so clean. But concealed plumbing means restricted access when something goes wrong. A leaking waste fitting or a failed tap cartridge behind a tiled wall requires cutting into the tile or the panel to reach it.
Good installation practice includes building in an access panel where possible, particularly for the tapware connections. It is a detail worth discussing with your plumber before the tiling starts, not after.
Back-to-Wall Bathtub Installation: Step-by-Step
Pre-Installation Planning and Waterproofing
Planning starts with confirming the bath position, the waste outlet location, and the tapware rough-in height. These three coordinates drive every trade that follows. Get them wrong at this stage, and corrections become expensive.
Waterproofing is applied to the wall substrate and the floor before any tiling or bath setting occurs. In New South Wales, waterproofing in wet areas must comply with AS 3740-2021, the Australian Standard for waterproofing of domestic wet areas. A licensed waterproofer applies the membrane, and the work must be inspected before it is covered.
Do not allow tiling to proceed over uninspected waterproofing. That single shortcut is responsible for a significant proportion of the bathroom leak claims we see in Sydney renovations.
Rough-In Plumbing and Waste Positioning
The plumber sets the waste outlet position in the floor or wall to match the bath’s waste location. For a back-to-wall bath, the waste is typically at the tapware end, the end sitting against the wall. The overflow connection is also roughed in at this stage.
Tapware connections: hot and cold supply lines are roughed into the wall at the correct height and spacing for the chosen tapware. Wall-mounted tapware is the most common choice for back-to-wall baths because it keeps the bath deck clear and reinforces the built-in aesthetic.
The plumber pressure-tests all connections before the wall is closed. This is not optional. A failed pressure test at this stage costs an hour. A failed connection discovered after tiling costs a full tile demolition.
Setting and Securing the Bath Shell
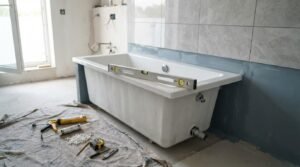
The bath shell is set into position on a mortar bed or adjustable feet, depending on the product specification. The mortar bed provides full support across the base of the bath, critical for acrylic shells, which flex under load and crack if unsupported.
The bath is levelled, checked for correct waste alignment, and secured to the wall framing at the back. The front face is left open at this stage to allow the tiler access to the floor and the front panel substrate.
Weight is a real consideration here. A stone resin or cast iron bath can exceed 150 kilograms before water and occupant load. Confirm the floor structure can carry that load before the bath is ordered, not after it arrives on site.
Finishing: Tiling, Panels, and Silicone Sealing
The tiler works around the set bath, finishing the floor, the wall surround, and the front panel face. The junction between the bath rim and the tile is one of the most important details in the whole installation. It needs a clean, consistent silicone joint, not grout.
Grout is rigid and cracks as the bath flexes under load. Silicone accommodates movement. A silicone joint in a colour matched to the grout is invisible in the finished bathroom and protects the waterproofing line at the bath perimeter.
The tapware is fitted by the plumber after tiling is complete. The waste cover and overflow trim are installed, the bath is filled and tested for leaks, and the silicone is left to cure fully before the bathroom is used.
Cost of Installing a Back-to-Wall Bathtub in Sydney
Supply Costs: Bath, Tapware, and Waste
A mid-range acrylic back-to-wall bath in Australia typically costs between $800 and $2,500 supply-only. Premium stone resin models from brands like Caroma, Kado, or Decina range from $2,500 to $6,000 or more depending on size and profile.
Wall-mounted tapware suited to a back-to-wall bath runs from $400 to $1,500 supply-only for a quality set. The waste and overflow kit adds another $80 to $200. Budget a realistic supply allowance of $1,500 to $4,000 for bath, tapware, and waste combined at the mid-range.
Labour and Trade Costs in Sydney
Sydney trade rates for bathroom work reflect the city’s high cost of living and strong renovation demand. Plumbing labour for a back-to-wall bath installation, including rough-in, setting, and final fit-off, typically runs between $1,200 and $2,500 depending on complexity and access.
Waterproofing costs $400 to $900 for a standard bathroom. Tiling labour for the bath surround and panel, separate from the broader bathroom floor and wall tiling, adds $600 to $1,500 depending on tile size and layout complexity. Total installed cost for the bath component of a Sydney bathroom renovation supply and all associated labour commonly lands between $4,000 and $9,000 for a mid-range back-to-wall installation.
Is a Back-to-Wall Bathtub Right for Your Bathroom?
A back-to-wall bath suits bathrooms where the goal is a tailored, integrated finish and where the layout allows at least one wall adjacency. It works best in new builds and full renovation strip-outs, where the plumbing and waterproofing can be set correctly from the start.
It is not the right choice for a cosmetic refresh where the existing bath position stays, and the budget is tight. In that scenario, a freestanding bath on existing waste connections is faster and cheaper to install.
For Sydney homeowners and investors planning a full bathroom renovation with a clear layout and a mid-to-upper budget, a back-to-wall bath delivers the best combination of aesthetics, space efficiency, and long-term property value. The installation complexity is real, but with the right trades and proper sequencing, it is entirely manageable.
Conclusion
A back-to-wall bathtub delivers a clean, integrated finish that lifts the overall quality of a bathroom renovation. The installation is more involved than a freestanding or alcove bath, but the result a built-in look with practical space efficiency justifies the additional trade coordination.
Understanding the pros, cons, and installation sequence puts you in control of the decision. You know what to expect, what to budget, and what questions to ask your trades before work starts.
At Sydney Home Renovation, we plan and manage back-to-wall bath installations from waterproofing through to final fit-off. Contact us to discuss your bathroom layout and get a clear, itemised quote.
Frequently Asked Questions
Can a back-to-wall bath be freestanding?
No. A back-to-wall bath is specifically designed to sit against a wall with its exposed sides enclosed by tiling or a panel. A freestanding bath is a separate product category with all sides finished by the manufacturer.
Do back-to-wall baths need a frame?
Most back-to-wall baths require a timber or steel frame to support the front panel substrate and provide a fixing point for the tiled face. The frame is built by a carpenter or builder before tiling begins.
How long does installation take?
A back-to-wall bath installation, as part of a full bathroom renovation, typically spans three to five days across trades: plumbing rough-in, waterproofing, tiling, and plumbing fit-off. Each trade requires cure or drying time before the next proceeds.
Can I tile around a back-to-wall bath myself?
Tiling around a bath is technically possible as a DIY task, but the waterproofing underneath must be done by a licensed waterproofer in NSW. Incorrect tiling at the bath junction is one of the most common sources of bathroom water damage.
What tapware suits a back-to-wall bath?
Wall-mounted tapware is the most common and visually consistent choice for a back-to-wall bath. It keeps the bath deck clear and reinforces the built-in aesthetic. Deck-mounted tapware on the bath rim is also an option where the bath profile allows it.
Is a back-to-wall bath harder to clean?
No, it is generally easier to clean than a freestanding bath. The tiled surround and panel eliminate the gap between the bath base and the floor, removing the main cleaning challenge of freestanding models.
What is the difference between back-to-wall and inset bathtubs?
An inset bath (also called an alcove bath) is recessed into a three-wall enclosure with all three sides tiled. A back-to-wall bath has only one or two sides against a wall, with the remaining exposed face finished by a tiled panel giving it a more open, design-forward appearance.


