
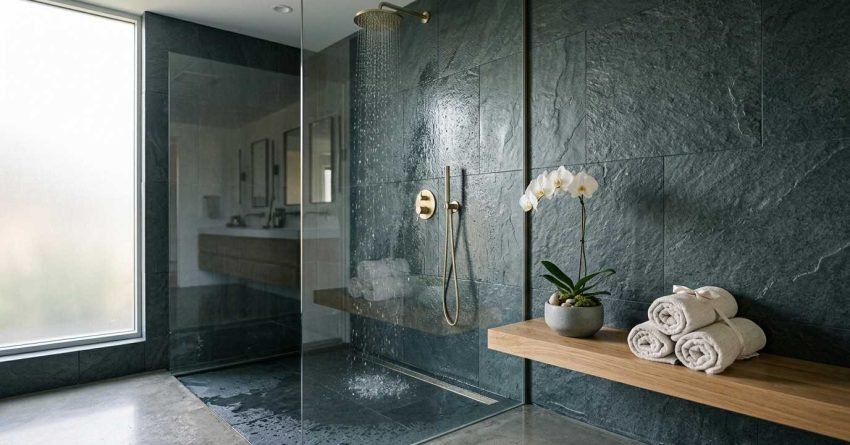
Walk-in showers are one of the highest-impact upgrades in any bathroom renovation, and the design choices you make here shape how the entire space looks and functions for years. Whether you’re working with a compact ensuite or a generous main bathroom, the right combination of glass, tile, fixtures, and layout transforms a basic shower into something genuinely impressive.
Homeowners and renovators in Sydney are making smarter design decisions than ever, and the options available now are far ahead of what was standard even five years ago.
This guide covers eight walk-in shower design ideas, from frameless enclosures and rainfall fixtures to curbless layouts and feature walls, with practical detail on what works, what lasts, and what to budget for.
1. Frameless Glass Enclosures
Frameless glass is the most requested walk-in shower design I see in Sydney renovations right now. It’s clean, it’s timeless, and it makes any bathroom feel larger than it actually is.
The reason it works so well is simple: glass doesn’t interrupt the eye. You see the tile, the fixture, the space, not a frame cutting across your sightline.
Why Frameless Works in Small and Large Bathrooms
In a small bathroom, frameless glass keeps the visual field open. The shower reads as part of the room rather than a boxed-off corner, and that perception of space is worth more than most people realise.
In a larger bathroom, frameless glass lets the tile work and feature wall carry the design without competition. The enclosure disappears, and the materials do the talking.
A single fixed panel with a frameless door is the most popular configuration. It’s also the most practical: fewer joints, fewer places for water to track, and easier to clean.
Glass Thickness, Fittings, and What to Budget
For a walk-in shower enclosure, 10mm toughened glass is the standard minimum. I recommend 12mm for doors and larger panels; it feels more substantial, swings more smoothly, and holds up better over time.
The fittings matter as much as the glass. Cheap hinges and channels corrode in a wet environment. Specify solid brass or 316 stainless steel hardware, and make sure the finish matches your tapware.
Budget between $1,800 and $4,500 for a quality frameless enclosure in Sydney, depending on panel size, door configuration, and hardware grade.
2. Floor-to-Ceiling Tiled Walls
Full-height tiling is one of those decisions that looks expensive but actually protects your renovation investment. Stopping tiles at 1.8m or 2.1m and painting above it creates a maintenance problem, and a design problem.
Taking tiles to the ceiling eliminates the painted zone entirely. The shower reads as a complete, finished space.
Tile Format and Layout Choices That Elevate the Space
The format you choose changes the character of the space entirely. Large-format tiles, 600x600mm or 600x1200mm, create a calm, uninterrupted surface with minimal grout lines. Subway tiles laid in a stacked or offset pattern add texture and a slightly more traditional feel.
Herringbone and chevron layouts work well as feature wall accents but become visually busy across an entire shower. Use them selectively.
Vertical tile layouts make ceiling heights feel taller. Horizontal layouts make a narrow shower feel wider. These are simple tools, and they work.
Grout Colour as a Design Decision
Most people treat grout as an afterthought. It isn’t. Grout colour is one of the most visible design decisions in a tiled shower.
Matching grout to the tile creates a seamless, monolithic look. Contrasting grout, dark grout with light tiles, or white grout with charcoal tiles, emphasises the tile pattern and adds graphic interest.
Epoxy grout is worth the extra cost in a shower environment. It resists staining, doesn’t absorb moisture, and stays looking clean far longer than cement-based grout.
3. Niche Shelving and Built-In Storage
A walk-in shower without storage is a design problem waiting to happen. Bottles lined up on the floor, a wire caddy hanging off the head, neither looks good, and neither functions well.
Built-in niches solve this properly. They’re recessed into the wall, tiled to match, and completely flush with the surface.
Recessed Niches vs. Corner Shelves
A recessed niche requires a stud wall with enough depth, typically 90–100mm, to accommodate the recess without compromising waterproofing or structural integrity. The standard niche depth is around 100mm, which fits most shampoo and conditioner bottles comfortably.
Corner shelves are a practical alternative when the wall structure doesn’t allow a full recess. They’re easier to install and still look intentional when tiled correctly.
I always recommend at least two niches in a walk-in shower, one at shoulder height for daily-use products, one lower for body wash and razors.
Waterproofing and Tiling a Niche Correctly
This is where a lot of DIY renovations go wrong. A niche is a horizontal surface inside a wet area, which means waterproofing is non-negotiable.
The membrane must wrap into the niche completely, floor, sides, and back, before any tile adhesive goes down. A slight fall toward the front of the niche helps water drain out rather than pool.
Done correctly, a tiled niche lasts the life of the renovation. Done incorrectly, it becomes a source of water damage behind the wall.
4. Rainfall Showerheads and Multi-Function Fixtures
A rainfall showerhead changes the experience of a shower in a way that’s hard to describe until you’ve used one. The water falls vertically, covers a wider area, and feels genuinely different from a standard wall-mounted head.
It’s one of the most popular fixture upgrades in Sydney bathroom renovations, and for good reason.
Ceiling-Mounted vs. Wall-Mounted Rainfall Heads
Ceiling-mounted rainfall heads deliver the most authentic overhead experience. Water falls straight down, coverage is even, and the look is clean with no arm projecting from the wall.
The trade-off is plumbing. A ceiling-mounted head requires the supply line to be roughed in through the ceiling during construction. Retrofitting it into an existing bathroom is possible but adds cost.
Wall-mounted rainfall heads use an extended arm to position the head overhead. They’re easier to install in a renovation context and still deliver a strong overhead experience. The arm length matters; a short arm positions the head too close to the wall and reduces the rainfall effect.
Pairing Overhead and Hand-Held Fixtures
A dual-outlet system, overhead rainfall head plus a hand-held shower, is the most functional configuration for a walk-in shower. The hand-held handles rinsing, cleaning the shower, and bathing children or pets.
A diverter valve or thermostatic mixer controls both outlets. Specify a quality thermostatic valve; it maintains water temperature precisely and makes the shower genuinely comfortable to use every day.
5. Matte Black and Brushed Nickel Tapware
Tapware finish is one of the most visible design decisions in a walk-in shower. Chrome is still common, but matte black and brushed nickel have become the dominant choices in contemporary Sydney renovations.
Both finishes photograph well, age gracefully, and work across a wide range of tile palettes.
Choosing a Finish That Lasts in a Wet Environment
Not all tapware finishes are equal in a wet environment. Standard chrome is durable but shows water spots and fingerprints easily. Matte black and brushed nickel hide marks better in daily use.
The key specification is PVD coating, Physical Vapour Deposition. PVD-coated tapware bonds the finish at a molecular level, making it significantly more resistant to corrosion, tarnishing, and wear than electroplated alternatives.
Specify PVD-coated tapware for any finish other than chrome. It costs more upfront and saves you from replacing corroded fixtures within five years.
Mixing Metals, What Works and What Doesn’t
Mixing metals in a bathroom is acceptable when it’s intentional. The rule is simple: choose one dominant finish and use a second finish as a deliberate accent.
Matte black fixtures with brushed brass accents work well. Brushed nickel with chrome accents reads as inconsistent rather than designed.
Warm metals, brass, bronze, gold, pair with warm tile tones. Cool metals, chrome, brushed nickel, gunmetal pair with cooler palettes. Crossing warm and cool in the same space creates visual tension that’s hard to resolve.
6. Wet Room and Curbless Shower Designs
A curbless shower, also called a wet room or barrier-free shower, has no step, no hob, and no threshold. The floor of the shower is continuous with the bathroom floor, and water is managed entirely through gradient and drainage.
It’s a design choice that looks effortless and functions exceptionally well when it’s built correctly.
Linear Drains and Slope Requirements
A curbless shower requires a linear drain, a channel drain running along one wall or across the entry, to collect water efficiently without a central floor drain.
The floor must fall toward the drain at a minimum gradient of 1:80 under AS 3740 waterproofing requirements. Getting this gradient right across a large wet room floor requires precise screeding and a skilled tiler.
The tile direction matters too. Tiles should run parallel to the drain channel so the fall reads as intentional rather than uneven. Large-format tiles work particularly well here: fewer grout lines, cleaner fall, easier to maintain.
Who Benefits Most From a Curbless Layout
Curbless showers are the right choice for anyone planning long-term in their home. The barrier-free entry is safer for older residents, easier for anyone with limited mobility, and genuinely more comfortable for everyday use.
They’re also the right choice aesthetically for anyone who wants the bathroom to read as a single, continuous space rather than a shower box inserted into a room.
The additional waterproofing and screeding work adds cost, typically $800 to $2,000 more than a standard shower base, but the result is a bathroom that functions and looks better for the life of the renovation.
7. Feature Walls and Stone-Look Tiles
A feature wall inside the shower is one of the most effective ways to add visual depth and character to a walk-in design. One wall, typically the back wall behind the shower head, is tiled in a material or format that contrasts with the surrounding surfaces.
Done well, it anchors the entire bathroom design.
Porcelain vs. Natural Stone for Shower Feature Walls
Natural stone, marble, travertine, and slate are beautiful and genuinely unique. Every slab is different, and the veining and texture are impossible to replicate artificially.
The maintenance commitment is real, though. Natural stone in a shower requires sealing on installation and periodic resealing throughout its life. Unsealed stone absorbs moisture, stains, and eventually deteriorates.
Porcelain tiles that replicate stone, particularly large-format book-matched porcelain, deliver a comparable visual result with significantly less maintenance. They don’t require sealing, they’re harder and more resistant to chipping, and the slip ratings are easier to specify for a wet area.
For most Sydney homeowners, porcelain stone-look tiles are the more practical choice without sacrificing the aesthetic.
Large-Format Tiles and Fewer Grout Lines
Large-format tiles, 600x1200mm and above, have become the standard for feature walls in contemporary walk-in showers. The reduced grout line count creates a cleaner, more continuous surface that reads closer to a solid material than a tiled one.
Rectified tiles are essential at this format. Rectified tiles are cut to precise dimensions after firing, which allows tighter grout joints and eliminates the lippage risk that comes with non-rectified large-format tiles.
Adhesive coverage is critical with large-format tiles; full bed coverage prevents hollow spots, cracking, and eventual tile failure.
8. Lighting Inside the Shower
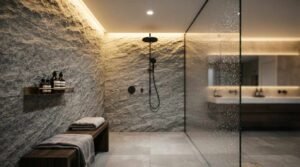
Shower lighting is one of the most overlooked elements in a bathroom renovation, and it’s one of the most impactful. The right lighting inside the shower makes the space feel considered and complete. The wrong lighting, or no lighting, makes even an expensive renovation feel unfinished.
IP Ratings and What They Mean for Shower Zones
In Australia, shower lighting must comply with the zone requirements set out in AS/NZS 3000. The shower enclosure itself is Zone 1, the highest risk zone, and requires luminaires rated to at least IP65.
IP65 means the fitting is dust-tight and protected against water jets from any direction. IP67 and IP68 ratings offer higher protection and are worth specifying for recessed fittings that sit flush with the ceiling inside the shower.
Never install a standard downlight inside a shower enclosure. The compliance risk is real, and the safety risk is serious.
Recessed Downlights vs. LED Strip Lighting
Recessed IP-rated downlights are the most common and most practical choice for shower lighting. A single well-positioned downlight directly overhead illuminates the shower evenly and creates a clean, uncluttered ceiling.
LED strip lighting, installed in a recess or behind a shadow line at the top of the shower wall, adds ambient warmth and a layered lighting effect. It works particularly well in combination with a recessed downlight rather than as a standalone solution.
Specify warm white LEDs, 2700K to 3000K, for shower lighting. Cool white reads as clinical and flattens the appearance of tiles and stone.
Conclusion
Walk-in shower design comes down to a handful of decisions: glass type, tile format, fixtures, drainage, and lighting, and getting each one right produces a result that looks and functions well for decades.
The best renovations combine strong material choices with proper construction. A beautiful feature wall means nothing if the waterproofing behind it fails.
At Sydney Home Renovation, we help homeowners plan and build walk-in showers that are designed well and built to last. Get in touch to talk through your bathroom renovation.
Frequently Asked Questions
What is the most popular walk-in shower design in Sydney right now?
Frameless glass enclosures with large-format porcelain tiles and matte black tapware are the most requested combination in Sydney renovations right now. Curbless layouts are also growing quickly, particularly in full bathroom renovations where the floor can be properly graded.
How much does a walk-in shower renovation cost in Sydney?
A walk-in shower renovation in Sydney typically costs between $8,000 and $20,000, depending on size, materials, and fixture selections. Frameless glass, premium tapware, and feature wall tiles sit at the higher end of that range.
Do walk-in showers need a door?
No. Many walk-in shower designs use a fixed glass panel and an open entry rather than a hinged or sliding door. The key is positioning the entry away from the showerhead so water doesn’t track out onto the bathroom floor.
What size does a walk-in shower need to be?
The minimum comfortable size for a walk-in shower is 900x900mm, but 1000x1000mm or larger is strongly recommended. A curbless or wet room design works best at 1200mm wide or more to allow proper floor grading toward the drain.
Can I add a walk-in shower to an existing bathroom?
Yes. Most existing bathrooms can be converted to include a walk-in shower, though the scope of work depends on the current layout, plumbing positions, and floor structure. A full strip-out and refit gives the best result and allows proper waterproofing from the substrate up.


