
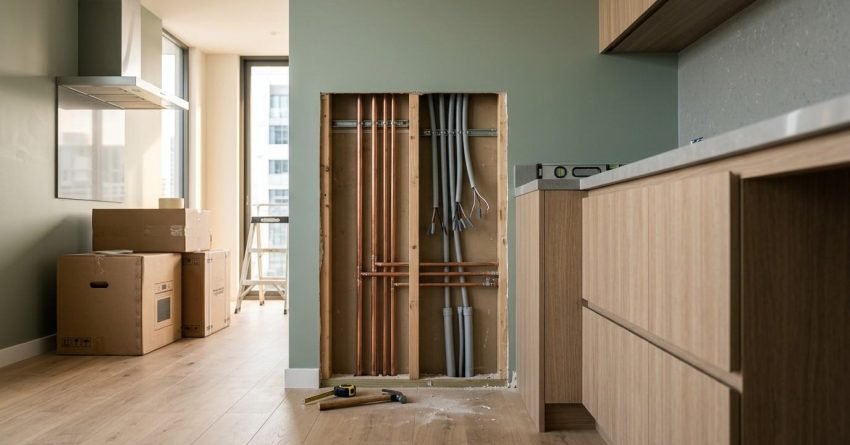
A kitchen remodel follows a strict sequence. We plan and secure approvals first, then move through demolition, structural work, rough-in trades, wall lining, flooring, cabinetry, benchtops, appliances, painting, and final inspections last. Getting this order right is the single biggest factor separating a smooth renovation from a costly, delayed one.
In Sydney, licensed trades, council requirements, and compliance certificates add layers of complexity, so the sequence matters even more. One trade out of order can mean rework, re-inspection fees, and weeks of unnecessary delays.
We walk through every stage of a kitchen remodel in the correct order below, with clear explanations of what happens at each step, why it happens then, and what Sydney homeowners need to know before work begins.
What Is the Correct Order for a Kitchen Remodel?
The correct order for a kitchen remodel is planning and design, council approvals if required, demolition, structural work, waterproofing, rough-in plumbing and electrical, insulation and wall lining, plastering, flooring, cabinet installation, benchtops and splashbacks, appliance connection, painting, and final inspections.
This sequence isn’t arbitrary. Each stage creates the physical conditions the next stage depends on. Rough-in plumbing must sit inside the walls before we line them. Cabinets must be fixed before we template benchtops. Painting follows cabinetry but precedes hardware installation. Skipping ahead or reversing steps forces trades to undo completed work, and we charge that rework at full labour rates.
For Sydney homeowners, this sequence maps directly to the compliance pathway. Licensed plumbers, electricians, and gas fitters must complete rough-in work before we close the walls. We issue certificates of compliance after fit-off, not before.
Kitchen Remodel Order at a Glance
| Stage | What Happens | Typical Timing |
| 1. Planning & approvals | Design lock-in, budget, council check | 2–6 weeks |
| 2. Demolition | Strip back to structure | Days |
| 3. Structural & waterproofing | Beam install, membrane | Days to 1 week |
| 4. Rough-in trades | Plumbing, electrical, gas | 3–5 days |
| 5. Insulation & wall lining | Plasterboard closes walls | 2–4 days |
| 6. Plastering | Set, sand, prime | 5–7 days incl. drying |
| 7. Flooring | Tile, LVP, or timber | 2–5 days |
| 8. Cabinet installation | Wall, base, tall units | 2–4 days |
| 9. Benchtops & splashback | Template, fabricate, install, tile | 2–3 weeks lead time |
| 10. Appliance fit-off | Plumbing, electrical, gas connection | 1–2 days |
| 11. Painting | Two coats, cut-in, touch-up | 3–5 days |
| 12. Final inspections | Certificates, walkthrough, handover | 1–2 days |

Why Sequence Matters More Than Speed
The most expensive kitchen renovation mistakes in Sydney aren’t caused by choosing the wrong tiles or overspending on appliances. They come from scheduling trades in the wrong order.
When a tiler arrives before plastering has cured, the adhesive bond fails, and tiles crack within months. When we install cabinets before flooring, the floor finish must be cut around every cabinet base, adding hours of labour and creating visible joins that age poorly.
Sequence is project management. A builder who controls the sequence controls the budget.
Step 1: Planning, Design, and Council Approvals
Every kitchen remodel begins before a single tool is picked up. The planning phase defines the scope, locks in the design, coordinates trade requirements, and determines whether council approval is needed.
At this stage, we produce a detailed scope of works, a trade schedule, a materials list, and a realistic timeline. Design decisions, including cabinet layout, appliance positions, sink location, and island dimensions, get finalised here, not during construction. Changes made during construction cost three to five times more than changes made on paper.
Setting Your Kitchen Renovation Budget
A realistic kitchen renovation budget in Sydney covers four cost categories.
| Cost Category | Typical Share of Budget |
| Labour (builder, plumber, electrician, gas fitter, tiler, plasterer, painter) | 35–45% |
| Materials and joinery (cabinetry, benchtops, flooring, hardware) | Variable by finish level |
| Appliances and fixtures | Variable; factor in lead times |
| Contingency for unforeseen conditions | 10–15% |
Underestimating labour, or assuming trades can overlap when they can’t, is where most budget blowouts begin. A custom stone benchtop can take three to four weeks from template to installation, and imported appliances can take six to eight weeks. We build these lead times into the schedule during planning, not mid-construction.
Do You Need Council Approval?
Most standard kitchen renovations in Sydney don’t require a Development Application with council. Work that stays within the existing footprint and doesn’t alter the building’s structure typically qualifies as exempt or complying development under the NSW Environmental Planning and Assessment Act 1979.
Council approval or a Complying Development Certificate may be required if the remodel involves removing a load-bearing wall, relocating plumbing beyond minor adjustments, adding a new window or door opening, or affects a heritage-listed property. We confirm the approval pathway before work begins, because proceeding without required approvals can result in stop-work orders and significant fines.
Step 2: Demolition and Site Preparation
Once planning is complete and approvals are confirmed, demolition begins. This is where we strip the existing kitchen back to the structure, and where we discover hidden conditions.
Demolition typically involves removing cabinetry, disconnecting and capping plumbing and gas lines, isolating electrical circuits, and stripping wall and floor finishes. Electrical circuits get isolated at the switchboard before any wall removal begins.
What Gets Removed First?
In a full gut-out, we isolate services first, then remove appliances, then strip cabinetry, then remove wall and floor finishes, then address structural elements last.
Services, meaning electricity, gas, and water, are always isolated before physical demolition begins under the NSW Work Health and Safety Act 2011. A licensed electrician isolates circuits, a licensed plumber caps water lines, and a licensed gas fitter isolates and purges gas lines before physical demolition proceeds.
Asbestos and Hidden Hazards
Sydney homes built before 1990 have a significant probability of containing asbestos-containing materials in wall sheeting, floor tiles, and ceiling linings. Homes built before 1970 may also contain lead-based paint.
Under SafeWork NSW regulations, any work disturbing asbestos-containing materials over 10 square metres, or friable material of any size, must be carried out by a licensed asbestos removalist. We strongly recommend an asbestos inspection, typically $300 to $600, before demolition begins in any pre-1990 home. That cost is insignificant next to an unplanned removal mid-construction, which can halt a project for days.
Step 3: Structural and Waterproofing Work
After demolition, the structure is exposed, and we carry out any structural modifications. This is the correct point in the sequence because existing conditions are now fully visible.
Structural work most commonly involves removing load-bearing walls to create open-plan layouts, installing steel beams to carry loads previously carried by removed walls, and reinforcing floor structures for heavy stone benchtops.
When Do You Need a Structural Engineer?
A structural engineer is required whenever a remodel involves removing or modifying a load-bearing wall, installing a new beam, or making any change affecting structural integrity. The engineer issues a certificate confirming the design meets National Construction Code requirements, which we need for the building inspection and final occupation certificate.
Attempting to remove a load-bearing wall without engineering advice is one of the most dangerous decisions a homeowner can make. It creates an uninsurable condition and can affect the property’s ability to be sold or refinanced.
Waterproofing Requirements
Waterproofing is required under the National Construction Code in areas subject to water, specifically under and around the sink, dishwasher, and any adjacent wet area. We apply the membrane to the substrate before tiling begins, and it must cure fully, typically 24 to 48 hours, before any tiling adhesive goes on.
Step 4 Rough-In Trades (Plumbing, Electrical, and Gas)
With structural work complete, rough-in trades begin. This is one of the most critical stages because all plumbing, electrical, and gas infrastructure gets installed inside walls before we close those surfaces.
Rough-in work must be completed, inspected where required, and signed off before wall lining begins. Unlicensed work is illegal, voids insurance, and can result in mandatory demolition of completed work.
Plumbing Rough-In
Kitchen plumbing rough-in involves positioning water supply lines and waste pipes at their final locations before walls close. Cabinet design must be finalised before rough-in begins, because if the sink position changes afterward, the plumber must return to relocate pipes inside closed walls.
Waste pipe falls must comply with AS/NZS 3500.2 (Sanitary Plumbing and Drainage). Insufficient fall causes slow drainage and blockages.
Electrical Rough-In
Kitchen electrical rough-in involves running all cables to their final positions before wall lining. This typically includes dedicated circuits for the oven, cooktop, dishwasher, and rangehood, plus lighting circuits.
Under AS/NZS 3000 (the Australian Wiring Rules), all outlets within 300mm of a sink must be protected by a residual current device. Appliance specifications must be confirmed before rough-in so circuit sizing and outlet positions are correct.
Gas Rough-In and Compliance
Gas rough-in involves running gas supply lines to the cooktop and oven where applicable. All gas work in NSW must be carried out by a licensed gas fitter under the Gas Supply Act 1996.
After rough-in, gas lines get pressure-tested, typically a 15-minute hold at 1.5 times working pressure, before walls close. The gas fitter issues a Certificate of Compliance for Gas Work (Form 4) after fit-off.

Step 5: Insulation and Wall Lining
With rough-in complete and inspections passed, we install insulation and line the walls. This stage permanently encloses the rough-in work, so the sequence is non-negotiable. Once walls are lined, accessing rough-in pipework requires destructive work.
The standard wall lining is 10mm plasterboard on timber or steel framing. In moisture zones behind the sink and dishwasher, we specify moisture-resistant plasterboard. In splashback zones that will be tiled directly, fibre cement sheet is often preferred as a more stable substrate.
For apartments, acoustic insulation may be a requirement under the National Construction Code for Class 2 buildings to achieve minimum sound insulation ratings between units. In detached homes, it’s a value-adding specification that improves liveability.
Step 6: Plastering, Rendering, and Wall Preparation
Once wall lining is complete, plastering begins. This covers plasterboard joins, screw heads, and imperfections to create a smooth, paint-ready finish.
The sequence is set coat, sand back, second coat where required, final sand, and prime. Each coat must dry fully before the next goes on. Rushing this stage results in surface cracking and paint adhesion failure.
How Long Does Plastering Take to Cure?
Set compound typically needs a minimum of 24 hours of drying time per coat under normal Sydney conditions. In humid conditions, common during Sydney summers, drying times extend to 36 to 48 hours per coat.
As a practical rule, we allow a minimum of five to seven days from completed plastering to the start of tiling or painting, accounting for multiple coats, drying time, and priming.
Step 7: Flooring Installation
Flooring goes in after plastering and wall preparation but before cabinet installation. This sequence is deliberate.
Installing flooring before cabinets means the floor finish runs continuously under the cabinet bases. This allows future cabinet repositioning without leaving bare patches and eliminates visible joins at the cabinet base.
Should Flooring Go In Before or After Cabinets?
Flooring should go in before kitchen cabinets in most Sydney renovations. The exception is floating timber or laminate flooring, which requires an expansion gap, so cabinets go in first, and the floating floor runs up to the cabinet base with a small gap covered by beading.
For tile, luxury vinyl plank, and glued engineered timber, the sequence is flooring first, then cabinets. This is standard practice among experienced Sydney kitchen builders because it produces a cleaner finish and simplifies future cabinet replacement.
The most popular flooring choices in Sydney kitchens are large-format porcelain tiles, luxury vinyl plank, and engineered timber, each with distinct trade-offs in durability, cost, and moisture resistance suited to the kitchen environment.
Step 8: Kitchen Cabinet and Joinery Installation
Cabinet installation is one of the most visible and technically demanding stages. Cabinets must be installed level, plumb, and square, in a room that is rarely any of those things naturally.
The Order of Cabinet Installation
The correct order is wall cabinets first, then base cabinets, then tall units. Wall cabinets go in first because installing them after base cabinets risks damaging the base cabinet finish and makes accurate fixing heights harder to achieve.
Base cabinets are shimmed and levelled to the finished floor height. The standard finished bench height in Australian kitchens is 900mm, adjustable for accessibility or preference. Tall units, including pantry cabinets and oven towers, go in last because they’re the most complex to position.
Custom vs. Flat-Pack Cabinets
Custom cabinetry is manufactured off-site to exact dimensions, with lead times of four to eight weeks from Sydney cabinet makers. This lead time must be built into the schedule during planning.
Flat-pack cabinetry has shorter lead times, typically one to three weeks, and a lower cost per unit, though installation is more labour-intensive and quality depends heavily on the installer’s skill. For investment properties, flat-pack with quality hardware represents strong value; for owner-occupied homes, custom cabinetry is usually the better long-term investment.
Step 9 Benchtop, Splashback, and Tiling
Benchtops can’t be templated until cabinets are fully installed, levelled, and fixed. This is a fixed sequence point many homeowners underestimate.
When Are Benchtops Templated and Installed?
We template benchtops after cabinet installation and before splashback tiling. For stone benchtops, engineered or natural, the time from template to installation is typically two to three weeks in Sydney. This lead time is non-negotiable, though other work, like painting, can continue during it.
Stone benchtops are heavy. A 20mm engineered stone benchtop on a standard 3-metre run weighs approximately 80 to 100 kilograms and requires two or more installers. After installation, silicone joints must cure for 24 hours before the sink connects or the benchtop meets water.
Splashback and Tile Sequence
Splashback tiling begins after benchtops are installed, so the tile layout sets out from the benchtop surface upward. The sequence is substrate preparation, waterproofing where required, adhesive application, tile laying, grouting after the adhesive cures, and silicone sealing at all movement joints.
Movement joints, where tile meets benchtop or cabinet, must be filled with silicone, not grout, under AS 3958.1 (Guide to the Installation of Ceramic Tiles). Grout is rigid, and cracks at movement points as the building shifts with temperature and humidity.
Step 10 Appliance Installation and Trade Fit-Off
With cabinetry, benchtops, and splashbacks complete, the kitchen is ready for appliance installation and fit-off. This is where rough-in work gets completed, and all services are tested and certified.
Connecting Appliances
Three licensed trades work in a coordinated sequence at fit-off. The plumber connects the sink and dishwasher, including the high loop or air gap required under AS/NZS 3500.2 to prevent backflow. The electrician fits cover plates, connects hardwired appliances, tests all circuits, and issues a Certificate of Compliance for Electrical Work.
The gas fitter connects the cooktop and any gas oven, performs a final pressure test, and commissions the appliances, issuing Form 4 afterward. Gas appliances must not operate in NSW until this certificate is issued.
Installation Order
The practical order is oven and cooktop first, as they’re built into the cabinetry, then rangehood, then dishwasher, then sink and tapware last, since the plumber needs clear access to the under-sink cabinet. Rangehood clearance above the cooktop typically needs to be 650mm to 750mm for gas cooktops and 600mm to 650mm for induction.
Step 11 Painting and Finishing
Painting is one of the final stages, though not the last. The correct sequence is painting after cabinets and before hardware installation.
Painting after cabinets means the painter cuts in neatly to the cabinet edges without masking tape gaps. Painting before hardware means unobstructed access to all surfaces, and hardware installation covers any minor paint imperfections at fixing points.
Choosing Kitchen Paint Finishes
Sydney’s humid summers and temperature variation, combined with kitchen grease and steam, place specific demands on paint finishes. For walls, we specify low-sheen or semi-gloss acrylic paint, which cleans more easily than flat finishes and resists moisture better. For ceilings, a flat or low-sheen ceiling paint resists condensation and shows fewer roller marks.
Step 12: Final Inspections, Certificates, and Handover
The final stage of a kitchen remodel is compliance sign-off and handover, critically important for insurance, property sale, and legal compliance.
What Certificates Are Required in NSW?
A kitchen renovation involving licensed trade work requires several compliance certificates. The Certificate of Compliance for Electrical Work covers all new electrical work under the Electricity (Consumer Safety) Act 2004. The Certificate of Compliance for Gas Work (Form 4) covers all new gas work under the Gas Supply Act 1996.
A Plumbing and Drainage Certificate covers all new plumbing work, inspected by a licensed plumbing inspector before walls close and after fit-off. Where a Complying Development Certificate or Development Application was required, an Occupation Certificate follows a final inspection confirming compliance with approved plans.
Final Walkthrough Checklist
Before signing off, we confirm cabinet doors and drawers operate smoothly, benchtops are level with tight joints, tiles are fully adhered with no hollow spots, and all appliances run through a full cycle. We test plumbing for leaks, electrical outlets with a plug-in tester, and paint surfaces for consistency. Any defects get documented in writing and rectified before final payment is released.

How Long Does a Kitchen Remodel Take in Sydney?
A kitchen remodel in Sydney takes between four and twelve weeks from the start of construction, depending on scope, design complexity, and material lead times. This doesn’t include the planning phase, which typically adds two to six weeks, or council approval, which can add four to twelve weeks if required.
A cosmetic refresh, new doors, benchtop, splashback, and appliances with no layout changes, typically takes two to four weeks. A mid-range renovation with new cabinetry, benchtop, flooring, and minor service modifications takes four to six weeks. A full renovation with complete gut-out, structural work, and full rough-in typically takes eight to twelve weeks, reflecting the sequential nature of the work and non-negotiable drying and curing times.
What Are the Most Common Sequencing Mistakes?
Understanding where the sequence breaks down helps homeowners spot warning signs when overseeing a renovation.
The most common mistake is ordering materials before the design is finalised, resulting in cabinets that don’t fit and can’t be returned. The second is scheduling trades without adequate lead time, like calling the tiler before plaster has cured. The third is failing to confirm appliance specifications before rough-in, forcing electricians to return and cut into completed walls. The fourth is attempting to overlap stages that can’t overlap, like painting during active tiling, which contaminates surfaces.
A competent builder or project manager controls the sequence, manages lead times, and coordinates trades to eliminate these mistakes before they happen.
Conclusion
A kitchen remodel done in the right order, from planning and approvals through to final inspections and certificates, is the difference between a renovation that runs on time and on budget and one that accumulates costly rework, delays, and compliance issues. The sequence isn’t a preference; it’s construction logic built around drying times, trade dependencies, and compliance requirements that can’t be shortcut without consequences.
Every stage in this guide connects to the next. Rough-in trades depend on finalised design, benchtops depend on installed cabinets, and certificates depend on licensed trades completing work in the correct sequence.
At Sydney Home Renovation, we manage every stage of your kitchen remodel, from the first design consultation to the final compliance certificate, with transparent scheduling, licensed trades, and clear communication at every step. Contact us today to discuss your kitchen renovation and get a detailed project plan built around the right sequence from day one.
Frequently Asked Questions
What is the first step in a kitchen remodel?
The first step is planning and design, finalising the layout, confirming appliance specifications, establishing a realistic budget, and determining whether council approval is required. We don’t start construction until the design is fully resolved.
Can plumbing and electrical work be done at the same time?
Yes, plumbing and electrical rough-in can be carried out simultaneously, as long as each trade has clear access to their work areas. Coordinating both trades in the same phase compresses the timeline and reduces how often we need to open walls.
Should I install flooring before or after kitchen cabinets?
For most flooring types, including tiles, luxury vinyl plank, and glued engineered timber, we install flooring before cabinets. This produces a continuous floor finish and eliminates visible cut lines at the cabinet base.
How long should I wait after plastering before tiling or painting?
We allow a minimum of five to seven days after plastering is complete before tiling or painting begins. This accounts for multiple coats, drying time, and priming.
When are benchtops measured and installed?
We template benchtops after cabinet installation is fully complete and before splashback tiling begins. For stone benchtops, fabrication from template to installation typically takes two to three weeks.
Do I need a building permit for a kitchen remodel in Sydney?
Most standard kitchen renovations don’t require a Development Application and qualify as exempt or complying development. A Complying Development Certificate or DA may be needed if the remodel removes a load-bearing wall or affects a heritage-listed property.
What happens if trades are scheduled in the wrong order?
Scheduling trades in the wrong order causes rework, charged at full labour rates. Common consequences include tiling over uncured plasterboard and templating benchtops before cabinets are level.


