
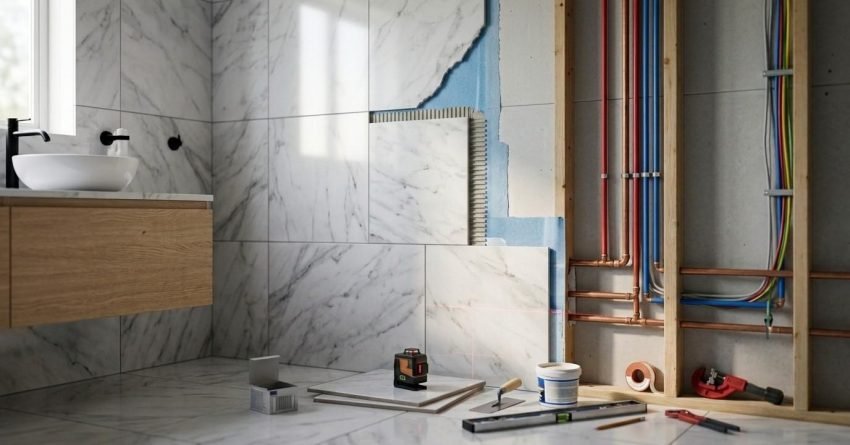
The correct bathroom renovation order follows 10 sequential steps: planning, permits, demolition, rough-in plumbing and electrical, structural work, waterproofing, tiling, cabinetry, fixture installation, and final inspection. Skipping steps or working out of sequence leads to costly rework, compliance failures, and project delays.
For Sydney homeowners, understanding this sequence is essential. Each trade depends on the previous one completing their work correctly. Waterproofing happens before tiling, and plumbing rough-in precedes wall sheeting. Getting the order wrong adds weeks to a timeline and thousands to a budget.
We walk you through every stage of a bathroom renovation in the exact order professional contractors follow. You’ll learn what happens at each step, why the sequence matters, and how to avoid the mistakes that derail renovations across Sydney every week.
What Is the Correct Order for a Bathroom Renovation?
A bathroom renovation follows a strict sequence that ensures each trade completes their work without obstruction or rework. This order exists because building codes, material curing times, and trade dependencies all dictate when specific tasks must occur.
The standard bathroom renovation order in Australia is:
- Planning and design
- Permits and approvals
- Demolition and strip-out
- Rough-in plumbing and electrical
- Structural work and framing
- Waterproofing
- Tiling and floor finishes
- Cabinetry and vanity installation
- Fixture and fitting installation
- Final inspection and handover
For smaller ensuites or powder rooms, this same sequence applies; the steps simply compress into shorter timeframes since there’s less floor area to waterproof, tile, and fit out.
Why Sequence Matters in Bathroom Renovations
Every step in a bathroom renovation builds on the previous one. Waterproofing cannot be applied until plumbing rough-in is complete and inspected, and tiles cannot be laid until waterproofing has cured and been certified.
Breaking this sequence creates compounding problems. Tiling before waterproofing certification means an inspector may require tile removal for re-inspection, and installing a vanity before wall tiling is complete leaves visible tile cuts and potential water ingress points.
We follow this order because it minimises callbacks, ensures compliance, and protects both the homeowner and the builder from liability.
Overview of the 10-Step Renovation Process
The renovation process divides into three phases. The first covers preparation, planning, permits, and demolition. The second handles infrastructure: plumbing, electrical, structural work, and waterproofing. The third focuses on finishes: tiling, cabinetry, fixtures, and final inspection.
Each phase needs to be substantially complete before the next begins. Overlapping phases without proper coordination lead to trade conflicts, damaged work, and schedule blowouts.

Step 1: Planning and Design
Planning is the foundation of every successful bathroom renovation. This step determines your budget, timeline, layout, and material selections before any physical work begins.
Rushing through planning is the single most common cause of budget overruns. Homeowners who skip detailed planning often make expensive changes mid-renovation when their original choices don’t work.
Setting Your Renovation Goals and Budget
We start by defining what you want to achieve: updating a dated bathroom for personal enjoyment, preparing a property for sale, or adding value for rental return. Your goals directly influence budget allocation.
According to the Housing Industry Association’s renovation cost guidance, a standard bathroom renovation in Sydney typically costs between $15,000 and $35,000 for a complete renovation of a standard-sized bathroom. High-end renovations with premium fixtures and custom finishes can exceed $50,000.
Break your budget into categories:
- Labour (typically 40–50% of total cost)
- Tiles and waterproofing (15–20%)
- Fixtures and fittings (15–25%)
- Cabinetry and vanity (10–15%)
- Contingency (10–15%)
The contingency allowance is non-negotiable. Hidden issues like water damage, asbestos, or outdated plumbing frequently emerge during demolition.
Measuring Your Bathroom and Creating a Layout
Accurate measurements are essential before selecting fixtures or finalising designs. We measure room dimensions, door swing clearance, window positions, and existing plumbing locations.
Australian standards recommend minimum clearances of 600mm in front of toilets and basins, and shower enclosures should be at least 900mm x 900mm for comfortable use. Moving a toilet more than 300mm from its current position often requires significant floor work and additional plumbing labour.
Selecting Fixtures, Fittings, and Finishes
We choose fixtures, tiles, and fittings during the planning phase, not during construction. Late selections cause delays when items are out of stock or have extended lead times.
Create a complete selections list including:
- Toilet (back-to-wall, wall-hung, or close-coupled)
- Basin and vanity
- Shower base or wet area floor waste
- Tapware (basin, shower, bath if applicable)
- Tiles (floor, wall, feature)
- Shower screen
- Mirror and lighting
- Accessories (towel rails, toilet roll holder, hooks)
Confirm stock availability and delivery timeframes for all items before demolition begins.
Step 2: Obtaining Permits and Approvals
Not every bathroom renovation requires council approval, but all bathroom renovations in Sydney require licensed tradespeople for plumbing and electrical work.
Sydney Council Requirements for Bathroom Renovations
In NSW, bathroom renovations that don’t alter the building’s footprint or structure typically qualify as exempt development, meaning no development application is required under the NSW State Environmental Planning Policy (Exempt and Complying Development Codes) 2008.
You may need approval when your renovation involves:
- Structural changes to load-bearing walls
- Changes to the building envelope
- Work in heritage-listed properties
- Alterations affecting fire safety systems
We recommend checking with your local council or a private certifier when you’re unsure. The cost of a compliance certificate is far less than the cost of rectifying unapproved work.
When You Need a Certified Plumber or Electrician
All plumbing work in NSW must be performed by a licensed plumber who holds a Certificate of Compliance, as required under the NSW Plumbing and Drainage Act 2011. This includes moving or installing water supply lines, relocating drainage, installing fixtures, and hot water connections.
All electrical work must be performed by a licensed electrician who provides a Certificate of Compliance for Electrical Work, as governed by the NSW Electricity (Consumer Safety) Act 2004. This covers new lighting installations, exhaust fan wiring, heated towel rail connections, and power point installations.
Keep these certificates. They’re required for insurance claims and property sales.
Step 3: Demolition and Strip-Out
Demolition marks the start of physical work. This step removes all existing fixtures, tiles, and fittings to expose the substrate for inspection and new work.
Removing Old Fixtures, Tiles, and Fittings
Demolition follows a specific sequence: disconnecting and removing fixtures, stripping wall and floor tiles, removing damaged wall sheeting, and inspecting the substrate for water damage, mould, or structural issues.
Professional demolition typically takes 1–2 days for a standard bathroom. The timeframe extends when asbestos is present or significant water damage is discovered.
Waste Disposal and Skip Bin Considerations
Bathroom demolition generates substantial waste. A standard bathroom strip-out produces approximately 1–2 cubic metres of debris, including tiles, cement sheet, fixtures, and packaging.
Most Sydney renovators use skip bins ranging from 2m³ to 4m³ for this work. Homes built before 1990 should be tested for asbestos before demolition begins, since asbestos-containing materials require licensed removal and separate disposal.
Protecting Adjacent Areas During Demolition
Demolition creates dust that travels throughout the home. We install dust barriers using plastic sheeting and seal doorways to contain debris.
Floor protection in hallways and adjacent rooms prevents damage from foot traffic and equipment movement.
Step 4: Rough-In Plumbing and Electrical
Rough-in work installs the infrastructure that sits behind walls and under floors. This step must be completed and inspected before walls are closed up.
Relocating or Installing New Plumbing Lines
The plumber installs or relocates hot and cold water supply lines, drainage pipes and connections, and waste positioning for the shower, toilet, and basin. Copper or PEX piping is standard for water supply, and PVC is used for drainage.
Relocating fixtures is the most labour-intensive plumbing phase. Moving a shower from one wall to another requires new drainage runs, often involving floor cutting and concrete work.
Electrical Wiring for Lighting, Exhaust Fans, and Heated Towel Rails
The electrician installs wiring for ceiling lights, exhaust fans, heated towel rails, shaver power points, and underfloor heating where specified. All bathroom electrical work must comply with AS/NZS 3000 (Wiring Rules), which defines electrical safety zones in wet areas.
Power points cannot be installed within Zone 1, directly above baths and showers.
Inspection and Compliance Sign-Off
Before walls are closed, rough-in work requires inspection. The plumber provides a compliance certificate for plumbing rough-in, and the electrician provides certification for electrical rough-in.
These inspections verify that work meets code requirements before it becomes inaccessible. We never allow wall sheeting to proceed without these sign-offs.
Step 5: Structural Work and Framing
With rough-in complete, structural work prepares the walls and floors for waterproofing and tiling.
Wall Repairs, Stud Work, and Niche Installation
This phase addresses repairing damaged wall framing, installing additional studs for wall-hung fixtures, building shower niches, and installing blocking for grab rails or accessories. Wall-hung toilets and vanities require reinforced framing to support their weight.
Shower niches are framed during this phase rather than cut into finished walls later, ensuring proper waterproofing.
Installing Cement Sheeting and Moisture Barriers
Standard plasterboard is not suitable for wet areas. Bathrooms require water-resistant wall sheeting such as fibre cement sheet or water-resistant plasterboard outside direct wet zones.
The Australian Standard AS 3740 defines wet areas requiring water-resistant materials: shower walls, bath surrounds, and areas within 1.5m of a shower or bath. Cement sheeting is fixed to studs with corrosion-resistant screws, and joints are taped and set to create a smooth substrate.
Step 6: Waterproofing
Waterproofing is the most critical step in any bathroom renovation. Failures here cause structural damage, mould growth, and expensive rectification work.
Australian Standards for Bathroom Waterproofing
Bathroom waterproofing in Australia must comply with AS 3740-2021 (Waterproofing of domestic wet areas), which specifies which areas must be waterproofed, minimum membrane thickness, required overlap at joints, and inspection requirements.
In NSW, waterproofing is mandatory certification work. A licensed waterproofer completes the work and provides a certificate of compliance before tiling proceeds.
Waterproofing Wet Areas: Shower, Floor, and Walls
Mandatory waterproofing areas include the full shower floor and walls to 1800mm height, the entire bathroom floor, the bath hob, and a minimum 100mm radius around floor wastes.
The waterproofing membrane is typically a liquid-applied product that cures to form a continuous barrier, with two coats standard and the second applied perpendicular to the first. Critical areas like internal corners and floor-wall junctions receive fabric tape reinforcement, and penetrations get puddle flanges and sealed pipe entries.
Waterproofing Inspection and Certification
After application and curing, typically 24–48 hours, the waterproofing must be inspected for membrane continuity, minimum dry film thickness, correct treatment of corners and penetrations, and flood testing.
Tiling can only proceed after certification. Tiling over uncertified waterproofing voids your warranty and may breach building regulations.
Step 7: Tiling and Floor Finishes
Tiling transforms the bathroom’s appearance and provides a durable, water-resistant surface for daily use.
Choosing Tiles: Porcelain, Ceramic, and Natural Stone
Porcelain tiles are dense, low-porosity, and highly durable, making them the most common choice for Sydney bathroom renovations. Ceramic tiles are lighter and easier to cut but more porous, suiting walls and low-traffic floors at a more affordable price point.
Natural stone offers unique aesthetics but requires sealing and more maintenance since it’s porous and can stain without proper care. For shower floors, we select tiles rated R10 or R11 on the AS 4586 slip resistance standard.
Tile Installation Sequence: Floors vs Walls
Professional tilers lay wall tiles first in most cases, starting from the second row up using a batten for level. Floor tiles come second, working from the back of the room toward the door, and the bottom row of wall tiles goes in last to meet the floor with a minimal grout line.
In showers, floor tiles are laid with a fall toward the waste. The standard fall is 1:60, approximately 17mm per metre; insufficient fall causes pooling water.
Grouting, Sealing, and Finishing Touches
After tiles are set and adhesive has cured for a minimum of 24 hours, grouting fills the joints. Grout colour significantly impacts the final appearance, since lighter grouts show dirt more readily.
Silicone sealant, not grout, is used at wall-floor junctions, internal corners, and around fixtures and penetrations. These areas experience movement and require flexible sealant rather than rigid grout.
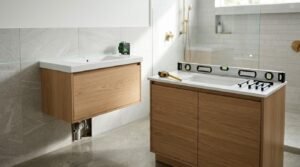
Step 8: Cabinetry and Vanity Installation
With tiling complete, cabinetry installation adds storage and defines the bathroom’s functional layout.
Wall-Hung vs Floor-Mounted Vanities
Wall-hung vanities mount directly to the wall, leaving floor space visible beneath for easier cleaning and a more spacious feel in small bathrooms. This installation requires the reinforced framing installed during Step 5.
Floor-mounted vanities sit on the floor and are generally easier to install, offering more storage capacity and a traditional appearance. These units are shimmed level and sealed at the floor junction to prevent water ingress.
Custom Cabinetry and Storage Solutions
Standard vanity sizes don’t suit every bathroom. Custom cabinetry addresses non-standard room dimensions, specific storage requirements, and matching existing home joinery.
Custom cabinetry requires longer lead times, typically 4–6 weeks from measurement to delivery. We order early in the planning phase to avoid installation delays.
Step 9: Fixture and Fitting Installation
Fixture installation brings the bathroom to functional completion, connecting all the plumbing and electrical rough-in work to finished products.
Installing Toilets, Basins, and Tapware
The plumber returns to install the toilet, basin, tapware, and shower fittings. All connections are tested for leaks under pressure, and the plumber runs each fixture to check proper drainage and water flow.
Shower Screens, Mirrors, and Accessories
After plumbing fixtures are installed, shower screens are measured, fabricated, and fitted, typically with a 1–2 week lead time for custom screens. Mirrors and accessories go in last.
Accessory placement should be planned during design, since drilling into freshly tiled walls risks cracking tiles if not done carefully.
Connecting Heated Towel Rails and Exhaust Fans
The electrician returns to complete the heated towel rail connection, exhaust fan wiring, lighting, and final power point fitting. All electrical work receives final certification after completion.
Step 10: Final Inspection and Handover
The final step ensures everything works correctly and meets the agreed specifications.
Quality Checks and Snagging List
A thorough inspection covers tiling for chips and lippage, fixtures for proper operation, cabinetry alignment, silicone continuity, and full electrical testing. We document any defects on a snagging list and address them promptly before final payment.
Final Plumbing and Electrical Certification
The plumber provides a final Certificate of Compliance covering all plumbing work, and the electrician provides a Certificate of Compliance for electrical work for all electrical installations.
These certificates are legal requirements in NSW. Keep them with your property documents; they’re required for insurance claims, property sales, and future renovation approvals.
Cleaning and Client Walkthrough
We complete a final clean, removing construction dust, adhesive residue, and protective films from fixtures. The walkthrough covers operation of all fixtures, maintenance requirements, and warranty information.
Which Trades Work in Which Order
Understanding the trade handoff sequence helps you coordinate scheduling and know who to expect on-site at each stage. The typical order is: demolition crew, plumber for rough-in, electrician for rough-in, carpenter for framing and sheeting, licensed waterproofer, tiler, cabinetmaker, plumber again for final fixture fit-off, electrician again for final connections, and finally the glazier for the shower screen.
Each trade signs off their work before the next one starts. This handoff discipline is what prevents the compliance failures and rework that plague poorly sequenced renovations.
What You Can (and Can’t) DIY Yourself
Some tasks are safe for a competent homeowner to handle, while others carry legal and safety requirements that make DIY impossible. Demolition, removing accessories, and basic painting prep are generally fine to do yourself if you’re comfortable with the work.
Plumbing, electrical work, and waterproofing must be completed by licensed tradespeople in NSW, no exceptions. Attempting these yourself voids compliance certification, creates uninsurable work, and can compromise the safety and resale value of your home.
Common Mistakes That Disrupt Bathroom Renovation Order
Understanding common errors helps you avoid them. These mistakes consistently cause delays and cost overruns in Sydney bathroom renovations.
Tiling Before Waterproofing Is Certified
This is the most serious sequencing error. Tiling over uncertified waterproofing means no proof the membrane was correctly applied, a potential requirement to remove tiles for inspection, voided product warranties, and personal liability if water damage occurs.
We always obtain the waterproofing certificate before tiling begins. No exceptions.
Ordering Fixtures Too Late
Fixtures and fittings have variable lead times: standard tapware takes 1–2 weeks, custom shower screens 2–3 weeks, imported vanities 4–8 weeks, and custom cabinetry 4–6 weeks. Late orders stall the project since tradespeople can’t install what hasn’t arrived.
We order everything during the planning phase and confirm delivery dates before demolition.
Skipping the Planning Phase
Inadequate planning causes mid-project changes, and changes during construction are expensive. Moving a toilet after rough-in, changing tile selection after ordering, or altering the layout after framing all add high cost and delay.
Investing time in planning costs nothing but prevents these expensive changes.

How Long Does a Bathroom Renovation Take in Sydney?
Timeline expectations help you plan around the disruption of losing bathroom access.
Typical Timeline for Standard Bathroom Renovations
A standard bathroom renovation in Sydney takes 2–4 weeks from demolition to completion. This breaks down approximately as:
| Phase | Duration |
| Demolition | 1–2 days |
| Rough-in plumbing and electrical | 2–3 days |
| Structural work and sheeting | 1–2 days |
| Waterproofing (including curing) | 2–3 days |
| Tiling (including curing) | 3–5 days |
| Cabinetry and fixture installation | 2–3 days |
| Final inspection and handover | 1 day |
These timeframes assume materials are on-site and no unexpected issues arise.
Factors That Extend or Shorten Your Timeline
Factors that extend timelines include asbestos discovery, water damage requiring structural repair, custom fixture lead times, plumbing or electrical relocation, weather delays, and council inspection scheduling.
Factors that shorten timelines include simple like-for-like replacements, no fixture relocation, standard fixtures with immediate availability, and an experienced, well-coordinated trade team.
Bathroom Renovation Order Checklist
Use this checklist to track your renovation progress.
Planning Phase
- Define renovation goals and budget
- Measure bathroom and create layout
- Select all fixtures, fittings, and tiles
- Confirm stock availability and lead times
- Obtain quotes from licensed contractors
- Check permit requirements
Pre-Construction
- Order all fixtures and materials
- Confirm delivery dates
- Arrange skip bin
- Test for asbestos (pre-1990 homes)
- Set up temporary bathroom arrangements
Construction Phase
- Demolition complete
- Rough-in plumbing complete and certified
- Rough-in electrical complete and certified
- Structural work and sheeting complete
- Waterproofing complete and certified
- Tiling complete
- Cabinetry installed
- Fixtures installed
- Electrical final fit-off complete
Completion
- Final plumbing certificate received
- Final electrical certificate received
- Snagging list completed
- Final clean done
- Client walkthrough complete
- Final payment made
Conclusion
Following the correct bathroom renovation order protects your investment and ensures a compliant, high-quality result. Each step builds on the previous one, and skipping or reordering steps creates problems that cost time and money to fix.
The sequence exists for good reason. Waterproofing must cure before tiling, rough-in must be inspected before walls close, and fixtures must be ordered before demolition begins. Understanding this order puts you in control of your renovation.
We guide homeowners through every step of their bathroom renovation with transparent communication and professional coordination, from initial planning through final handover. Contact Sydney Home Renovation today to receive a detailed scope of work that follows the correct sequence from start to finish.
Frequently Asked Questions
What is the first step in a bathroom renovation?
The first step is planning and design. This includes setting your budget, measuring the space, creating a layout, and selecting all fixtures and finishes before construction starts.
Do I need council approval for a bathroom renovation in Sydney?
Most bathroom renovations in Sydney qualify as exempt development and don’t require council approval. Licensed plumbers and electricians who provide compliance certificates are always required.
When should waterproofing be done during a bathroom renovation?
Waterproofing happens after rough-in plumbing and electrical work is complete and after wall sheeting is installed. It must be inspected and certified before any tiling begins.
Can I live in my house during a bathroom renovation?
Yes, most homeowners stay in their home during a bathroom renovation. Access to another bathroom or toilet facility is needed since water and power may be temporarily disconnected during certain phases.
How long does a full bathroom renovation take?
A standard bathroom renovation in Sydney takes 2–4 weeks from demolition to completion. Complex renovations with structural changes or custom fixtures may take 4–6 weeks.
What order do tradespeople work in during a bathroom renovation?
The typical trade sequence is demolition crew, plumber, electrician, carpenter, waterproofer, tiler, cabinetmaker, plumber again for final fix, electrician again, and glazier. Each trade depends on the previous one finishing.
What happens if renovation steps are done out of order?
Working out of sequence causes rework, compliance failures, and additional costs. Tiling before waterproofing certification, for example, may require tile removal for inspection.


