
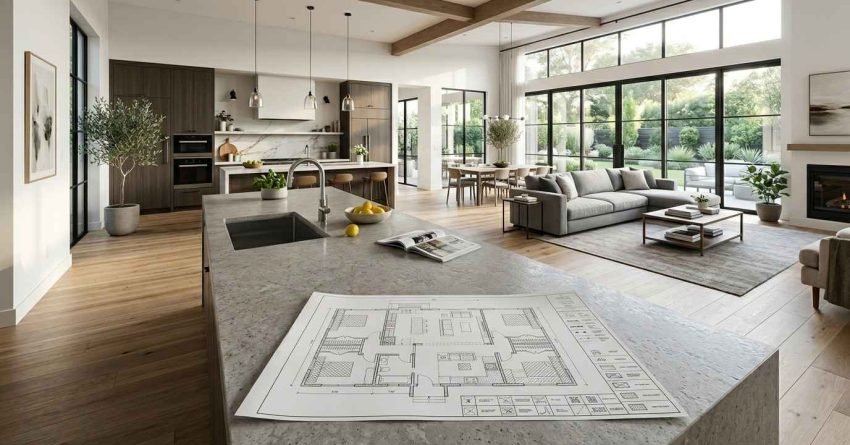
An open-plan living renovation transforms a compartmentalised home into a connected, light-filled space by removing internal walls to merge the kitchen, dining, and living areas into a single, flowing environment. For Sydney homeowners, it is one of the most impactful structural changes a property can undergo, improving liveability, maximising natural light, and adding measurable resale value when planned and executed correctly.
Getting it wrong carries real consequences. Removing the wrong wall without structural assessment, skipping council approvals, or underestimating the full scope of trades involved can turn a straightforward renovation into a costly, drawn-out project that disrupts your home and your budget.
This guide covers everything you need to understand before removing a wall in Sydney: what open-plan living actually involves, how to identify structural walls, what approvals you need, how to plan your layout, what the on-site process looks like, what it costs, and how to choose the right contractor to deliver it.
What Is an Open-Plan Living Renovation?
Open-plan living is a residential design approach that removes or reduces the internal walls separating the kitchen, dining room, and living area, creating a single, multi-functional space that flows without physical division. In Australian homes built before the 1990s, these rooms were typically separated by full-height walls, narrow doorways, and isolated corridors, a layout that made sense for the era but feels disconnected by modern living standards.
An open-plan renovation is not simply about demolition. It is a coordinated structural, spatial, and finishing project that requires engineering assessment, council compliance, trades coordination, and deliberate design decisions about how the resulting space will function, feel, and flow.
For Sydney homeowners, the appeal is clear. Open-plan layouts make smaller homes feel significantly larger, allow natural light to penetrate deeper into the floor plan, and create the kind of connected family living that modern buyers and occupants expect. Properties with open-plan kitchen-living configurations consistently attract stronger buyer interest and command premium pricing in Sydney’s competitive market.
The scope of an open-plan renovation varies considerably. Some projects involve removing a single non-structural wall between a kitchen and dining room, a relatively contained job. Others require removing load-bearing walls, installing structural steel beams, relocating plumbing and electrical services, and reconfiguring HVAC systems across a significantly altered floor plan. Understanding which category your project falls into is the first and most important step.

Understanding Load-Bearing vs. Non-Load-Bearing Walls
The most critical distinction in any wall removal project is whether the wall you want to remove is load-bearing. A load-bearing wall is a structural element that transfers the weight of the roof, upper floors, or structural beams down through the building to the foundations. Removing it without proper engineering support will compromise the structural integrity of your home.
A non-load-bearing wall, by contrast, is a partition. It divides space but carries no structural load, and these walls can typically be removed with far less structural intervention, though they may still contain electrical wiring, plumbing, or data cabling that needs to be relocated before demolition begins.
Identifying which type of wall you are dealing with is not always straightforward. Several indicators help narrow it down:
- Walls that run perpendicular to floor joists are more likely to be load-bearing
- Walls positioned directly above a foundation wall or beam below are strong candidates
- Walls that sit in the centre of the floor plan, rather than at the perimeter, often carry load
- Original building plans, if available, will show structural wall designations clearly
Visual inspection alone is not sufficient for a definitive determination.
In Sydney, a licensed structural engineer for wall removal must assess any wall suspected of being load-bearing before removal work begins. This is not optional. It is a legal and safety requirement, and any licensed builder will insist on it before proceeding.
The consequences of removing a load-bearing wall without proper support are severe. Ceiling deflection, cracking, and in extreme cases, partial structural collapse are all documented outcomes of unassessed wall removal. Even where the damage is not immediately catastrophic, the remediation costs far exceed what a proper engineering assessment would have cost at the outset.
The Structural Engineering and Approval Process in Sydney
Once a wall is confirmed as load-bearing, the project enters a formal engineering and approval phase. This is where many Sydney homeowners are surprised by the complexity involved, and where projects that were not properly scoped at the outset begin to encounter delays and cost overruns.
A structural engineer’s role in a wall removal project is to design the replacement structural element, typically a steel beam (LVL or steel RSJ), that will carry the load previously held by the wall. The engineer calculates the beam size, specifies the support posts or columns required at each end, and produces stamped engineering drawings that form part of the approval documentation.
In New South Wales, wall removal projects that affect structural elements require either a Development Application (DA) or a Complying Development Certificate (CDC). The pathway that applies to your project depends on several factors:
- Whether your property is heritage-listed or in a heritage conservation area
- The extent of structural change involved
- Your local council’s specific planning controls
- Whether the work is classified as exempt development under the State Environmental Planning Policy
CDC approval is generally faster than a DA, often achievable within 10 to 20 business days, but it is not available for all properties or all project types. A DA can take anywhere from 40 to 120 days depending on council workload and whether the application requires neighbour notification.
Proceeding with structural wall removal without the required approvals carries significant legal and financial risk. Unapproved structural work can result in stop-work orders, mandatory reinstatement, difficulty selling the property, and insurance complications. In Sydney’s current regulatory environment, compliance is not a bureaucratic formality. It is a fundamental part of responsible renovation planning.
Heritage Properties and Additional Approval Requirements
If your home sits within a heritage conservation area or is listed on the State Heritage Register, the approval process involves an additional layer of assessment. Local councils in Sydney, including those covering the Inner West, Eastern Suburbs, and Lower North Shore, apply heritage overlays that restrict the extent of structural modification permitted under standard CDC pathways.
In these cases, a DA is almost always required, and the application must demonstrate that the proposed wall removal does not compromise the heritage significance of the building. We recommend engaging a heritage consultant early in the planning process if your property is subject to any heritage controls. Identifying this requirement before engineering work begins saves significant time and cost.

Planning Your Open-Plan Layout: Flow, Function, and Zones
Removing a wall creates possibility, but it does not automatically create a great space. The layout decisions you make before and during the renovation determine whether the resulting open-plan environment genuinely works for how your household lives, or whether it simply feels like a large, undifferentiated room.
Effective open-plan design is built around three principles: zone definition, traffic flow, and sightline management.
Zone definition is the process of establishing distinct functional areas- kitchen, dining, and living- within a single open space, without relying on walls to do it. Zones are defined through a combination of flooring transitions, ceiling height changes, lighting placement, furniture arrangement, and kitchen island positioning. A well-zoned open-plan space feels organised and purposeful; a poorly zoned one feels chaotic and hard to furnish.
Traffic flow refers to the movement paths people take through the space during daily use. In an open-plan kitchen-dining-living layout, the primary traffic corridor typically runs from the entry through to the living area, with secondary paths connecting the kitchen to the dining table and the living area to outdoor spaces. The new layout needs to resolve traffic conflicts through deliberate spatial planning, not rely on the removed wall to have been doing that work.
Sightlines are the visual connections between zones and between indoor and outdoor spaces. One of the primary reasons homeowners pursue open-plan renovations is to connect interior living areas to gardens, courtyards, or views. Achieving this requires careful consideration of where the kitchen island sits, how the dining table is oriented, and whether the living area’s primary seating faces outward or inward.
In Sydney homes, the relationship between the kitchen and outdoor entertaining areas is particularly important. Many open-plan renovations are paired with bifold or sliding door installations that extend the living space onto a deck or alfresco area. Getting this right requires more than choosing a door style. The structural header above the door opening must be engineered to span the full width, the threshold detail needs to be flush or near-flush for indoor-outdoor flow, and the door width should be proportionate to the wall opening so the space reads as genuinely connected rather than simply adjacent. This combination significantly amplifies the spatial and lifestyle impact of the wall removal.

The Wall Removal Process: What Happens on Site
Understanding the sequence of work involved in a structural wall removal helps you set realistic expectations, plan for disruption, and avoid being caught off guard by the complexity of what appears, from the outside, to be a straightforward demolition job.
A structural wall removal project typically follows this sequence:
Structural assessment and engineering sign-off come first. Before any physical work begins, the structural engineer’s drawings must be finalised and approvals obtained. The beam specification, support post design, and connection details are all confirmed at this stage.
Temporary propping is installed before demolition begins. Temporary acrow props or strongboys support the ceiling and any structure above the wall while the wall itself is removed. This is a non-negotiable safety step. No licensed builder will remove a load-bearing wall without temporary support in place.
Wall demolition proceeds once propping is confirmed. The wall lining (plasterboard) is removed first, exposing the internal framing. Any electrical wiring, plumbing, or data cabling running through the wall is identified and isolated before the structural framing is cut and removed.
Beam installation follows. The structural beam, typically a steel RSJ or LVL timber beam, is lifted into position and seated on the support posts or columns at each end. In some cases, the beam is concealed within the ceiling cavity; in others, it is expressed as a feature element. The engineer inspects and certifies the installation before temporary propping is removed.
Services relocation is often the most time-consuming and cost-variable part of the project. Electrical circuits, light switches, power points, plumbing pipes, and HVAC ducts that ran through or alongside the removed wall all need to be rerouted. The extent of this work depends on what was in the wall and how the new layout is configured.
Patching and making good completes the structural phase. Ceiling, floor, and wall surfaces are patched, plastered, and prepared for the finishing trades, flooring, painting, and joinery.
Asbestos in Older Sydney Homes
If your home was built before 1990, asbestos-containing materials are a genuine risk in any wall removal project. Asbestos was widely used in wall sheeting, ceiling linings, and insulation products in Australian residential construction through the 1980s, and its presence is not always visible to the untrained eye.
Before any demolition work begins in a pre-1990 Sydney home, we strongly recommend an asbestos inspection by a licensed assessor. If asbestos-containing materials are identified in or around the wall to be removed, a licensed asbestos removalist must carry out the removal under SafeWork NSW regulations. Attempting to remove asbestos-containing materials without the correct licensing is illegal and carries serious health risks for everyone on site.
The cost of asbestos testing and removal should be factored into your contingency budget from the outset. Testing typically costs $300 to $600; removal costs vary significantly depending on the extent and type of material involved.
Typical Project Timeline
Understanding how long each phase takes helps you plan around the disruption and set realistic expectations with your household.
- Engineering and approval: 2 to 12 weeks depending on whether a CDC or DA is required
- Pre-construction preparation (propping, isolation of services): 1 to 2 days
- Wall demolition and beam installation: 1 to 3 days for a standard single-wall removal
- Services relocation (electrical, plumbing, HVAC): 3 to 10 days depending on scope
- Patching, plastering, and making good: 3 to 7 days including drying time
- Finishing trades (flooring, painting, joinery): 5 to 15 days depending on scope
Most open-plan wall removal renovations in Sydney run four to twelve weeks from approval to completion. The approval phase is the most variable, and the one most homeowners underestimate.
Open-Plan Renovation Costs in Sydney
Cost is the variable that determines what is possible, and in Sydney’s construction market, the range for an open-plan wall removal renovation is wide. A straightforward non-structural wall removal between two rooms might cost $3,000 to $6,000 all-in. A full structural wall removal with beam installation, services relocation, and finishing work in a Sydney home can range from $15,000 to $50,000 or more, depending on the scope.
Wall Type and Structural Complexity
Non-load-bearing wall removal is significantly cheaper than structural wall removal. The beam size required, which is determined by the span and the load it carries, is one of the largest single cost variables. A short-span LVL beam might cost $800 to $1,500 installed; a long-span steel RSJ in a two-storey home can cost $5,000 to $12,000 or more, including engineering, fabrication, and installation.
Services Relocation
Electrical, plumbing, and HVAC work is priced separately by licensed trades. A wall containing a single power circuit might add $500 to $1,500 in electrical work. A wall containing a wet area drain, gas line, or ducted HVAC return can add $3,000 to $8,000 or more in services relocation costs.
Approval and Engineering Fees
Structural engineering fees in Sydney typically range from $1,500 to $4,000 for a wall removal project. CDC certification adds $1,500 to $3,000. DA applications, if required, add council fees and potentially consultant fees on top.
Finishing Work
Flooring extension, ceiling patching, painting, and joinery modifications are often underestimated in initial budgets. In a 40 to 60 square metre open-plan space, flooring alone can add $4,000 to $12,000 depending on the material selected.
Contingency
A 15 to 20 percent contingency allowance is standard practice for structural renovation work in Sydney. Hidden conditions, asbestos in older walls, unexpected plumbing configurations, or subfloor issues revealed during demolition are common enough that budgeting without a contingency is a significant financial risk.
Residential renovation costs in Sydney’s metropolitan area have increased substantially over the past two years, driven by labour shortages and materials price inflation. This makes accurate upfront budgeting more important than ever, and it is one of the reasons we provide fully itemised quotes before any work begins.

Flooring, Lighting, and Finishes That Unify Open Spaces
Once the structural work is complete and the walls are gone, the finishing decisions you make determine whether the open-plan space feels intentional and cohesive or disjointed and unresolved. Flooring, lighting, and surface finishes are the tools that do the work walls used to do, defining zones, creating visual rhythm, and connecting the space to the rest of the home.
Continuous flooring is one of the most powerful unifying strategies available in an open-plan renovation. Running a single flooring material, engineered timber, large-format tile, or polished concrete, across the entire kitchen-dining-living zone eliminates the visual interruptions that different floor coverings create and makes the space feel larger and more connected. Where a flooring transition is desired between zones, a subtle change in tile format or a thin brass or aluminium strip is far more effective than a full material change.
In Sydney homes where the existing flooring in the living area does not match the kitchen, the open-plan renovation often becomes the trigger for a full flooring replacement across the ground floor. This is an additional cost that should be factored into the project budget from the outset.
Lighting design in an open-plan space requires a layered approach. A single central pendant or a flat grid of downlights will not serve the different functional needs of a kitchen, dining area, and living zone. Effective open-plan lighting typically combines:
- Task lighting over the kitchen bench and island (recessed downlights or under-cabinet strips)
- Ambient lighting across the living zone (dimmable downlights or track lighting)
- Feature lighting over the dining table (a pendant or chandelier that anchors the zone)
- Accent lighting to highlight architectural features or artwork
Each lighting zone should be on a separate circuit with independent dimmer control, allowing the space to shift from bright and functional during meal preparation to warm and relaxed during evening use.
Surface finishes, cabinetry, benchtops, splashbacks, and wall colours should be selected with the full open-plan space in mind, not room by room. In an open-plan environment, the kitchen cabinetry is visible from the living area, the dining room wall colour reads against the kitchen splashback, and the benchtop material is seen from multiple angles and distances. A cohesive material palette, developed with the full spatial context in view, is what separates a well-resolved open-plan renovation from one that feels like three separate rooms that happen to share a floor.
Acoustic and Thermal Considerations in Open-Plan Homes
Open-plan living delivers significant spatial and lifestyle benefits, but it also introduces acoustic and thermal challenges that compartmentalised floor plans handle naturally through their internal walls. Understanding these challenges before the walls come down, and planning for them during the renovation, is far more effective and cost-efficient than trying to address them after the fact.
Acoustic performance is the most commonly underestimated consequence of open-plan living. Without internal walls to absorb and block sound, noise from the kitchen, appliances, extraction fans, and cooking activity travels freely into the living and dining areas. Television sound, music, and conversation carry across the entire space simultaneously. In homes with children, this can make the open-plan environment feel loud and difficult to manage during evening hours when different household members want to use different parts of the space.
Acoustic management strategies for open-plan spaces include:
- Soft furnishings, rugs, upholstered seating, and curtains, that absorb sound rather than reflecting it
- Acoustic ceiling panels or baffles in specific zones, particularly above the kitchen and dining area
- Double-glazed windows and doors, which reduce both external noise intrusion and internal sound reflection off hard glass surfaces
- Quiet-rated kitchen appliances and extraction systems
- Strategic joinery placement, such as a full-height pantry or bookcase, that creates partial acoustic separation without reinstating walls
- Ceiling insulation batts above the open-plan zone, which dampen sound transmission and improve thermal performance simultaneously
Thermal performance is equally important. Internal walls in a compartmentalised home act as thermal buffers, slowing the movement of heat between rooms and allowing individual spaces to be heated or cooled independently. In an open-plan space, the entire zone must be conditioned as a single environment, which increases the load on heating and cooling systems and can make energy management more challenging.
In Sydney’s climate, characterised by warm to hot summers and mild winters, the primary thermal challenge in open-plan homes is managing solar heat gain through north and west-facing glazing. An open-plan renovation that incorporates large sliding or bifold doors to an outdoor area significantly increases the glazed area of the home. This challenge is best addressed through appropriate external shading (fixed or operable), thermally broken glazing specifications, and insulation upgrades to the ceiling and any exposed wall cavities. Homes assessed under the NatHERS framework will need to demonstrate that the open-plan configuration meets the minimum star rating for the climate zone, which is a useful benchmark for specifying the right glazing and insulation combination.

Working With a Renovation Contractor in Sydney
An open-plan wall removal renovation involves multiple licensed trades: builder, structural engineer, electrician, plumber, plasterer, and potentially a certifier, all working in a defined sequence across a project that typically spans four to twelve weeks from approval to completion. Coordinating this process effectively is the difference between a renovation that runs smoothly and one that stalls, blows its budget, and leaves the homeowner managing disputes between trades.
For most Sydney homeowners, the most reliable approach is engaging a licensed renovation contractor in Sydney who takes full responsibility for the project, from structural assessment and approval management through to trades coordination, quality control, and final handover. This is not simply a matter of convenience. It is a structural risk management decision.
When evaluating renovation contractors for an open-plan project, the key considerations are:
Licensing and insurance. In New South Wales, any structural renovation work must be carried out by a licensed builder holding a current contractor licence issued by NSW Fair Trading. Verify the licence number before signing any contract. Public liability insurance and home building compensation cover (for projects over $20,000) are mandatory requirements.
Structural experience. Not all renovation contractors have experience with load-bearing wall removal. Ask specifically about previous structural wall removal projects, their relationship with structural engineers, and how they manage the approval process. A contractor who is vague about the engineering and approval sequence is a contractor who has not done this work at the required standard.
Transparent pricing. A detailed, itemised quote that separates structural work, services relocation, approval fees, and finishing work is the baseline expectation for a reputable contractor. Lump-sum quotes with minimal breakdown make it impossible to understand what you are paying for or to compare quotes accurately.
Communication and project management. Open-plan renovations involve decisions at multiple stages: beam exposure or concealment, flooring selection, lighting layout, joinery modifications. A contractor who communicates proactively, provides a clear project schedule, and keeps you informed of progress and any variations is worth more than a marginally cheaper quote from someone who goes quiet once the contract is signed.
Strata Properties: Additional Approvals Required
If your property is in a strata scheme, wall removal requires written approval from the owners corporation before any work begins, in addition to any council or certifier approvals required for structural changes. The strata by-laws and the building’s common property boundaries determine what modifications are permissible, and some schemes require a by-law amendment before structural work can proceed. We work with strata-experienced certifiers and can guide you through the owners corporation approval process as part of our project management service.
Conclusion
An open-plan living renovation is one of the most structurally and spatially significant changes a Sydney home can undergo, combining load-bearing wall assessment, engineering design, council approvals, trades coordination, and deliberate spatial planning into a single, interconnected project.
Every stage of this renovation, from identifying whether your wall is structural to selecting the finishes that unify the space, requires decisions that compound on each other. Getting the early steps right, particularly the engineering assessment, the approval pathway, and the asbestos check in older homes, protects everything that follows.
When you are ready to move forward, we at Sydney Home Renovation are here to plan, approve, and deliver your open-plan renovation with structural confidence, transparent pricing, and end-to-end project management. Contact us to discuss your project and receive a fully itemised quote.
Frequently Asked Questions
Do I need council approval to remove a wall in Sydney?
Yes, if the wall is load-bearing or structural. Structural wall removal requires either a Development Application or a Complying Development Certificate. Non-structural partition walls may qualify as exempt development, but confirm this before work begins.
How do I know if a wall is load-bearing?
A wall is more likely to be load-bearing if it runs perpendicular to floor joists, sits above a foundation wall, or is positioned centrally in the floor plan. A licensed structural engineer must assess any wall suspected of being structural before removal proceeds.
How long does an open-plan renovation take?
Most open-plan wall removal renovations in Sydney take four to twelve weeks from approval to completion. Approval alone can take two to twelve weeks depending on whether a CDC or DA is required.
What does it cost to remove a wall in Sydney?
Non-structural wall removal typically costs $3,000 to $6,000. Structural wall removal with beam installation, services relocation, and finishing work ranges from $15,000 to $50,000 or more. A 15 to 20 percent contingency is recommended.
Can I remove a wall in a strata property?
Yes, but written approval from the owners corporation is required before any work begins, in addition to council or certifier approvals. The strata by-laws and common property boundaries determine what is permissible.
Will removing walls affect my home’s resale value?
Open-plan renovations consistently add resale value in Sydney’s market when executed well. Buyers respond positively to connected kitchen-dining-living layouts, improved natural light, and modern spatial flow.
What trades are involved in a wall removal renovation?
A structural wall removal renovation typically involves a licensed builder, structural engineer, electrician, plumber, and plasterer as core trades. Depending on scope, a private certifier, HVAC technician, flooring installer, and joinery specialist may also be required.
What is the difference between a CDC and a DA for wall removal?
A CDC is assessed by a private certifier against pre-set standards and is typically faster, often 10 to 20 business days. A DA goes through your local council and can take 40 to 120 days. Heritage properties and complex structural changes usually require a DA.


