
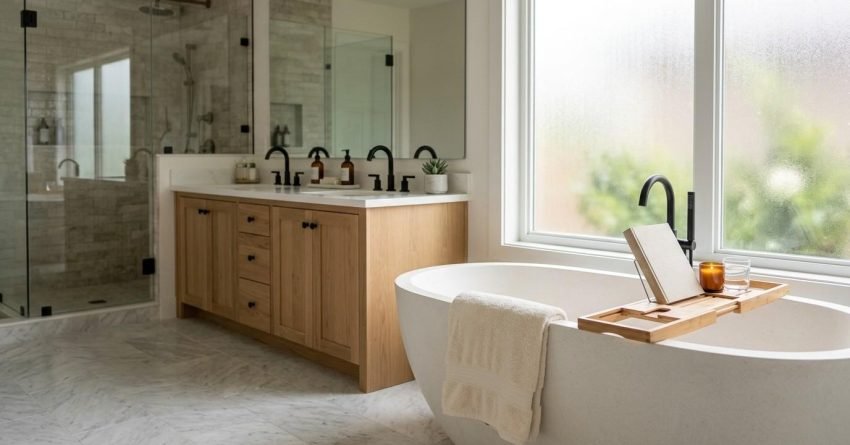
Designing a bathroom starts with clarity on three things: how the space will be used, what the budget can realistically support, and how layout connects plumbing, lighting, and storage into one cohesive plan.
A well-designed bathroom protects the investment, supports daily routines, and prevents costly mistakes that surface when early planning skips structural or lifestyle considerations. We see this play out on every project we run: the homeowners who plan thoroughly spend less, stress less, and end up with a result they’re genuinely proud of.
This complete step-by-step guide walks Sydney homeowners through every design decision, covering layout, fixtures, lighting, ventilation, storage, approvals, and common pitfalls so the renovation succeeds first time.
Step 1: Define Your Bathroom Design Goals and Budget
Every successful bathroom design begins with two clear inputs: what the space needs to do, and how much can realistically be spent. Without both, hours disappear comparing fixtures that don’t suit the household or quotes that don’t fit the finances.
Identify Who Will Use the Bathroom
A main family bathroom, an ensuite, and a guest powder room all serve different purposes. We always start by mapping out who uses the space, how often, and what features matter most. Families with young children typically prioritise a deep tub and durable surfaces. Couples tend to favour a walk-in shower, double vanity, and considered storage. Investors planning a rental benefit most from neutral, hard-wearing finishes that appeal to a broad tenant pool and hold up across multiple tenancies.
Set a Realistic Budget Range
In Sydney, a standard bathroom renovation typically ranges from $20,000 to $35,000, while premium designs with custom joinery or stone finishes can exceed $50,000. We recommend allocating roughly 40% to labour, 35% to fixtures and finishes, 15% to plumbing and electrical, and a 10% contingency for unexpected costs uncovered during demolition.
Prioritise Value-Adding Features
Spend where it shows and lasts. Quality tapware, well-built vanities, large-format tiles, and certified waterproofing return long-term value both in daily use and at resale. Mid-range tapware from reputable brands like Caroma or Methven outperforms budget imports significantly over a ten-year period. Skimping on waterproofing or tile adhesive is the area we most often see homeowners regret, because the repair bill always exceeds what the saving was worth.
Step 2: Measure Your Space and Plan the Layout
The bathroom layout determines how the room functions every single day. Getting this right early prevents expensive plumbing relocations and awkward fixture placement later.
Take Accurate Room Measurements
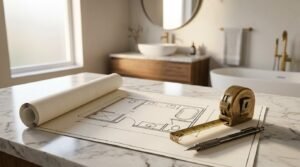
Measure the length, width, and ceiling height of the room. Record the position of existing plumbing stacks, windows, doors, and any structural elements. Note door swing direction; it directly affects where a vanity, toilet, or towel rail can sit. We always measure twice and sketch a floor plan to scale before any product is selected.
Choose the Right Layout Type
Common Sydney bathroom layouts include:
- Three-piece layout: Toilet, vanity, and shower in a compact footprint ideal for ensuites and small main bathrooms
- Four-piece layout: Adds a separate bathtub, suited to family bathrooms with adequate floor area
- Wet room layout: Open shower zone with continuous waterproofing across the full floor, popular for modern and accessible designs
- Galley layout: Fixtures along two parallel walls, efficient for narrow rooms where every centimetre counts
Keep clearances generous. We recommend 600mm in front of toilets, 700mm in front of vanities, and 900mm of shower clearance where possible. Cramming fixtures into a tight footprint reduces usability and resale appeal.
Ensuite vs. Main Bathroom: How Design Priorities Differ
An ensuite serves one or two people and prioritises efficiency; a well-sized shower, a single vanity with smart storage, and quality tapware matter more than floor area. A main family bathroom needs to handle peak-hour traffic, which means durable surfaces, a bath for young children, and storage that accommodates multiple users without crowding the bench. Getting clear on which type we’re designing before selecting a single fixture saves significant rework later.
Bathroom Planning Tools Worth Using
Free tools like Planner 5D, RoomSketcher, and the IKEA bathroom planner let us test layouts digitally before committing to a floor plan. They’re not a substitute for a professional set of drawings, but they’re genuinely useful for visualising clearances, testing fixture positions, and communicating ideas to a builder or designer before the formal design process begins.
Step 3: Map Plumbing, Electrical, and Structural Requirements
This is where design meets construction reality. Moving plumbing rough-ins, relocating waste pipes, or upgrading electrical capacity adds thousands to a renovation, so we plan deliberately.
Plan Plumbing Locations Early
Keeping fixtures close to existing plumbing is the single fastest way to control the budget. Major relocations of the toilet stack, shower drain, or vanity waste pipes typically add $2,000 to $5,000 to the project cost. We move services only when there’s a meaningful design reason, not for a minor aesthetic preference that could be resolved another way.
Coordinate Electrical and Waterproofing
Plan power points for heated towel rails, exhaust fans, mirrors with integrated lighting, and shaver outlets before any wall linings go up. All circuits must handle the load and meet Australian Standards for electrical work in wet areas.
Waterproofing must comply with AS 3740, with membrane extending up shower walls and across all wet floor zones. There are two inspection stages we always build into the schedule: a pre-tile inspection to confirm membrane coverage, and a final waterproofing certificate before handover. Skipping or rushing waterproofing is the single most common cause of bathroom failure in Sydney homes, and it voids the builder’s warranty in most cases.
For bathrooms that are part of a larger multi-room renovation, trade sequencing becomes critical. Waterproofing inspections must be booked and passed before tiling begins, and electrical rough-in must be signed off before wall linings close up. Planning these hold points into the schedule from day one prevents costly delays mid-build.
Step 4: Choose a Bathroom Style and Material Palette
With the practical bones settled, we move into the visual side of design with confidence. A coherent style decision shapes every fixture, tile, and tap selected from here on.
Define Your Design Direction
Sydney bathrooms tend to fall into a handful of recurring styles: modern minimalist, classic Hamptons, warm Japandi, contemporary luxe, and coastal. We pick one direction and stay with it. Mixing styles dilutes the look and usually results in a space that feels unresolved something that’s obvious in photos six months after completion and even more obvious at resale. Pinterest boards, magazine tear-outs, and showroom visits help refine the look that genuinely resonates before any money is committed.
Select a Cohesive Colour and Material Scheme
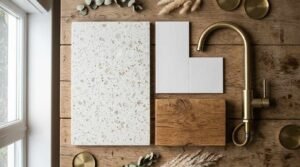
A reliable formula is three core finishes and one accent. For example: large-format off-white floor tile, matte white wall tile, oak timber vanity, and matte black tapware. We limit the palette to two or three colours plus a single metal finish; adding a fourth finish almost always creates visual noise rather than interest.
When the bathroom adjoins a kitchen or open-plan living area, finish coordination matters. Carrying a consistent tile tone, cabinetry colour, or metal finish across both spaces creates a unified aesthetic that reads as intentional rather than coincidental. This is worth discussing with the designer or builder before finalising either room’s selections.
Step 5: Select Fixtures, Fittings, and Tiles
Fixture selection is where the design starts to feel real. We build a complete fixture schedule before purchasing anything, so colours, finishes, and styles align across every product.
Choose Tapware, Toilet, Vanity, and Shower
Match all tapware finishes within the room: shower mixer, basin mixer, bath spout, and toilet flush button should belong to the same finish family. Mixing brushed nickel and chrome, or matte black and polished chrome, is one of the most common and most visible mistakes in bathroom fit-outs.
Choose a vanity sized to the space, with at least one full-extension drawer if storage matters. Wall-hung vanities create a sense of floor space in smaller bathrooms and make cleaning easier, but they require solid blocking in the wall framing, which must be planned before linings go up. For showers, frameless glass screens make the room feel larger and more contemporary, while semi-frameless options reduce cost without a significant visual trade-off.
Plan Tile Selection and Layout
Tile choice has more visual impact than any other surface in the bathroom. Larger tiles reduce grout lines and make small bathrooms feel bigger; a 600×600mm floor tile reads very differently from a 300×300mm one in the same space.
Common selections include:
- Floor: Slip-rated porcelain in 600×600mm or larger (minimum R10 slip rating for wet zones)
- Walls: Ceramic or porcelain, 300×600mm to 600×1200mm
- Feature: Mosaic, fluted, or stone-look tile on a single wall
Grout colour is often underestimated. A light grout on a light tile reads as seamless; a contrasting grout becomes a design feature. Tile direction also matters; running a rectangular tile vertically adds height, while a horizontal lay widens the space. We always order 10% extra to allow for cuts, wastage, and future repairs.
Step 6: Plan Storage, Lighting, and Ventilation
Design quality lives in details that get overlooked early and missed every day after. Storage, lighting, and airflow define how the bathroom actually feels to use.
Design Smart Storage
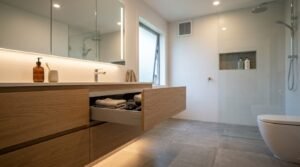
Plan storage around what’s actually owned and used daily. A vanity with two full-extension drawers, a recessed shower niche, and a mirrored cabinet typically covers everyday needs for a couple or small family. For a main family bathroom, we add a second niche or a tall linen cabinet to handle towels, cleaning products, and the overflow of personal items that accumulates over time.
For ensuites, a single deep drawer for hair tools and a shallow drawer for daily products is usually sufficient; the goal is efficiency, not volume. Crowding the bench with products is a storage failure, not a space failure.
Layer Bathroom Lighting
Layer three lighting types: ambient (ceiling downlights), task (mirror or vanity lighting at face level), and accent (LED strip under vanities or inside niches). Use warm-white globes around 2700K to 3000K for a softer, more flattering tone; cooler temperatures above 4000K make the space feel clinical and unflattering.
Mirror lighting height matters. We position task lighting at approximately 1,800mm from the floor at face level rather than above the mirror, which casts shadows downward. Always specify IP44 or higher rated fittings in wet zones, and install dimmers on ambient circuits so the bathroom can shift from functional morning light to relaxed evening use.
Ensure Proper Ventilation
A quality exhaust fan ducted to the exterior, not the ceiling cavity, prevents mould, peeling paint, and damaged plaster. Choose a fan rated for the bathroom’s volume in cubic metres per hour, and consider a timer or humidity sensor so it runs long enough after a shower to clear residual moisture.
Sydney bathrooms that share a wall with the laundry often benefit from a combined ventilation strategy; a single high-capacity fan serving both wet areas through a split duct can be more effective and quieter than two undersized units running independently.
Do You Need Council Approval to Renovate a Bathroom in Sydney?
Most standard bathroom renovations in Sydney don’t require a Development Application (DA), but the rules depend on the scope of work and the property type.
When a CDC or DA Is Required
A Complying Development Certificate (CDC) covers most straightforward bathroom renovations, including full strip-outs, replumbing, and new fixtures, provided the work doesn’t alter the building’s footprint, structural elements, or heritage status. A DA is required when the renovation involves structural changes, is on a heritage-listed property, or falls within a strata building where the owners corporation has specific approval requirements.
Owner-builders in NSW must hold a valid owner-builder permit from NSW Fair Trading for work valued over $10,000. Licensed contractors handle their own licensing obligations, but we always confirm this before any contract is signed.
Strata-Specific Considerations
In a strata property, any work affecting waterproofing, structural elements, or common property, including pipes within shared walls, typically requires written approval from the owners corporation before work begins. We recommend obtaining this in writing before signing a building contract, as unapproved work in strata can result in mandatory rectification at the owner’s cost.
Common Bathroom Design Mistakes (and How to Avoid Them)
Even well-intentioned bathroom renovations go wrong in predictable ways. These are the mistakes we see most often and the ones that are easiest to avoid with early planning.
Choosing fixtures before finalising the layout. Ordering a vanity before the floor plan is locked is one of the most expensive mistakes in bathroom renovation. Dimensions that look fine on a product page can be completely wrong for the actual space once clearances are mapped.
Underestimating the contingency. A 10% contingency is a minimum, not a maximum. Older Sydney homes frequently reveal rotted substrate, asbestos-containing materials, or undersized drainage once demolition begins. We’ve seen contingencies of 15–20% consumed entirely on pre-1980s properties.
Skimping on waterproofing to save money. Waterproofing typically represents 3–5% of the total renovation budget. Cutting corners here to save a few hundred dollars is the single most reliable way to spend thousands on remediation within five years.
Ignoring ventilation until the end. Exhaust fan placement and ducting need to be planned before wall linings go up. Retrofitting proper exterior ducting after tiling is complete is expensive and disruptive.
Selecting tiles online without seeing them in person. Tile colour, texture, and finish read very differently on a screen versus in a showroom under natural light. We always recommend viewing full-size samples in the actual space before committing to an order.
Forgetting about the door swing. A door that opens into a vanity or toilet is a daily frustration. It’s one of the first things we check on any floor plan and one of the easiest to fix at the design stage.
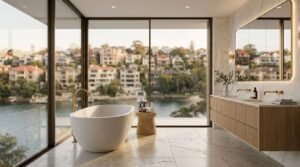
How Bathroom Design Affects Property Value in Sydney
A well-executed bathroom renovation consistently ranks among the highest-returning home improvements in the Sydney market. According to CoreLogic’s renovation impact research, bathroom and kitchen upgrades deliver the strongest return on renovation spend relative to cost.
What Buyers and Tenants Actually Value
In Sydney’s owner-occupier market, buyers respond most strongly to large-format tiles, frameless shower screens, quality tapware, and double vanities in main bathrooms. These features signal quality and reduce the perceived need for immediate renovation, which directly affects offer prices.
For investment properties, durability and neutral finishes matter more than premium aesthetics. Porcelain tiles, wall-hung vanities, and chrome tapware from mid-tier brands hold up across tenancies and appeal to the broadest tenant pool without requiring the maintenance that stone benchtops or timber vanities demand.
The Cost-to-Value Calculation
A $25,000 to $35,000 bathroom renovation in a Sydney property valued at $1.2 million typically adds $40,000 to $60,000 in perceived value at sale, a return of 1.1× to 1.7× the renovation cost, depending on the suburb, property type, and quality of execution. Renovations that exceed the neighbourhood’s price ceiling return less, which is why we always benchmark the design specification against comparable sales before finalising the budget.
Step 7: Finalise Your Design, Quotes, and Timeline
A complete design is one that can be priced accurately by any qualified builder. Vague specifications produce vague quotes and budget blowouts, so we lock every detail before construction begins.
Request Detailed Builder Quotes
Compile a full design pack including the floor plan, elevations, fixture schedule with model numbers, tile selections with supplier and product codes, and tapware finishes. Request itemised quotes from at least three licensed Sydney builders. Compare inclusions, not just totals. A cheaper quote often excludes waterproofing certification, demolition, rubbish removal, or the cost of replacing substrate found to be damaged during strip-out.
Red flags in a quote include lump-sum pricing with no line-item breakdown, no mention of waterproofing certification, and allowances for tiles or fixtures rather than specified products. These are signs that the final cost will be higher than the number on the page.
Confirm Schedule and Project Sequence
A typical Sydney bathroom renovation takes three to five weeks once construction starts. Allow two to four weeks before that for product ordering custom vanities, imported tiles, and stone tops have longer lead times that can stall a build if not ordered early.
The standard build sequence is: demolition → rough-in plumbing and electrical → waterproofing → waterproofing inspection → tiling → fixture installation → final trim and certification. Each stage has a hold point where the next trade cannot begin until the previous one is inspected and approved. Building this sequence into the timeline from day one prevents the pressure-driven shortcuts that compromise quality and void warranties.
Conclusion
A well-designed bathroom blends practical layout, durable materials, and considered fixtures into a space that supports daily life and adds long-term property value across Sydney homes.
From budget setting and layout planning through to fixture selection, lighting, ventilation, approvals, and final quoting, every step compounds on the one before. Skip any of them and the consequences show up in cost overruns, in daily frustrations, or in a result that doesn’t hold its value.
At Sydney Home Renovation, we help homeowners and investors design bathrooms that stay on budget, on schedule, and built to last. Get in touch to start planning your renovation with confidence today.
Frequently Asked Questions
How long does it take to design a bathroom?
Most bathroom designs take two to six weeks to finalise. This includes measuring, layout planning, fixture selection, sourcing quotes, and signing off the final schedule before construction begins.
What is the most important step in designing a bathroom?
Planning the layout and plumbing is the most critical step. Fixture positions dictate cost, function, and feel; changing them after construction starts adds significant time and expense.
Can I design a bathroom myself or do I need a designer?
Homeowners can design straightforward bathrooms with careful planning. Complex layouts, structural changes, or premium finishes benefit from a bathroom designer or experienced renovation contractor to avoid costly oversights.
What size should a bathroom be?
A functional three-piece bathroom needs about 3.5 to 5 square metres. Family bathrooms with a separate bath typically range from 6 to 10 square metres, allowing comfortable clearances and proper storage.
How do I make a small bathroom feel bigger?
Use large-format tiles, wall-hung vanities, frameless shower screens, and a consistent light palette. Layered lighting and a large mirror also expand the visual sense of space in compact Sydney bathrooms.
What’s the most expensive part of designing a bathroom?
Labour and waterproofing typically consume the largest share, followed by tiling and tapware. Custom joinery, stone benchtops, and relocating plumbing also drive costs well above standard budget ranges.
Do I need council approval for a bathroom renovation in Sydney?
Most standard renovations proceed under a CDC without a DA. Work on heritage properties, strata buildings, or projects involving structural changes typically requires additional approval before construction begins.
What should I know about accessible bathroom design?
Accessible bathrooms follow AS 1428.1 guidelines; step-free shower entries, 900mm door clearances, and reinforced walls for grab rails are the core requirements. Planning these features from the layout stage costs far less than retrofitting them later.


