
Mosaic tiles are one of the most versatile materials you can use in a bathroom renovation: small-format, grippy underfoot, and available in porcelain, glass, natural stone, and metal finishes that suit everything from a sleek modern ensuite to a heritage-style family bathroom.
Knowing where to place them and how to install them correctly makes the difference between a finish that lasts decades and one that fails within a few years.
In this guide, I cover the best placement zones, the installation steps that matter most, common mistakes to avoid, and what mosaic tiling costs in Sydney.
What Makes Mosaic Tiles a Smart Choice for Bathrooms
Mosaic tiles are small-format tiles, typically 25mm × 25mm up to 100mm × 100mm, usually supplied on mesh-backed sheets for easier installation. The high number of grout lines is what sets them apart from large-format tiles, and in a bathroom, those grout lines are a genuine functional advantage.
More grout joints mean more surface texture, which translates directly to better slip resistance in wet areas. That is why mosaic tiles are the go-to choice for shower floors, where a smooth large-format tile would be a safety risk.
They also conform to curved surfaces and irregular substrates far more easily than larger tiles. And the sheer range of materials, colours, and finishes available gives you design flexibility that standard tiles simply cannot match.
Types of Mosaic Tiles Used in Bathrooms
Porcelain mosaic tiles are the most practical all-rounder. They are dense, low-absorption, frost-resistant, and available in a huge range of finishes, including textured surfaces specifically rated for wet-area slip resistance.
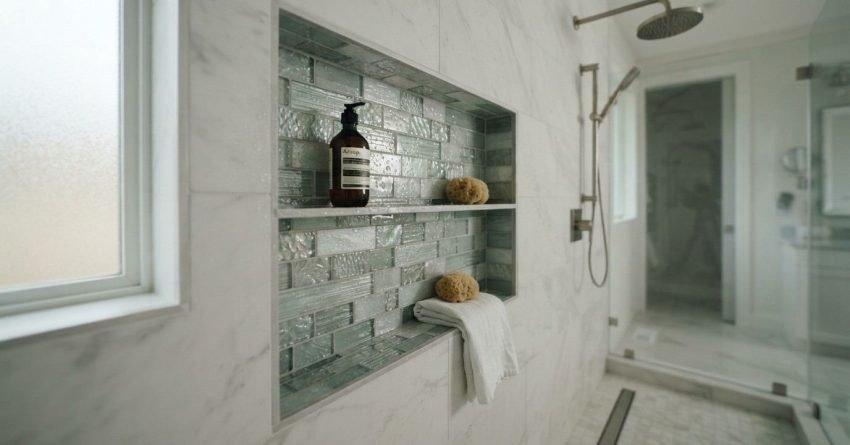
Glass mosaic tiles are the premium decorative choice. They reflect light beautifully and work well on feature walls and niches, but they are not ideal for floors because the smooth surface offers minimal grip.
Natural stone mosaics marble, travertine, slate bring a high-end, organic look. They require sealing and more careful maintenance than porcelain, but the aesthetic payoff is significant for the right project.
Metal and mixed-material mosaics are accent options. I use them sparingly as border strips or niche liners where a metallic finish adds contrast without dominating the space.
Key Benefits Over Standard Tiles
The slip resistance advantage is the most important practical benefit, particularly for shower floors and wet zone surrounds. But mosaic tiles also allow you to tile curved surfaces like a freestanding bath surround or a curved shower wall without cutting every tile individually.
They are also excellent for small bathrooms. A mosaic floor in a compact ensuite creates visual texture without making the space feel smaller, which is the opposite effect you often get with large-format tiles in a tight room.
Where to Use Mosaic Tiles in a Bathroom
Placement is everything with mosaic tiles. Used in the right zones, they perform brilliantly and look intentional. Used in the wrong spots, they create unnecessary maintenance and a cluttered visual result.
Shower Floors: The Most Practical Application
The shower floor is the single best place to use mosaic tiles in any bathroom. The grout lines provide the texture and grip that wet, soapy surfaces demand, and the small format allows the tiles to follow the fall-to-drain gradient without lippage or awkward cuts.
I always recommend a slip-resistant porcelain mosaic for shower floors, specifically tiles with a P4 or P5 slip rating, which meets Australian standards for wet area flooring. Glass and polished stone mosaics look beautiful but belong on walls, not floors.
The grout lines do require regular cleaning to prevent mould and soap scum build-up, but that is a manageable trade-off for a surface that is genuinely safe underfoot.
Feature Walls and Shower Niches
A mosaic feature wall behind the shower rose or behind a freestanding bath is one of the most impactful design moves in a bathroom renovation. The texture and depth that a mosaic wall creates, especially in glass or natural stone, is something a plain large-format tile cannot replicate.
Shower niches are another ideal application. A mosaic-lined niche adds a finished, intentional look to what would otherwise be a plain recessed shelf. I typically match the niche mosaic to the feature wall or use a contrasting material to make the niche a deliberate design element.
Keep the mosaic to one feature wall. Covering every wall in mosaic creates visual noise and makes the space feel smaller and busier than it should.
Bath Surrounds and Vanity Splashbacks
A mosaic surround on a built-in bath is a classic application that works in both contemporary and traditional bathrooms. The small format wraps the curved edges of the bath panel cleanly, and the grout lines add a tactile quality that complements the smooth surface of the bath itself.
Vanity splashbacks are a lower-commitment way to introduce mosaic tiles into a bathroom. The area is small, the installation is straightforward, and the visual impact is disproportionate to the cost. It is a good option for renovators who want the mosaic look without committing to a full feature wall.
Border Strips and Accent Bands
A single row of mosaic tiles used as a border strip or accent band is one of the most underused design tools in bathroom renovation. Run a mosaic border at dado height to break up a large expanse of plain wall tile, or use it as a transition strip between two different tile materials.
This approach works particularly well in bathrooms where the budget does not stretch to a full mosaic feature wall. A 100mm mosaic border strip costs a fraction of a full wall installation and delivers a custom, considered finish.
How to Use Mosaic Tiles Correctly: Installation Essentials
The installation process for mosaic tiles is more demanding than standard tiles. The small format, the mesh backing, and the high grout-line count all require specific techniques. Getting the substrate and the bedding right is non-negotiable.
Surface Preparation and Waterproofing
No mosaic tile installation in a wet area should begin without a properly prepared and waterproofed substrate. In Australia, wet area waterproofing is a mandatory requirement under the National Construction Code, and it applies to all shower floors, shower walls to a minimum height, and any surface that receives direct water contact.
The substrate, whether it is a cement sheet, a render coat, or a proprietary tile backer board, must be flat, solid, and free of movement. Any flex in the substrate will crack the grout joints and eventually the tiles themselves. I always check for hollow spots and fix them before a single tile goes down.
The Waterproofing membrane goes on after the substrate is prepared and before the adhesive. There are no shortcuts here. A failed waterproofing membrane behind mosaic tiles is an expensive and disruptive repair.
Adhesive and Bedding: Getting the Base Right
Mosaic tiles on mesh sheets require a flexible, polymer-modified tile adhesive, not a standard cement-based adhesive. The flexibility accommodates the minor movement that occurs in any building structure, and it prevents the grout joints from cracking prematurely.
Back-buttering, applying adhesive to the back of the mesh sheet as well as the substrate, is essential for full coverage. Mosaic tiles have a high surface-area-to-volume ratio, which means voids behind the tiles are more likely to cause cracking and water ingress than with larger tiles.
Press each sheet firmly and evenly into the adhesive bed. Check that the mesh is fully embedded and that no tiles are sitting proud of their neighbours. Lippage between mosaic tiles is difficult to fix after the adhesive sets.
Grouting Mosaic Tiles: What Most People Get Wrong
Grout selection is where most DIY mosaic tile jobs go wrong. The joint width on mosaic tiles is typically 1.5mm to 3mm, which requires a fine-grain, unsanded grout. Using a sanded grout in narrow joints scratches the tile surface, particularly on glass and polished stone mosaics, and does not compact properly into the joint.
Epoxy grout is worth considering for shower floors and other high-traffic wet areas. It is harder, more stain-resistant, and does not require sealing. The trade-off is that it is more difficult to work with and less forgiving of slow application.
Colour matters more with mosaic tiles than with large-format tiles because the grout is a much larger proportion of the visible surface. A contrasting grout colour emphasises the mosaic pattern. A matching grout colour creates a more seamless, monolithic look. Neither is wrong, but the choice is deliberate, not an afterthought.
Common Mistakes to Avoid With Bathroom Mosaic Tiles
The most common mistake I see is skipping or under-specifying the waterproofing membrane. Homeowners and inexperienced tilers sometimes treat waterproofing as optional in areas that receive splash rather than direct water contact. It is not optional. Water migrates through grout joints, and without a membrane behind the tiles, it reaches the substrate and causes structural damage over time.
The second most common mistake is using the wrong grout. Sanded grout in fine mosaic joints, standard cement grout on a shower floor that needed epoxy, or no sealant on a natural stone mosaic these are all avoidable errors that lead to staining, cracking, and mould growth within the first year.
Poor substrate preparation is the third major failure point. A substrate that is not flat, not solid, or not properly bonded to the wall or floor framing will move. When the substrate moves, the grout cracks. When the grout cracks, water gets in. The repair cost is always higher than the preparation cost would have been.
Finally, over-using mosaic tiles in a single bathroom creates a visually exhausting result. Mosaic tiles work best as a deliberate accent on one feature wall, the shower floor, or a niche liner, not as a wall-to-wall solution in every zone.
Mosaic Tile Costs in Sydney Bathrooms
Mosaic tile costs in Sydney vary significantly depending on the material, the format, and the complexity of the installation. As a general guide, entry-level porcelain mosaic tiles start at around $40–$60 per square metre for supply only. Mid-range glass and stone mosaics typically sit between $80–$150 per square metre, and premium imported or handmade mosaics can exceed $300 per square metre.
Installation costs for mosaic tiles in Sydney are higher than for standard large-format tiles. The additional time required for layout, back-buttering, and grouting means tiler rates for mosaic work typically run $80–$120 per square metre for labour, compared to $50–$80 per square metre for standard tiles.
For a full bathroom renovation in Sydney, the mosaic tile component supply and installation for a shower floor and one feature wall in a standard ensuite typically adds $1,200–$2,500 to the overall tile budget, depending on material selection and wall area.
Budget for adhesive, grout, waterproofing membrane, and any substrate preparation work on top of the tile and labour costs. These materials are not expensive individually, but they add up across a full bathroom renovation.
Maintaining Mosaic Tiles in a Bathroom
Mosaic tiles are not high-maintenance, but the grout lines do require consistent attention. The higher grout-to-tile ratio means more surface area for soap scum, mould, and mineral deposits to accumulate, particularly in shower floors and wet zone walls.
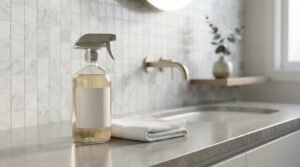
A pH-neutral bathroom cleaner applied weekly and rinsed thoroughly is all that is needed for routine maintenance. Avoid acidic cleaners on natural stone mosaics and avoid abrasive scrubbers on glass tiles. Both cause surface damage that is difficult to reverse.
Natural stone mosaics marble, travertine, limestone require sealing on installation and resealing every 12 to 24 months, depending on use. Porcelain and glass mosaics do not require sealing, but the grout joints in wet areas benefit from a penetrating grout sealer applied annually.
Grout discolouration is the most common maintenance issue. A grout pen or a professional grout re-colour service restores the appearance without the cost and disruption of re-grouting. For grout that has cracked or failed, re-grouting is straightforward and significantly cheaper than retiling.
Conclusion
Mosaic tiles bring genuine functional and design value to a bathroom renovation when they are placed and installed correctly. The shower floor, feature wall, niche, and accent band are the zones where they perform best.
Getting the substrate, waterproofing, adhesive, and grout right is what separates a mosaic tile installation that lasts twenty years from one that fails in two.
At Sydney Home Renovation, we handle every part of the process from tile selection and layout planning to waterproofing, installation, and grouting, so your mosaic tiles look and perform exactly as they should. Contact us to discuss your bathroom renovation.
Frequently Asked Questions
Are mosaic tiles suitable for bathroom floors?
Yes, mosaic tiles are one of the best choices for bathroom floors, particularly in wet areas like shower floors. The high number of grout lines provides natural slip resistance that large-format tiles cannot match. Choose a porcelain mosaic with a P4 or P5 slip rating for shower floors.
What is the best mosaic tile material for a wet shower area?
Porcelain is the best all-round material for wet shower areas. It is dense, low-absorption, and available in textured finishes with certified slip ratings. Glass mosaics are better suited to shower walls and feature applications where slip resistance is not a factor.
How many mosaic tiles do I need per square metre?
The number depends on the tile format. A standard 25mm × 25mm mosaic tile requires approximately 1,600 individual tiles per square metre. Most mosaic tiles are supplied on mesh-backed sheets, typically 300mm × 300mm, so you need approximately 11 sheets per square metre, plus 10% for cuts and waste.
Can mosaic tiles be used in a small bathroom?
Absolutely. Mosaic tiles work particularly well in small bathrooms. A mosaic floor adds texture and visual interest without making the space feel smaller, and a mosaic feature wall on a single surface adds depth without overwhelming a compact room.
Do mosaic tiles require more maintenance than large-format tiles?
The grout lines in mosaic tiles do require more consistent cleaning than large-format tiles, simply because there are more of them. Weekly cleaning with a pH-neutral cleaner keeps grout lines clear. Annual grout sealing in wet areas reduces staining and mould growth significantly.
How long does it take to tile a bathroom with mosaic tiles?
A standard ensuite shower floor and one feature wall in mosaic tiles typically takes an experienced tiler one to two days, not including waterproofing cure time. Full bathroom mosaic tiling floor, walls, and feature zones takes three to five days depending on the area and complexity.
Should I hire a professional tiler for mosaic tiles in Sydney?
Yes. Mosaic tiles are more technically demanding than standard tiles; the substrate preparation, back-buttering, grout selection, and wet area compliance requirements all require experience to get right. A licensed tiler with mosaic experience delivers a result that lasts and meets Australian building standards.


