
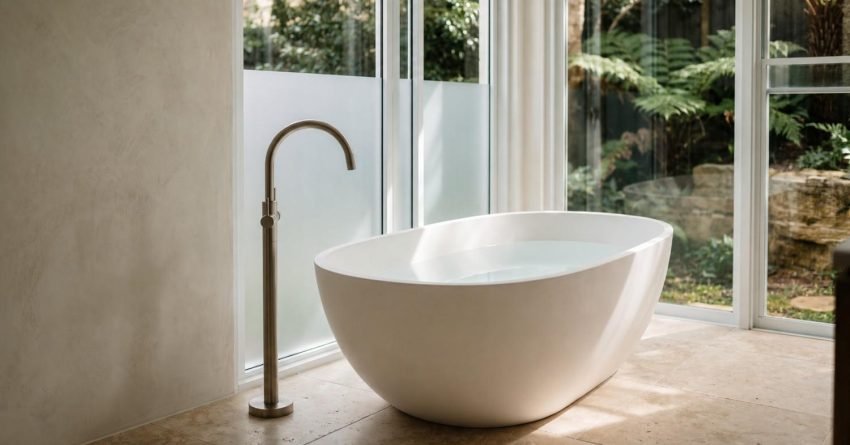
A freestanding bathtub transforms a bathroom from a functional room into a genuine retreat, and the right placement makes all the difference between a bath that looks stunning and one that actually works.
Getting this decision right takes more than picking a style you love. It takes understanding your floor plan, your plumbing constraints, and how the bath will sit within the room proportionally.
In this guide, I walk through the most popular freestanding bath styles, practical placement strategies for different bathroom sizes, and the structural and plumbing factors every Sydney homeowner needs to know before installation.
Why Freestanding Bathtubs Work in Modern Bathrooms
Freestanding baths have become one of the most requested features in Sydney bathroom renovations, and it is not hard to see why. They bring a sculptural quality to a bathroom that built-in baths simply cannot replicate.
They work because they function as a visual anchor. The eye lands on the bath first, and everything else in the room the tiles, the vanity, the tapware reads as supporting elements around it.
What Makes a Freestanding Bath Different
A freestanding bathtub is a self-contained bath unit that stands independently on the floor without being built into a surround, alcove, or platform. Unlike a built-in bath, it is finished on all four sides and requires no tiling or boxing-in to look complete.
That independence is what gives it design flexibility. You can position it anywhere the plumbing and floor structure allow, rather than being locked into a corner or wall recess.
Popular Freestanding Bathtub Styles and Shapes
Choosing a style is the first real decision, and it shapes every other choice that follows from tapware to tile selection to placement. There are three broad style families worth understanding before you commit.
Clawfoot and Pedestal Designs
Clawfoot baths are the classic freestanding form. They sit on four decorative feet, traditionally cast iron with ornate claw detailing and carry a strong heritage aesthetic that suits period homes, Hamptons-style bathrooms, and Federation-era renovations across Sydney.
Pedestal designs are a cleaner evolution of the same idea. The bath rests on a solid base rather than individual feet, giving a more grounded, contemporary silhouette while retaining the freestanding character.
Both styles work best in bathrooms with generous floor space, since the visual weight of the base demands breathing room around it.
Oval and Slipper Baths
Oval baths are the most versatile freestanding shape. The smooth, continuous curve reads as modern without being stark, and the symmetrical form makes placement straightforward in most bathroom layouts.
Slipper baths introduce an asymmetric profile: one end rises higher than the other to support the bather’s back at a reclined angle. Double-ended slipper baths raise both ends, which suits couples sharing the bath and adds a distinctly luxurious feel.
These shapes suit contemporary and transitional bathrooms particularly well, and they are among the most popular choices I see in Sydney ensuite renovations right now.
Stone Resin and Concrete Finishes
Stone resin baths are cast from a composite of natural minerals and resin, producing a matte, tactile surface that looks and feels closer to natural stone than acrylic. The finish is warm to the touch, resistant to chipping, and holds heat well, which matters more than most people expect when you are actually in the bath.
Concrete-finish baths deliver a similar aesthetic with an industrial edge. They suit minimalist and warehouse-style bathrooms where raw materials and neutral palettes define the design language.
Both materials carry more weight than acrylic, which is a structural consideration I cover in the practical section below.
Freestanding Bathtub Placement Ideas for Every Bathroom Layout
Placement is where most renovation decisions go wrong. People fall in love with a bath style and then try to force it into a space that does not suit it. The better approach is to understand what each placement position offers and then match the bath to the position that works for your specific room.
Centrepiece Placement in Large Bathrooms
In a large bathroom, typically anything above 8 square metres, placing the freestanding bath as a centrepiece is the strongest design move available. The bath sits away from all walls, with clear floor space on every side, and becomes the undisputed focal point of the room.
This placement works best when the bath is aligned with the room’s central axis. Symmetry reinforces the statement, so I always recommend considering the position of the door, the window, and the vanity before locking in the bath’s location.
The practical requirement here is a floor waste positioned centrally beneath the bath, which means the drain location needs to be planned at the rough-in stage, not after the tiles go down.
Window-Facing Placement for Natural Light
Positioning a freestanding bath to face a window is one of the most effective ways to elevate the bathing experience. Natural light floods the bath from the front, the view creates a sense of space, and the bath becomes a destination rather than just a fixture.
Privacy glass, frosted film, or high-set windows resolve any overlooking concerns without sacrificing the light. In Sydney homes where north-facing bathrooms are common, this placement also captures warmth through winter, a detail that makes a real difference to how often the bath actually gets used.
The plumbing consideration here is straightforward: the drain runs toward the wall behind the bath, which is typically the simplest rough-in configuration available.
Alcove and Corner Placement in Smaller Spaces
A freestanding bath does not require a large bathroom. Alcove and corner placements make freestanding baths viable in compact ensuites and medium-sized bathrooms where a centrepiece position is not possible.
In an alcove, the bath sits between two walls with one open end facing the room. This creates a sense of enclosure that actually enhances the bathing experience, and it keeps the floor plan efficient. A corner placement tucks the bath diagonally or parallel into a corner, freeing up the central floor area for movement.
The key in both configurations is clearance. I recommend a minimum of 150mm between the bath and any adjacent wall, enough to clean behind it and prevent moisture buildup.
Ensuite Placement Tips for Sydney Homes
Sydney ensuites present a specific challenge: the rooms are often compact, the layouts are constrained by existing plumbing stacks, and the expectation is still for the bath to look considered and intentional.
In most Sydney ensuite renovations I work on, the bath goes against the longest wall, positioned to be visible from the bedroom doorway. This creates the impression of a larger, more luxurious space without requiring additional floor area.
Where the ensuite is genuinely tight under 5 square metres, I often recommend reconsidering whether a freestanding bath is the right choice at all, or whether a smaller freestanding model (1400mm or under) delivers the aesthetic without compromising the room’s function.
Practical Considerations Before You Place a Freestanding Bath
The design decisions are the enjoyable part. The practical considerations are what determine whether the design is actually buildable, and getting these wrong is expensive to fix after the fact.
Floor Strength and Structural Support
Freestanding baths are heavy. A stone resin or cast iron bath filled with water and occupied by a bather can exceed 300kg in total load. That load concentrates on a small footprint, which puts real stress on the floor structure beneath it.
Timber-framed floors common in older Sydney homes often require additional structural support before a heavy freestanding bath can be installed safely. A concrete slab, by contrast, handles the load without modification in most cases.
I always recommend a structural assessment before specifying a heavy bath material in a timber-framed home. It is a straightforward check that prevents a costly problem later.
Plumbing Rough-In and Drain Positioning
The drain position is the single most important plumbing decision in a freestanding bath installation. Unlike a built-in bath where the waste connects to a wall, a freestanding bath typically drains through the floor, and that floor waste needs to be in exactly the right location before the slab is poured or the tiles go down.
Moving a floor waste after tiling is high-cost. Getting the rough-in right the first time is not complicated, but it requires the bath’s final position to be confirmed before the plumber sets the drain.
This is why I always lock in placement decisions at the planning stage, not during the fit-out.
Clearance Zones and Minimum Space Requirements
Australian building standards and practical usability both point to the same minimum clearances around a freestanding bath. Allow at least 150mm on any side adjacent to a wall, and 600mm on the access side where you step in and out.
These clearances are not just about aesthetics. They allow for cleaning, prevent moisture damage to adjacent surfaces, and ensure the bath can be serviced or replaced without demolishing surrounding work.
In tight layouts, I map the clearance zones on the floor plan before any other placement decision. If the clearances cannot be met, the bath size or position changes, not the clearance.
Choosing the Right Freestanding Bath for Your Sydney Renovation
Style and placement decisions are easier to make once the practical constraints are understood. With those locked in, the remaining choices come down to size, material, and long-term value.
Matching Bath Size to Room Proportions
Standard freestanding baths run from 1400mm to 1800mm in length. The most common sizes in Sydney renovations are 1500mm and 1700mm; the former suits compact ensuites, the latter works well in full bathrooms and master ensuite configurations.
The rule I use is simple: the bath should occupy no more than 40% of the room’s longest dimension. A 1700mm bath in a 2000mm room looks cramped and reads as a mistake. The same bath in a 3500mm room looks proportionate and intentional.
Material and Finish Considerations for Long-Term Value
Acrylic is the most affordable freestanding bath material and the lightest, which makes it the default choice where floor loading is a concern. It is warm to the touch, easy to repair if scratched, and available in the widest range of shapes and sizes.
Stone resin and cast iron cost more upfront but deliver better heat retention, greater durability, and a premium tactile quality that holds its appeal over time. For a bathroom renovation aimed at maximising property value, the material upgrade is often worth the additional spend.
The finish matters too. Matte surfaces show water marks less than gloss, which is a practical consideration in a bathroom that gets daily use.
Freestanding Bath Tapware and Accessory Placement
The bath itself is only part of the picture. Tapware placement affects both the aesthetics and the practicality of the finished installation, and it is a decision that needs to be made before the plumber sets the rough-in.
Floor-Mounted vs Wall-Mounted Tapware Options
Floor-mounted tapware, where the tap rises from the floor beside the bath, is the most visually dramatic option and the one most associated with high-end freestanding bath installations. It requires a separate floor penetration for the supply lines, which adds plumbing complexity but delivers a clean, uncluttered bath profile.
Wall-mounted tapware is simpler to install and easier to service. The supply lines run through the wall rather than the floor, which suits bathrooms where the bath sits close to a wall and floor penetrations are impractical.
Deck-mounted tapware where the tap mounts directly onto the bath rim is available on some freestanding models and offers the simplest installation of the three. The trade-off is that it limits tapware selection to models compatible with the bath’s pre-drilled holes.
Conclusion
A freestanding bathtub is one of the most impactful decisions in a bathroom renovation and the difference between a bath that looks right and one that truly works comes down to placement, proportion, and planning.
Getting the structural, plumbing, and spatial decisions right before the build starts is what separates a renovation that runs smoothly from one that costs more than it should.
At Sydney Home Renovation, we help homeowners plan and install freestanding baths with confidence from the first floor plan to the final fit-off. Reach out to our team and let us help you get it right.
Frequently Asked Questions
How much space do I need for a freestanding bathtub?
A freestanding bath needs a minimum of 150mm clearance on any wall-adjacent side and 600mm on the entry side. For a standard 1700mm bath, I recommend a room length of at least 2800mm to allow comfortable clearance on all sides.
Can a freestanding bath go against a wall?
Yes, a freestanding bath can sit close to a wall, but I always maintain at least 150mm of clearance to allow cleaning and prevent moisture damage. Some installations use a feature wall directly behind the bath as a deliberate design element.
What floor types support a freestanding bathtub?
Concrete slabs handle the load of any freestanding bath without modification. Timber-framed floors need a structural assessment first, particularly for heavy stone resin or cast iron models that can exceed 200kg before water is added.
Are freestanding baths harder to clean than built-in baths?
The floor area around a freestanding bath requires more attention than a built-in surround. The bath itself is no harder to clean and in some ways easier, since all four sides are accessible. The gap between the bath base and the floor is the area that needs regular attention.
Do freestanding baths add value to a Sydney home?
A well-chosen and well-placed freestanding bath adds genuine appeal in the Sydney property market, particularly in master ensuites. The value comes from the overall quality of the renovation, not the bath alone, but it is consistently one of the features buyers respond to most positively.
What is the most popular freestanding bath style in Sydney?
Oval and slipper baths in matte white or stone resin finishes are the most requested styles in Sydney renovations right now. They suit the contemporary and transitional aesthetics that dominate new builds and renovation projects across the city.
How long does it take to install a freestanding bathtub?
The physical installation of a freestanding bath takes one to two days once the rough-in plumbing is complete. The total timeline from planning to finished installation, including tiling, plumbing rough-in, and fit-off, typically sits within the broader bathroom renovation schedule of two to four weeks.


