
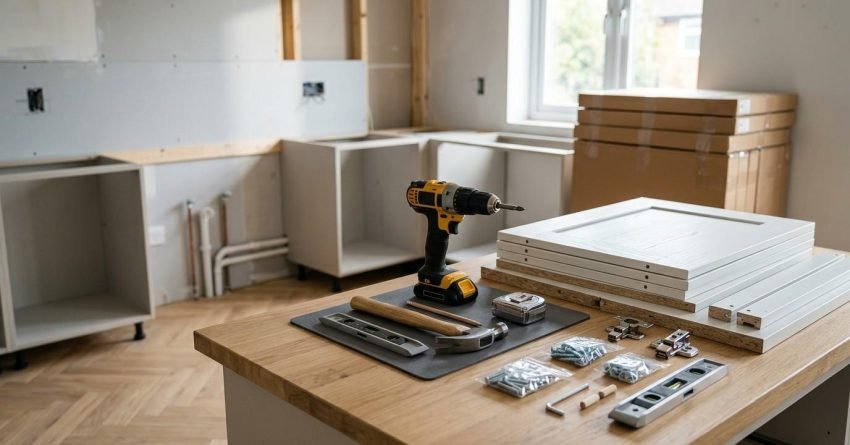
Flat pack kitchen cabinets are genuinely DIY-friendly, and with the right sequence, the right tools, and a solid understanding of what level actually means in practice, most Sydney homeowners get a clean, professional result.
The difference between a kitchen that looks great and one that fights you every step of the way comes down to preparation. Skipping the planning stage costs you hours on the back end.
This guide walks through every stage, tools, wall prep, carcass assembly, base and wall cabinet installation, door fitting, and the mistakes worth knowing before you start.
What You Need Before You Start
Getting the tools together before you touch a single cabinet panel saves a full day of back-and-forth. I’ve seen installs stall for hours because someone didn’t have a stud finder on site.
Tools and Materials Checklist
You need these on hand before assembly begins:
- Power drill with drill bits and screwdriver bits
- Spirit level (1.2m minimum longer is better)
- Tape measure
- Pencil
- Stud finder
- Clamps (at least four)
- Cabinet screws and wall plugs
- Adjustable spanner
- Safety glasses
Most flat pack kits include the cam locks, dowels, and shelf pins. Check your components against the packing list before you start, missing hardware mid-assembly is a frustrating stop.
Reading Your Cabinet Plan
Your cabinet supplier provides a layout drawing. Read it completely before opening a single box.
The drawing shows the run order, which cabinets sit at corners, where appliances land, and where plumbing and electrical penetrations fall. Mark those positions on your actual walls with a pencil before anything else.
Base cabinets always go in before wall cabinets. That sequence matters, fitting wall units first leaves you working around them when you’re trying to level the base run

How to Prepare Your Walls and Floor
Wall and floor prep is the step most DIYers rush. It’s also the step that determines whether every cabinet in the run sits level or whether you’re shimming and adjusting for the rest of the day.
Start by finding the highest point of your floor across the entire cabinet run. Use your spirit level and a long straight edge to check. That highest point becomes your reference, every adjustable leg gets set from there.
Mark a horizontal datum line across the wall at the height of your finished base cabinet top (typically 870mm to 900mm from the floor, depending on your kickboard and benchtop thickness). This line is your guide for the entire installation. Every base cabinet top should hit it.
Locate your wall studs with a stud finder and mark them clearly. Cabinets fixed to plasterboard alone, without hitting a stud or using appropriate wall anchors, will pull away from the wall under load. In Sydney homes with double brick or hebel walls, you’ll need masonry anchors rather than timber stud fixings.
How to Assemble Flat Pack Cabinet Carcasses
Assemble all carcasses before you start fixing anything to the wall. Trying to assemble and install simultaneously creates chaos, and it’s much harder to check square once a cabinet is already in position.
Lay the side panels flat on a clean surface. Insert the dowels into the pre-drilled holes, then fit the cam lock bolts into their housings. Slide the top and bottom panels onto the dowels and hand-tighten the cam locks, don’t fully tighten yet.
Fit the back panel into its groove before you lock anything down. The back panel is what keeps the carcass square. Once it’s seated, check the carcass for square by measuring diagonally corner to corner, both measurements should match. Then tighten the cam locks fully.
Over-tightening cam locks on particleboard carcasses strips the housing. Firm and snug is the target, not as tight as the tool will go.
How to Install Base Cabinets
Start at the highest floor point you identified during prep. Place the first cabinet there, set the adjustable legs to bring the top to your datum line, and check level in both directions, front to back and side to side.
Work outward from that first cabinet along the run. Each subsequent cabinet gets levelled to match the first, with legs adjusted as the floor drops away. Clamp adjacent carcasses together before you fix them, this keeps the faces flush and the run tight.
Fix each cabinet to the wall through the back rail, driving screws into studs or masonry anchors. Two fixing points per cabinet is the minimum. Check level again after fixing, wall fixing can pull a cabinet slightly out of position.
Corner cabinets need particular attention. Blind corner units require a specific clearance gap to allow the adjacent door to open fully. Check your supplier’s specification for that gap before you fix the corner unit in place.
How to Hang Wall Cabinets
The standard clearance between the benchtop and the bottom of wall cabinets is 600mm. That measurement gives you enough working space at the bench and keeps the kitchen proportions right. Mark that height on the wall from your confirmed benchtop height, not from the floor.
Most flat pack wall cabinets fix either directly to the wall through internal hanging brackets or onto a continuous hanging rail. The hanging rail method is faster and allows fine horizontal adjustment after fixing. If your cabinets use direct fixing, mark each fixing point carefully before drilling.
Fix into studs wherever possible. Where studs don’t align with fixing points, use toggle bolts or appropriate wall anchors rated for the cabinet weight. A standard 600mm wall cabinet loaded with crockery puts real load on those fixings.
Hang the first cabinet, check plumb and level, then work along the run. Clamp adjacent wall cabinets together before final tightening to keep the face line consistent.
Fitting Doors, Drawers, and Adjustments
Fit doors and drawers only after every carcass is fixed, levelled, and joined. Fitting them earlier means you’ll be removing them again to make adjustments, and hinge holes in particleboard don’t improve with repeated removal.
Clip the hinges into the hinge cups on the door, then hook them onto the mounting plates inside the carcass. Modern concealed hinges have three axes of adjustment, height, depth, and side-to-side. Use all three to get consistent gaps around every door.
The target reveal, the gap between adjacent doors, is typically 2mm to 3mm. Set one door, then use it as your reference for every door in the run. Consistent gaps read as a quality finish. Inconsistent gaps read as a rushed job.
Drawer runners clip or screw into the carcass sides. Check the runner is level before fitting the drawer box, a runner that’s even slightly off will cause the drawer to bind or drop at the front. Most soft-close runners have a height adjustment clip at the front that lets you fine-tune the drawer face position after fitting.
Common Mistakes to Avoid
The most expensive mistake is skipping the datum line. Without a consistent reference height across the whole run, you end up with base cabinets at slightly different heights, and no amount of door adjustment fixes that.
The second most common problem is missing studs. Plasterboard fixings alone hold fine until the cabinet is loaded. Then they pull. Always find the studs, always fix into them, and always use appropriate anchors where studs aren’t available.
A few others worth knowing:
- Assembling before planning the run you end up with a corner cabinet that doesn’t fit or a cabinet that blocks a power point
- Ignoring floor level a floor that drops 15mm across a 3m run needs to be accounted for from the first cabinet, not corrected at the last
- Fitting doors before the run is fully levelled door adjustment compensates for small variations, not for a run that’s fundamentally out
- Over-tightening cam locks strips the housing in particleboard; once stripped, the joint is permanently weakened
When to Call a Professional
Most standard flat pack kitchen installations are well within DIY reach. A straightforward run of base and wall cabinets in a rectangular kitchen, with no structural changes and existing plumbing and electrical in the right positions, is a realistic weekend project for a capable DIYer.
The calculation changes when the layout gets complex. Corner cabinet configurations with pull-out mechanisms, kitchen renovations that involve moving plumbing or electrical , structural walls, or layouts that require scribing cabinets to uneven surfaces, these are situations where a professional saves you more than the labour cost.
We work with Sydney homeowners on exactly these projects at Sydney Home Renovation. If your kitchen involves more than a straight cabinet swap, or if you’ve started and hit a problem you’re not sure how to solve, get in touch and we’ll give you a straight answer on what it actually takes.
Conclusion
Flat pack kitchen cabinet installation is a process that rewards patience and preparation. Get the datum line right, find the studs, assemble before you fix, and work the run in sequence, and the result is a kitchen that looks and functions like a professional installation.
The finish quality comes from the details: consistent door gaps, level drawer faces, and a base run that doesn’t rock. Those details are achievable without a trade background when the sequence is followed correctly.
At Sydney Home Renovation, we’re here when the project needs more than a straight cabinet run. Reach out and let’s talk through what your kitchen actually needs.
Frequently Asked Questions
How long does it take to install flat pack kitchen cabinets?
A standard kitchen with 10 to 15 cabinets takes most DIYers a full weekend, one day for assembly and prep, one day for installation and adjustments. Complex layouts with corner units or appliance integration take longer.
Do I need a permit to install kitchen cabinets in Sydney?
Cabinet installation alone doesn’t require a permit in NSW. Any associated plumbing or electrical work does require a licensed tradesperson and, depending on scope, a development application or complying development certificate.
Can flat pack cabinets be fixed to any wall type?
Flat pack cabinets fix to timber stud walls, double brick, hebel, and concrete, but the fixing method changes for each. Timber studs use cabinet screws directly. Masonry walls need appropriately rated masonry anchors. Plasterboard alone is not sufficient for loaded cabinets.
What order should I install kitchen cabinets in?
Install base cabinets first, then wall cabinets. Within the base run, start at the highest floor point and work outward. Fix corner units before adjacent straight runs to ensure clearance gaps are correct.
How do I deal with an uneven floor when installing base cabinets?
Flat pack base cabinets have adjustable legs for exactly this reason. Find the highest floor point, set the first cabinet legs to bring the top to your datum line, then adjust every subsequent cabinet’s legs to match as the floor drops away.
Are flat pack kitchen cabinets as strong as custom cabinets?
Quality flat pack cabinets from reputable suppliers are structurally sound for standard kitchen use. The key variables are the carcass material thickness, the quality of the cam lock joints, and how well the cabinet is fixed to the wall. A well-installed flat pack cabinet performs comparably to a site-built equivalent.
What is the standard height for wall cabinets above a kitchen bench?
The standard clearance is 600mm between the benchtop surface and the bottom of the wall cabinet. This is a widely accepted industry standard in Australian kitchen design and gives adequate working space at the bench.


