
Bathroom waterproofing is the single most critical step in any Sydney bathroom renovation, and getting it wrong can cost you tens of thousands of dollars in structural repairs. Whether you are tiling a new shower recess or gutting an entire bathroom, the waterproofing membrane beneath those tiles is the only thing standing between your home and progressive water damage.
This guide breaks down everything you need to know: Australian Standards compliance, membrane types, the full application process, realistic Sydney pricing, and the mistakes that catch renovators off guard. You will finish this page knowing exactly what proper waterproofing involves, what it should cost, and how to make sure it is done right the first time.
What Is Bathroom Waterproofing and Why Does It Matter
Bathroom waterproofing is the process of applying a continuous, impervious membrane to surfaces in wet areas to prevent water from penetrating into the building structure. In practical terms, it means coating your bathroom floors, shower walls, and critical junctions with a specialised product that stops moisture from reaching the substrate beneath your tiles.
Without this membrane, water migrates through grout lines, tile edges, and any gap in the surface. It saturates the substrate, whether that is a concrete slab, fibre cement sheeting, or timber framing. Over time, this leads to structural degradation that is invisible until the damage becomes severe.
Waterproofing is not optional in Australia. It is a regulated building requirement governed by the Building Code of Australia and enforced through state legislation. For Sydney homeowners, this means every bathroom renovation that involves removing tiles or modifying wet area surfaces triggers a legal obligation to waterproof to current standards.
How Water Damage Affects Your Bathroom Structure
Water that bypasses a failed or absent membrane does not simply evaporate. It follows gravity and capillary action into wall cavities, floor joists, and adjoining rooms. In timber-framed homes, which are common across Sydney’s inner west and northern suburbs, this moisture causes rot in structural framing members. In slab-on-ground construction, it can lead to efflorescence, mould growth beneath floor coverings, and degradation of adhesive bonds.
The damage is cumulative. A small leak behind a shower wall might take two to three years before visible signs appear: bubbling paint in an adjacent room, a musty smell, or soft spots in flooring. By that point, remediation typically involves stripping the bathroom back to the frame, treating or replacing structural members, and starting the waterproofing and tiling process from scratch.
Mould is the other major consequence. Bathrooms that leak create persistent moisture environments inside wall cavities where airflow is minimal. Black mould colonies establish in these conditions and can affect indoor air quality throughout the home. For families with respiratory conditions, this is a genuine health concern, not just a cosmetic issue.
The financial impact is significant. Repairing water damage from a failed waterproofing job in Sydney typically costs between $15,000 and $40,000 depending on the extent of structural involvement. Compare that to the $1,500 to $4,000 it costs to waterproof a standard bathroom properly during a renovation, and the value proposition is clear.
Australian Standards for Bathroom Waterproofing (AS 3740)
AS 3740-2021 is the Australian Standard that governs waterproofing of domestic wet areas. It specifies where waterproofing membranes must be applied, the minimum performance requirements for those membranes, and the methods of application that are considered compliant.
Under this standard, all shower floors and walls must be waterproofed. Shower walls require membrane coverage to a minimum height of 1800mm from the finished floor level, or to the ceiling if the shower has no fixed screen. Bathroom floors outside the shower must be waterproofed for the full floor area if the bathroom is on an upper storey, or at minimum 100mm up the walls on ground-level bathrooms.
The standard also addresses junctions, penetrations, and hobs. Every point where the floor meets a wall, where pipes penetrate the membrane, or where a shower screen meets the floor requires specific detailing. These junctions are the most common failure points in bathroom waterproofing, and AS 3740 prescribes the use of bond breakers, reinforcing fabric, and compatible sealants at each one.
In New South Wales, compliance with AS 3740 is referenced through the National Construction Code and enforced by local councils and private certifiers. When your bathroom renovation requires a construction certificate or complying development certificate, the waterproofing work must be inspected and signed off before tiling can commence. This sign-off is a legal requirement, not a suggestion.
Where Waterproofing Is Required in a Sydney Bathroom
Understanding exactly where waterproofing must be applied is fundamental to budgeting accurately and avoiding compliance issues. The requirements differ based on the specific zone within the bathroom, the floor level of the room, and the type of construction.
Wet Areas vs Dry Areas Explained
Australian Standards divide bathrooms into wet areas and dry areas. A wet area is any part of the bathroom that is subject to direct water exposure during normal use. This includes the shower recess, the area immediately around a freestanding bath, and any floor zone that receives regular splashing or runoff.
Dry areas are the remaining portions of the bathroom that do not receive direct water contact under normal conditions. A vanity zone or a toilet alcove separated from the shower by distance or a screen would typically be classified as a dry area.
The distinction matters because waterproofing requirements are more stringent in wet areas. Shower recesses require full floor and wall membrane coverage. Dry areas on ground-level bathrooms may only require floor waterproofing with a 100mm turn-up at walls. However, for upper-storey bathrooms in Sydney, the entire floor must be waterproofed regardless of wet or dry classification, because any leak has the potential to damage the ceiling and structure below.
Shower Recesses and Bath Surrounds
The shower recess is the highest-risk zone in any bathroom. It receives the most concentrated and sustained water exposure, and it contains the most penetrations and junctions per square metre.
For a standard shower recess, waterproofing must cover the entire floor area and extend up all walls to a minimum of 1800mm. If the shower is open (no fixed screen or door), the membrane must extend to the full ceiling height on all walls within the shower zone. The floor membrane must extend at least 50mm beyond the shower screen line or hob to account for water that tracks along the floor.
Bath surrounds follow similar principles. Where a bath is installed against a wall, the wall behind and beside the bath must be waterproofed to a height of at least 1800mm from the finished floor level. The floor beneath the bath should also be waterproofed, particularly if the bath is on an upper storey.
Bathroom Floors and Junctions
The bathroom floor is the primary collection point for all water in the room. Even outside the shower, condensation, splashing from the basin, and overflow events mean the floor surface is regularly wet.
Floor waterproofing must be continuous across the entire floor area and turn up at every wall junction by a minimum of 100mm. This turn-up creates a “tray” effect that contains water within the bathroom footprint. At the junction between the floor membrane and the wall, a bond breaker and reinforcing tape are applied to accommodate structural movement without cracking the membrane.
Penetrations through the floor, including the shower waste, toilet flange, and any floor-mounted tapware, require specific detailing. The membrane must be dressed into or around each penetration using compatible flanges or puddle flanges that create a watertight seal. The shower waste connection is particularly critical because it sits at the lowest point of the floor where water concentrates.
Laundry and Ensuite Considerations
If your renovation includes a combined bathroom and laundry, the laundry area is also classified as a wet area under AS 3740. The floor beneath and around the washing machine, laundry tub, and any floor waste must be waterproofed with the same membrane system used in the bathroom.
Ensuites follow identical requirements to main bathrooms. The smaller footprint of many Sydney ensuites actually increases the importance of precise waterproofing, because the wet zone often occupies a larger proportion of the total floor area. In a compact ensuite where the shower is separated from the vanity by less than a metre, it is common practice to waterproof the entire room to full wet area specifications rather than attempting to delineate separate zones.
Types of Waterproofing Membranes for Bathrooms
The membrane you choose affects application method, drying time, cost, and long-term performance. Three main categories dominate the Australian residential market, and each has specific advantages depending on the substrate and bathroom configuration.
Liquid Applied Membranes
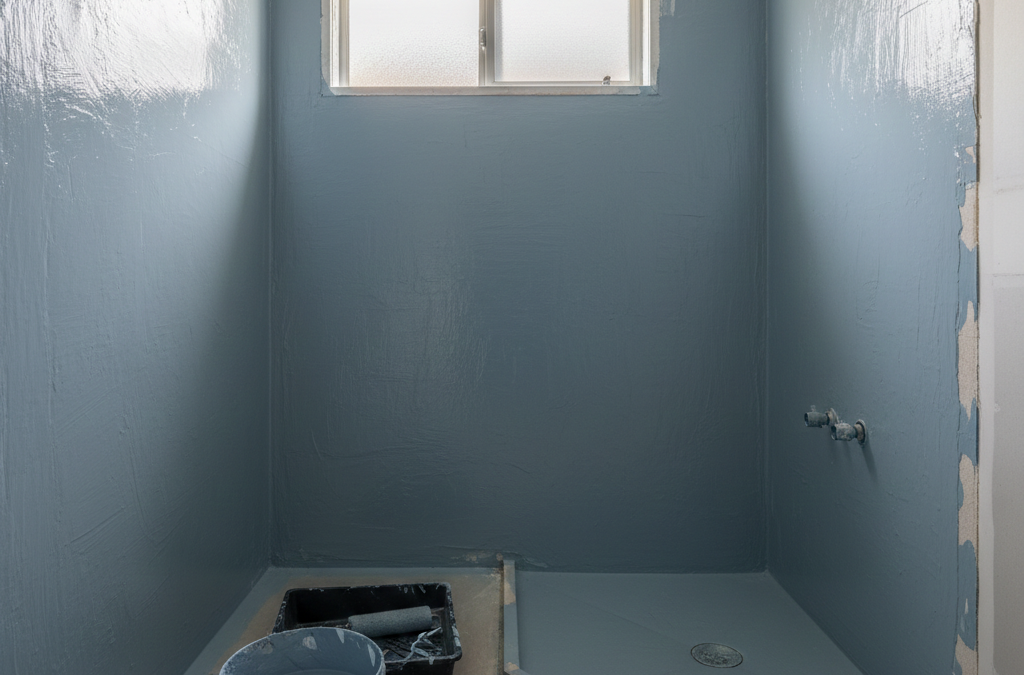
Liquid applied membranes are the most commonly used waterproofing system in Sydney bathroom renovations. These products are applied as a wet coating using a brush, roller, or spray, and they cure to form a seamless, flexible membrane bonded directly to the substrate.
Most liquid membranes used in Australian bathrooms are polyurethane-based or acrylic-modified polymer formulations. They are applied in two coats, with the second coat applied at right angles to the first to ensure complete coverage. The total dry film thickness must meet the manufacturer’s specification, which is typically between 1mm and 1.5mm.
The key advantage of liquid membranes is their ability to conform to complex shapes, corners, and penetrations without the need for cutting and joining. They bond directly to concrete, fibre cement, and properly prepared plasterboard, creating a monolithic waterproof layer with no seams.
Popular products in the Sydney market include Davco Polyurethane, Gripset 38, and Ardex WPM 300. These are all tested and certified to AS 4858, which is the performance standard for liquid-applied membranes referenced by AS 3740.
Sheet Membranes
Sheet membranes are pre-formed waterproofing products supplied in rolls. They are adhered to the substrate using a compatible adhesive or, in some cases, are self-adhesive with a peel-and-stick backing.
Common sheet membrane materials include modified bitumen, PVC, and polyethylene composites. They are typically 1mm to 2mm thick and are available in widths ranging from 200mm (for strip applications at junctions) to 1000mm or wider for floor coverage.
Sheet membranes offer consistent thickness across the entire application area, which eliminates the risk of thin spots that can occur with liquid products if application technique is inconsistent. They are particularly useful on large, flat floor areas and in situations where the substrate has minor cracking or movement potential.
The disadvantage is that sheet membranes require lapping at joints, and each lap must be sealed to maintain continuity. At corners, penetrations, and irregular shapes, sheet membranes need to be cut and detailed carefully. This makes them more labour-intensive in small or complex bathrooms.
Cementitious Waterproofing
Cementitious waterproofing products are cement-based coatings modified with polymers to provide water resistance. They are mixed on site and applied with a trowel or brush, similar to a render or screed.
These products are rigid once cured, which makes them less suitable for areas subject to structural movement. They are most commonly used on concrete substrates in ground-level applications where movement is minimal.
In Sydney bathroom renovations, cementitious waterproofing is less common than liquid membranes for shower recesses and walls. However, it is sometimes used as a tanking system for basement bathrooms or below-grade wet areas where hydrostatic pressure is a concern.
The main advantage is cost. Cementitious products are generally cheaper per square metre than polyurethane liquid membranes. The trade-off is reduced flexibility and a higher risk of cracking if the substrate moves.
The Bathroom Waterproofing Process Step by Step
Understanding the full process helps you evaluate whether your contractor is doing the job properly and allows you to plan your renovation timeline accurately. A standard bathroom waterproofing job in Sydney follows five distinct stages.
Surface Preparation and Priming
Proper surface preparation is the foundation of a durable waterproofing system. The substrate must be clean, dry, structurally sound, and free of contaminants that could prevent the membrane from bonding.
For concrete slabs, this means grinding or scarifying the surface to remove any curing compounds, laitance, or existing coatings. Cracks wider than 0.5mm must be chased out and filled with a flexible repair mortar. Any high spots or ridges that could create thin spots in the membrane are ground flat.
For fibre cement sheeting on walls, all joints must be taped and set with a flexible jointing compound. Screw heads must be flush with the surface and coated. The sheeting must be fixed at the centres specified by the manufacturer to prevent deflection under load.
Once the surface is prepared, a primer compatible with the chosen membrane system is applied. The primer improves adhesion between the substrate and the membrane and helps regulate the porosity of the surface so the membrane cures evenly. Primer must be allowed to dry completely before membrane application begins, which typically takes two to four hours depending on ventilation and temperature.
Applying the Waterproofing Membrane
For liquid applied membranes, the first coat is applied using a brush or roller at the coverage rate specified by the manufacturer. In a typical Sydney bathroom, this means applying the product at approximately 1 litre per square metre per coat for a polyurethane membrane.
The first coat is applied in one direction, working from the furthest point of the room back toward the door. All corners, junctions, and penetrations are detailed first using a brush to ensure full coverage in these critical areas before the broader floor and wall areas are rolled.
The second coat is applied once the first coat has dried to a tack-free state, which takes between two and six hours depending on the product and conditions. The second coat is applied at right angles to the first to ensure any thin spots or holidays in the first coat are covered.
The total dry film thickness after both coats must meet the manufacturer’s minimum specification. For most polyurethane membranes, this is 1mm to 1.5mm. Experienced applicators check thickness using a wet film gauge during application and a dry film gauge after curing.
Sealing Corners Joints and Penetrations
Internal corners where the floor meets the wall are the most common failure point in bathroom waterproofing. These junctions experience differential movement as the building settles and as temperature and moisture levels change.
A bond breaker, typically a polyethylene foam strip or silicone bead, is installed in each internal corner before the membrane is applied. This allows the membrane to bridge the junction without being bonded to both surfaces at the exact corner point, which would cause it to tear if movement occurs.
Reinforcing fabric, usually a polyester or fibreglass mesh, is then embedded into the wet membrane across each corner junction. The fabric extends at least 50mm onto each surface and is fully encapsulated within the membrane layer.
Pipe penetrations are sealed using puddle flanges or compression flanges that clamp the membrane to the pipe. The membrane is dressed over the flange and sealed with additional membrane product to create a continuous waterproof connection. Every penetration, including hot and cold water pipes, mixer bodies, shower wastes, and toilet outlets, must be individually detailed.
Drying and Curing Times
Waterproofing membranes require adequate drying and curing time before they can be tiled over. Rushing this stage is one of the most common causes of waterproofing failure in Sydney renovations.
Liquid polyurethane membranes typically require 24 to 72 hours of curing time after the final coat before tiling can commence. The exact time depends on the product, the ambient temperature, humidity levels, and ventilation. In Sydney’s humid summer months, curing times can extend beyond the manufacturer’s standard recommendation.
During the curing period, the membrane must be protected from foot traffic, rain, and contamination. Any damage to the membrane during curing requires repair and additional curing time before the project can proceed.
Temperature is a critical factor. Most membrane products should not be applied when the ambient temperature is below 10 degrees Celsius or above 35 degrees Celsius. In Sydney, this is rarely an issue for most of the year, but early morning applications in winter and midday applications in summer should be planned carefully.
Flood Testing Before Tiling
Flood testing, also called ponding testing, is the final quality assurance step before tiling begins. The bathroom floor is flooded with water to a depth of approximately 25mm and left for a minimum of 24 hours. The water level is marked at the start of the test and checked at the end.
If the water level drops, it indicates a breach in the membrane that must be located and repaired. The test is then repeated after the repair has cured.
In New South Wales, flood testing is not explicitly mandated by AS 3740, but it is considered best practice and is required by many certifiers before they will sign off on the waterproofing inspection. Most reputable Sydney waterproofing contractors include flood testing as a standard part of their process.
The flood test also verifies that the floor falls are correct and that water drains to the floor waste as intended. If water pools in areas away from the waste, the falls need to be corrected before tiling, which is far easier and cheaper to address at this stage than after tiles are laid.
How Much Does Bathroom Waterproofing Cost in Sydney
Waterproofing is one of the most cost-effective investments in a bathroom renovation, yet it is also one of the line items most frequently underestimated by homeowners budgeting for the first time.
Average Waterproofing Costs per Square Metre
For a standard Sydney bathroom renovation using a liquid applied polyurethane membrane, waterproofing costs typically range from $50 to $85 per square metre for supply and installation by a licensed contractor.
This rate includes surface preparation, priming, two coats of membrane, junction and penetration detailing, and a flood test. It does not include structural repairs to the substrate, which are quoted separately if required.
For a typical Sydney bathroom of 5 to 8 square metres, the total waterproofing cost falls between $800 and $3,500. The wide range reflects differences in bathroom complexity, the number of penetrations, the height of wall waterproofing required, and whether the bathroom is on an upper storey (which requires full floor waterproofing regardless of wet zone classification).
| Bathroom Size | Estimated Waterproofing Cost (Sydney 2024-2025) |
| Small ensuite (3-4 sqm) | $800 – $1,800 |
| Standard bathroom (5-7 sqm) | $1,500 – $3,000 |
| Large bathroom (8-12 sqm) | $2,500 – $4,500 |
| Bathroom + laundry combo (10-15 sqm) | $3,000 – $5,500 |
These figures represent the waterproofing component only. In a full bathroom renovation, waterproofing typically accounts for 5% to 10% of the total project cost.
Factors That Affect Waterproofing Price
Several variables push waterproofing costs toward the higher end of the range.
Substrate condition is the biggest variable. If the existing slab or sheeting has cracks, uneven surfaces, or contamination from old adhesives, additional preparation work is required before the membrane can be applied. Substrate repairs can add $500 to $2,000 to the waterproofing cost depending on severity.
Number of penetrations directly affects labour time. A bathroom with a single shower mixer, one shower waste, and a toilet outlet is straightforward. A bathroom with body jets, a rain shower head, a handheld shower, heated towel rail connections, and underfloor heating penetrations requires significantly more detailing work.
Upper storey location triggers the requirement for full floor waterproofing across the entire bathroom, not just the wet zones. This increases the membrane area and the number of wall turn-ups required.
Membrane product selection affects material cost. A premium polyurethane membrane costs more per litre than a standard acrylic product, but it also offers superior flexibility and longevity. For most Sydney bathroom renovations, the price difference between a mid-range and premium membrane is $200 to $500 for the total job, which is a small premium for a product that needs to last 15 to 25 years.
Access and logistics also play a role. A ground-floor bathroom with easy access for materials is cheaper to waterproof than a third-floor apartment bathroom where materials must be carried up stairs and waste removed manually.
How to Budget for Waterproofing in a Full Renovation
When planning your bathroom renovation budget, allocate waterproofing as a non-negotiable fixed cost rather than a variable you can reduce. It is not an area where cutting corners saves money. It is an area where cutting corners creates future costs that dwarf the original saving.
A practical approach is to budget 8% to 10% of your total renovation cost for waterproofing. On a $25,000 bathroom renovation in Sydney, that means setting aside $2,000 to $2,500 for waterproofing. On a $40,000 renovation, budget $3,200 to $4,000.
If your contractor’s quote shows waterproofing at less than 5% of the total project cost, ask questions. Either the bathroom is very simple, or the waterproofing specification may be inadequate. A suspiciously low waterproofing quote can indicate that the contractor is planning to use a cheaper product, skip detailing at junctions, or apply fewer coats than required.
Request a separate line item for waterproofing in every renovation quote. This allows you to compare the waterproofing specification between contractors and ensures the scope is clearly defined. The line item should specify the product to be used, the number of coats, the areas to be waterproofed, and whether flood testing is included.
Common Waterproofing Mistakes and How to Avoid Them
Waterproofing failures are almost always the result of human error during application, not product failure. Understanding the most common mistakes helps you ask the right questions and recognise substandard work before it is covered by tiles.
Skipping Waterproofing in Key Areas
The most damaging mistake is failing to waterproof areas that require it. This happens more often than you might expect, particularly in renovations where the scope creeps or where an unlicensed tradesperson is doing the work.
Common areas that get missed include the wall behind a freestanding bath, the floor beneath a bath on an upper storey, the junction between the bathroom floor and the door threshold, and the walls around a toilet where a concealed cistern is installed.
Each of these areas is specified in AS 3740, and each is a potential water entry point if left unprotected. The wall behind a freestanding bath, for example, receives regular splash exposure during bathing. Without a membrane, water penetrates the plasterboard or fibre cement and saturates the wall cavity.
Incorrect Membrane Application
Applying the membrane too thinly is the most frequent application error. When a liquid membrane is spread too thin, it does not achieve the minimum dry film thickness required for long-term performance. Thin spots allow water vapour transmission and eventually liquid water penetration.
This error is often invisible once the membrane has cured, because the surface appears coated. Only a dry film thickness gauge can confirm whether the membrane meets specification. Reputable contractors check thickness at multiple points across the floor and walls.
Other application errors include failing to apply the second coat at right angles to the first, applying the second coat before the first coat has dried sufficiently, and contaminating the membrane surface with dust or debris during curing.
Hiring Unlicensed Waterproofers
In New South Wales, waterproofing work valued at over $5,000 (including labour and materials) must be carried out by a licensed contractor. For work under $5,000, the person doing the work must still hold the appropriate trade qualifications.
Hiring an unlicensed waterproofer creates multiple risks. The work may not comply with AS 3740, which means it will fail inspection and need to be redone. Your home insurance may not cover water damage resulting from unlicensed work. And you have limited legal recourse if the work is defective, because unlicensed operators are not covered by the statutory warranty provisions of the Home Building Act 1989 (NSW).
Always verify your waterproofer’s licence through the NSW Fair Trading licence check before work commences. A licensed waterproofer will also carry public liability insurance and provide a written warranty for their work.
DIY vs Professional Bathroom Waterproofing
The question of whether to waterproof your own bathroom comes up frequently, particularly among cost-conscious renovators looking to reduce their overall budget.
When DIY Waterproofing Makes Sense
DIY waterproofing can be appropriate in limited circumstances. If you are waterproofing a small, simple area such as a laundry floor with no shower, and you have experience with surface preparation and coating application, a DIY approach using a quality liquid membrane product can produce an acceptable result.
The key requirements for successful DIY waterproofing are: thorough surface preparation, strict adherence to the manufacturer’s application instructions, correct detailing at all junctions and penetrations, and allowing full curing time before tiling.
However, even in a DIY scenario, the waterproofing must still comply with AS 3740 and must still be inspected by a building certifier if the project requires a construction certificate. The certifier will assess the work against the same standards they apply to professional installations.
Why Most Sydney Homeowners Choose Licensed Professionals
For most bathroom renovations in Sydney, professional waterproofing is the practical choice. The cost difference between DIY and professional application is relatively small compared to the total renovation budget, and the risk of getting it wrong is disproportionately high.
A licensed waterproofing contractor brings product knowledge, application experience, and accountability. They know which products are compatible with specific substrates, how to detail complex junctions, and how to manage curing in Sydney’s variable climate conditions.
Professional waterproofing also comes with warranty protection. Under the Home Building Act 1989 (NSW), residential building work carries a statutory warranty period of six years for major defects. Waterproofing failure that causes structural damage is classified as a major defect. This warranty applies only when the work is performed by a licensed contractor.
The practical reality is that most tilers in Sydney will not tile over waterproofing they did not apply or that was not applied by a licensed waterproofer. They understand that if the waterproofing fails, the tiling fails with it, and they do not want to be associated with a defective job.
NSW Licensing and Compliance Requirements
In New South Wales, waterproofing is classified as specialist work under the Home Building Act. The specific licence classes that authorise waterproofing work include the general building contractor licence and the specialist waterproofing licence.
For residential bathroom waterproofing, the contractor must hold either a general contractor licence (for work over $5,000) or demonstrate appropriate qualifications for work under that threshold. The relevant qualification is typically a Certificate III in Construction Waterproofing (CPC31420) or its predecessor.
Compliance also requires that the waterproofing work be inspected at the mandatory inspection stage before it is concealed by tiling. The certifier checks membrane coverage, thickness, junction detailing, and penetration sealing. They issue a compliance certificate or inspection report that forms part of the building documentation for the property.
This documentation is important beyond the immediate renovation. When you sell the property, the buyer’s solicitor or building inspector may request evidence of compliant waterproofing. Having proper certification on file protects your property value and avoids complications during the sale process.
How to Choose a Waterproofing Contractor in Sydney
Selecting the right contractor for your bathroom waterproofing is as important as choosing the right membrane product. The quality of the application determines the longevity of the system, and not all contractors deliver the same standard of work.
Questions to Ask Before Hiring
Start with these questions when evaluating waterproofing contractors for your Sydney bathroom renovation.
What membrane product do you use, and why? A knowledgeable contractor will name a specific product, explain its properties, and justify why it suits your particular bathroom. Vague answers like “we use whatever’s available” are a red flag.
How many coats do you apply, and how do you verify thickness? The answer should be a minimum of two coats applied at right angles, with thickness checked using a gauge. If the contractor cannot describe their quality control process, move on.
Do you include flood testing? Best practice contractors include flood testing as standard. If it is quoted as an optional extra, ask why.
Will you provide a waterproofing certificate? A licensed contractor should provide a certificate of waterproofing compliance that documents the product used, the areas waterproofed, and the date of application. This certificate is required for the building certifier’s inspection.
What warranty do you provide? Beyond the statutory warranty, many quality contractors offer a product warranty backed by the membrane manufacturer. This requires the contractor to be an approved applicator for that product range.
Checking Licences Insurance and Warranties
Verify the contractor’s licence number through NSW Fair Trading before signing any contract. The licence check confirms the licence is current, the correct class for the work, and whether any disciplinary action has been taken.
Request a copy of the contractor’s public liability insurance certificate. The minimum coverage for residential building work in Sydney should be $5 million, though many established contractors carry $10 million or $20 million in coverage.
Ask about the warranty structure. There are typically three layers of protection: the statutory warranty under the Home Building Act (six years for major defects, two years for minor defects), the contractor’s own workmanship warranty, and the membrane manufacturer’s product warranty. The manufacturer’s warranty usually requires that the product was applied by an approved applicator following the manufacturer’s specifications.
What a Professional Waterproofing Quote Should Include
A comprehensive waterproofing quote should clearly specify every element of the scope. Vague or lump-sum quotes make it difficult to compare contractors and can lead to disputes about what was included.
Your quote should itemise: surface preparation requirements and any substrate repairs, the primer product and application method, the membrane product (by brand and product name), the number of coats, the areas to be waterproofed (with square metre measurements), junction and penetration detailing, flood testing, clean-up and waste removal, the waterproofing certificate, and the warranty terms.
The quote should also state the expected timeline, including curing time before tiling can commence. This is important for coordinating with your tiler and managing the overall renovation schedule.
Compare at least three quotes for your waterproofing work. The cheapest quote is not always the best value. Look for consistency in the specification across quotes and question any contractor whose price is significantly below the others. A low price often means fewer coats, a cheaper product, or shortcuts in detailing.
How Long Does Bathroom Waterproofing Last
The longevity of your bathroom waterproofing depends on the quality of the original installation, the product used, and the ongoing maintenance of the bathroom.
Expected Lifespan of Waterproofing Membranes
A properly applied liquid polyurethane membrane in a Sydney bathroom should last 15 to 25 years under normal use conditions. Premium products from established manufacturers like Davco, Gripset, and Ardex are formulated to maintain their flexibility and waterproofing performance for the upper end of this range.
Sheet membranes can last even longer, with some manufacturers warranting their products for 25 years or more. The critical factor is the integrity of the laps and junctions, which are the potential weak points in a sheet membrane system.
Cementitious waterproofing has a shorter effective lifespan in areas subject to movement, typically 10 to 15 years. In stable concrete substrates with minimal movement, cementitious products can perform well for longer periods.
The practical lifespan of bathroom waterproofing in Sydney is often determined by the lifespan of the tiles and fixtures above it. Most homeowners renovate their bathroom every 15 to 20 years, at which point the waterproofing is replaced as part of the renovation regardless of its remaining service life.
Signs Your Bathroom Needs Re-Waterproofing
Several warning signs indicate that your existing waterproofing may be failing.
Persistent musty odours in or around the bathroom suggest moisture is trapped in the wall cavity or subfloor. This is often the earliest detectable sign of a waterproofing breach.
Discolouration or bubbling paint on walls adjacent to the bathroom, particularly on the other side of a shower wall, indicates water migration through the wall structure.
Loose or hollow-sounding tiles in the shower recess can indicate that moisture beneath the tiles has degraded the adhesive bond. Tap each tile with a coin or small tool. A hollow sound compared to a solid sound on adjacent tiles suggests adhesive failure.
Water stains on the ceiling below an upper-storey bathroom are an obvious sign of floor membrane failure. By the time stains are visible, the leak has typically been active for weeks or months.
Cracked or deteriorating grout in the shower is not a waterproofing failure in itself, but it increases the volume of water reaching the membrane. If the membrane is aging, increased water load accelerates its deterioration.
If you observe any of these signs, arrange a professional inspection before the damage escalates. Early intervention, such as re-grouting or localised membrane repair, can extend the life of the existing waterproofing. If the membrane has failed comprehensively, a full strip-out and re-waterproofing is the only reliable solution.
Conclusion
Bathroom waterproofing is a non-negotiable investment that protects your home’s structure, your renovation budget, and your long-term property value. Getting it right means understanding AS 3740 requirements, choosing the correct membrane, and ensuring every junction and penetration is properly detailed.
The difference between a waterproofing job that lasts 20 years and one that fails in five almost always comes down to the skill and diligence of the applicator. Licensed professionals who follow manufacturer specifications and include flood testing deliver results you can trust.
We help Sydney homeowners get bathroom waterproofing right the first time. Contact Sydney Home Renovation for a detailed, transparent waterproofing quote and renovation plan built around honest pricing and quality workmanship.
Frequently Asked Questions
Is waterproofing mandatory for bathroom renovations in NSW?
Yes. Any bathroom renovation in New South Wales that involves removing tiles or modifying wet area surfaces must include waterproofing that complies with AS 3740. This is a legal requirement enforced through the building certification process.
How long does bathroom waterproofing take to complete?
The application process for a standard bathroom takes one to two days, including surface preparation, priming, and two coats of membrane. Add 24 to 72 hours of curing time before tiling can begin, bringing the total to three to five days.
Can you waterproof over existing tiles?
It is possible to apply a waterproofing membrane over existing tiles in some circumstances, but it is not considered best practice for shower recesses. The membrane bonds to the tile surface rather than the substrate, and any loose or hollow tiles compromise the system. Most Sydney contractors recommend removing existing tiles for a reliable result.
What happens if bathroom waterproofing fails?
Failed waterproofing allows water to penetrate the building structure, causing timber rot, mould growth, and degradation of adjacent materials. Remediation typically requires a complete strip-out of tiles and waterproofing, structural repairs, and re-waterproofing. Costs range from $15,000 to $40,000 depending on the extent of damage.
Do I need a certificate of waterproofing compliance in Sydney?
Yes. For any bathroom renovation requiring a construction certificate or complying development certificate, the waterproofing must be inspected and certified before tiling commences. Your licensed waterproofer should provide a waterproofing compliance certificate documenting the product, coverage areas, and application details.
How much does it cost to re-waterproof a bathroom?
Re-waterproofing an existing bathroom in Sydney costs between $3,000 and $8,000 including tile removal, substrate preparation, new membrane application, and flood testing. This does not include the cost of re-tiling, which adds $3,000 to $8,000 depending on tile selection and bathroom size.
Should the whole bathroom floor be waterproofed or just the shower?
For ground-level bathrooms, AS 3740 requires waterproofing of the shower area and recommends full floor waterproofing. For upper-storey bathrooms, the entire floor must be waterproofed to protect the structure below. Most Sydney contractors waterproof the full floor regardless of level, as the additional cost is minimal compared to the protection it provides.